Stitching in a Winter Wonderland


All right, everybody, sing with me now! And-a-one, and-a-two:
(To the tune of "Walking in a Winter Wonderland")
Got my thread and my backing,
And it's time to get cracking!
These designs are so great,
I really can't wait,
For stitching in a Winter Wonderland!
And now that song will be in your head all day. You're welcome. :)
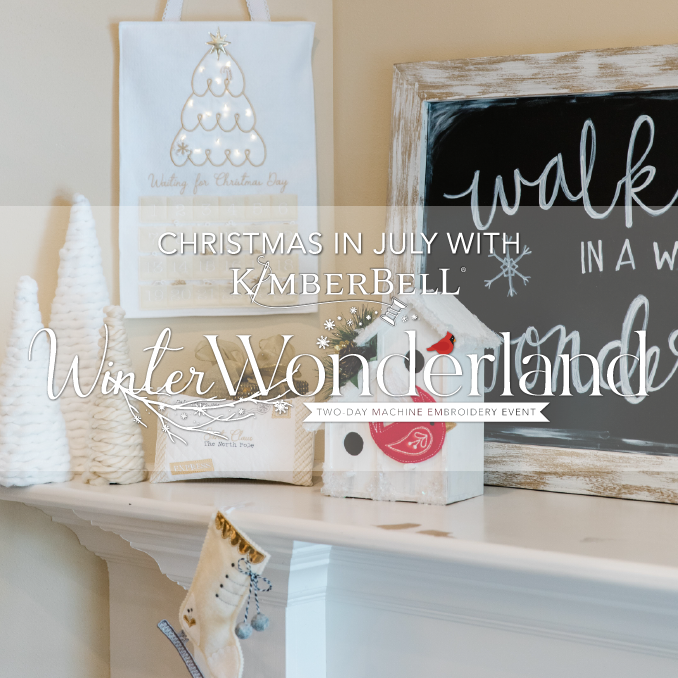
Kimberbell's Winter Wonderland two-day machine embroidery event is simply magical. Every project is classy and elegant and so much fun to create! And it all begins with signing up through your favorite quilt shop. Some shops hold events in-store, others virtually, and some are doing both. Our Event Locator lists ALL events being held by Kimberbell Certified Shops.
 The Event Project Kit
Once you've signed up, your quilt shop will give you the Event Project Kit. This darling, zippered bag is packed to the brim with the design CD, pre-cut fabric kits, embellishments, full-color instructions, Kimberbell Paper Tape, and your collectible event pin and lanyard. Basically, the kit comes with everything you need to make all of the event projects. (Note: You do need to provide your own stabilizer, thread, needles, etc.)
Speaking of which, I make it a priority to bust out my Project Kit days before an event. I like making sure I have the right stabilizers on hand. I also iron my fabric swatches, wind a few bobbins, and swap out my needle so I'm ready to go. I highly recommend reading the instructions ahead of time!
Day One
My quilt shop chose to host Winter Wonderland through Zoom software, and they sent the digital invite days before the event. When it was time to start, I put my laptop next to my embroidery machine, clicked the link, and just like that (snap!) I was at the event without ever leaving my chair. Our teachers encouraged us to ask questions, have fun, and give ourselves some grace if we made a mistake. I always need that little pep talk before an event, because I do inevitably make a mistake or two (or more). But if there's one thing I've learned about machine embroidery, it's that mistakes can either 1) be fixed, or 2) become a Barney Saltzberg-like Beautiful Oops that takes me into new creative territory. The instructors are always so good to answer questions and help solve any issues that may come up. They sincerely want every attendee to have a positive experience.
After taking care of the initial greetings, we got going with our first project: the Winter Cardinal Ornament.
 Winter Cardinal Ornament
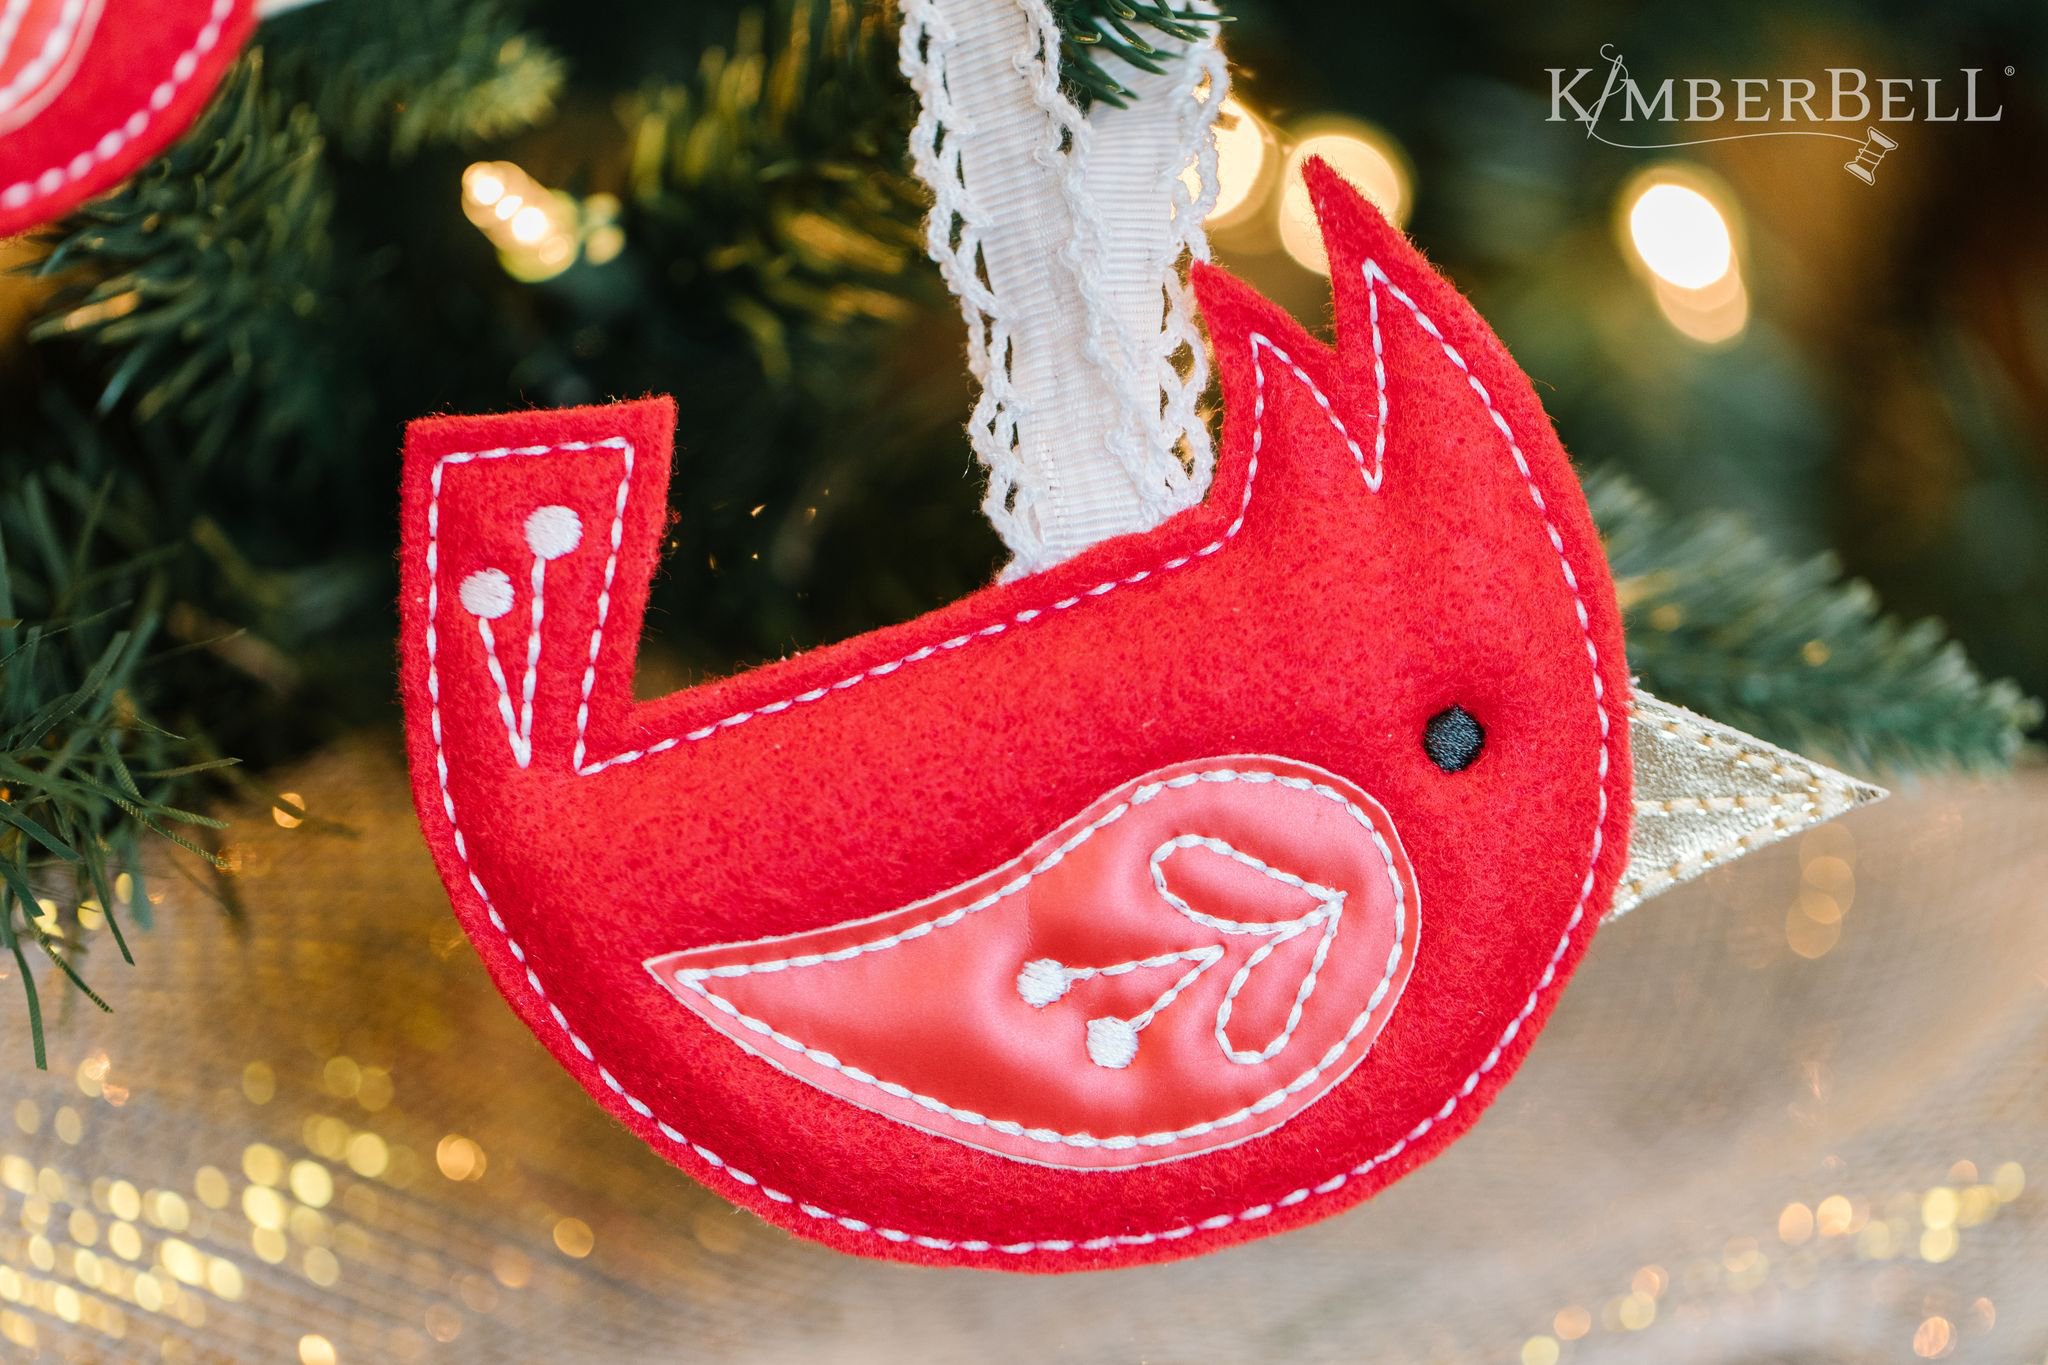
Isn't he adorable? The Winter Cardinal Ornament is made entirely in-the-hoop from Embroidery Felt and dimensional foam, with a beak and wing of red Embroidery Leather. (I love stitching on Embroidery Leather! It's soooo soft and dreamy.) The raw-edge finish and white stitches create a folksy feel for this little bird, which hangs from a charming loop of Crocheted Edge Trim. I stitched my cardinal in a 5x7 hoop, but the design CD also comes with a smaller size for a 4x4 hoop. One of these days, I may make a buddy for my little bird. Or maybe I'll stitch a whole flock in a variety of felt and leather colors. There are so many possibilities for ornaments and gift tags and more!
 Dream Skate Felt Stocking (Part One)
Our next project was the beautiful blade of the Dream Skate Felt Stocking, stitched in a 6x10 hoop on wash-away stabilizer. Mylar and Glitter Dot Organza make the blade SO sparkly! (The picture doesn't really capture the dazzle.) We made the blade on Day One so we could dissolve the stabilizer and allow for adequate drying time. Finishing the rest of the stocking was scheduled for Day Two.
When stitching the skate blade, we used silver thread in the bobbin as well as silver thread on top. (Good thing I read those directions and had pre-wound a silver bobbin!) Tip: When trimming Mylar, Organza, or any applique fabric, put the hoop on a flat surface and move it around to reach the pieces you need to cut. (Don't trim on your lap or you might pop the hoop!)
December Days Advent Calendar (Part One)
When the skate was finished and set aside to dry, we got started on the December Days Advent Calendar:
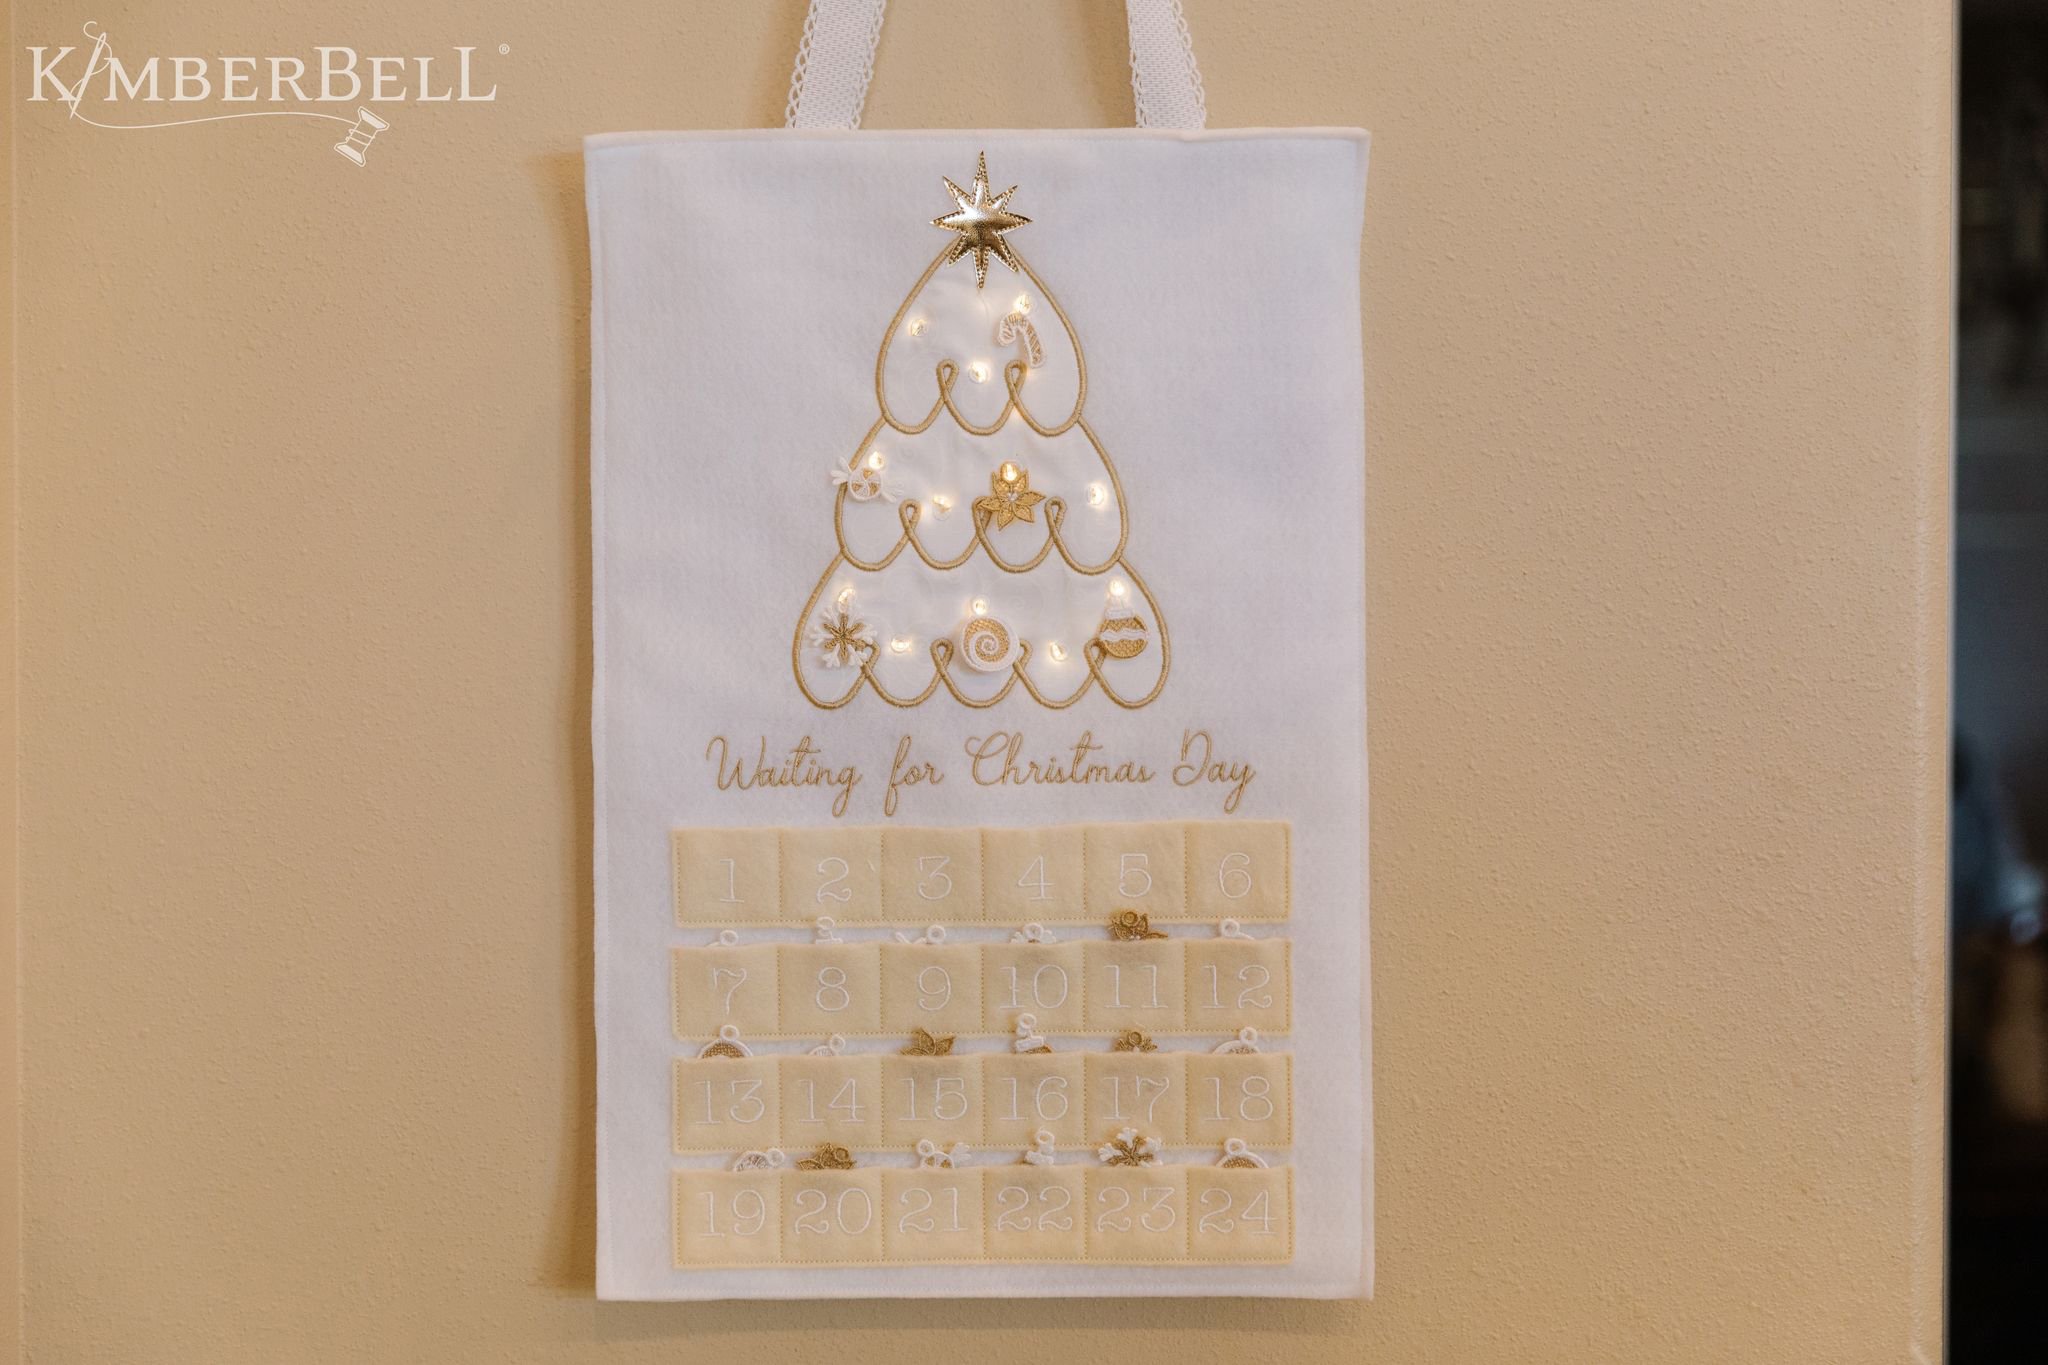
 Wow, right? The twinkling fairy lights! The tiny numbered pockets! The Mini & Merry Lace Ornaments! When this calendar came out of Product Development, I was absolutely enchanted. (I was also more than a little intimidated to make one myself!) But the instructor reassured us that we would take this project step by step, piece by piece, and eat the proverbial elephant one bite at a time. Encouraged by this reassurance, I hooped water-soluble stabilizer in my 6x10 hoop and dove right into stitching the placement lines. Before long, I had finished my first row of pockets! Our instructors showed us two of their pre-made samples: one with white numbering, and one with gold numbering. Either way is beautiful! Remember, we are the artists, thread is our palette, and it's more than okay to experiment with color. (One of the attendees used green thread for her tree, and it was gorgeous.)

After stitching rows 7 through 24, we grabbed some sticky-back tear-away and finished the front of the calendar with all of the pockets, the applique tree, and the "Waiting for Christmas Day" lettering. Through this whole process, the instructors stitched right along with us, with close-up shots of their hands and machines doing every single step. (I love that aspect of virtual events!) They answered our questions, gave helpful tips, and repeated instructions when needed. At the end of the day, I couldn't believe what I'd accomplished one stitch at a time.
Day Two
Day Two of Winter Wonderland began with the Dream Skate Felt Stocking (Part Two). My sparkly blade was nice and dry--time to stitch the beautiful boot!
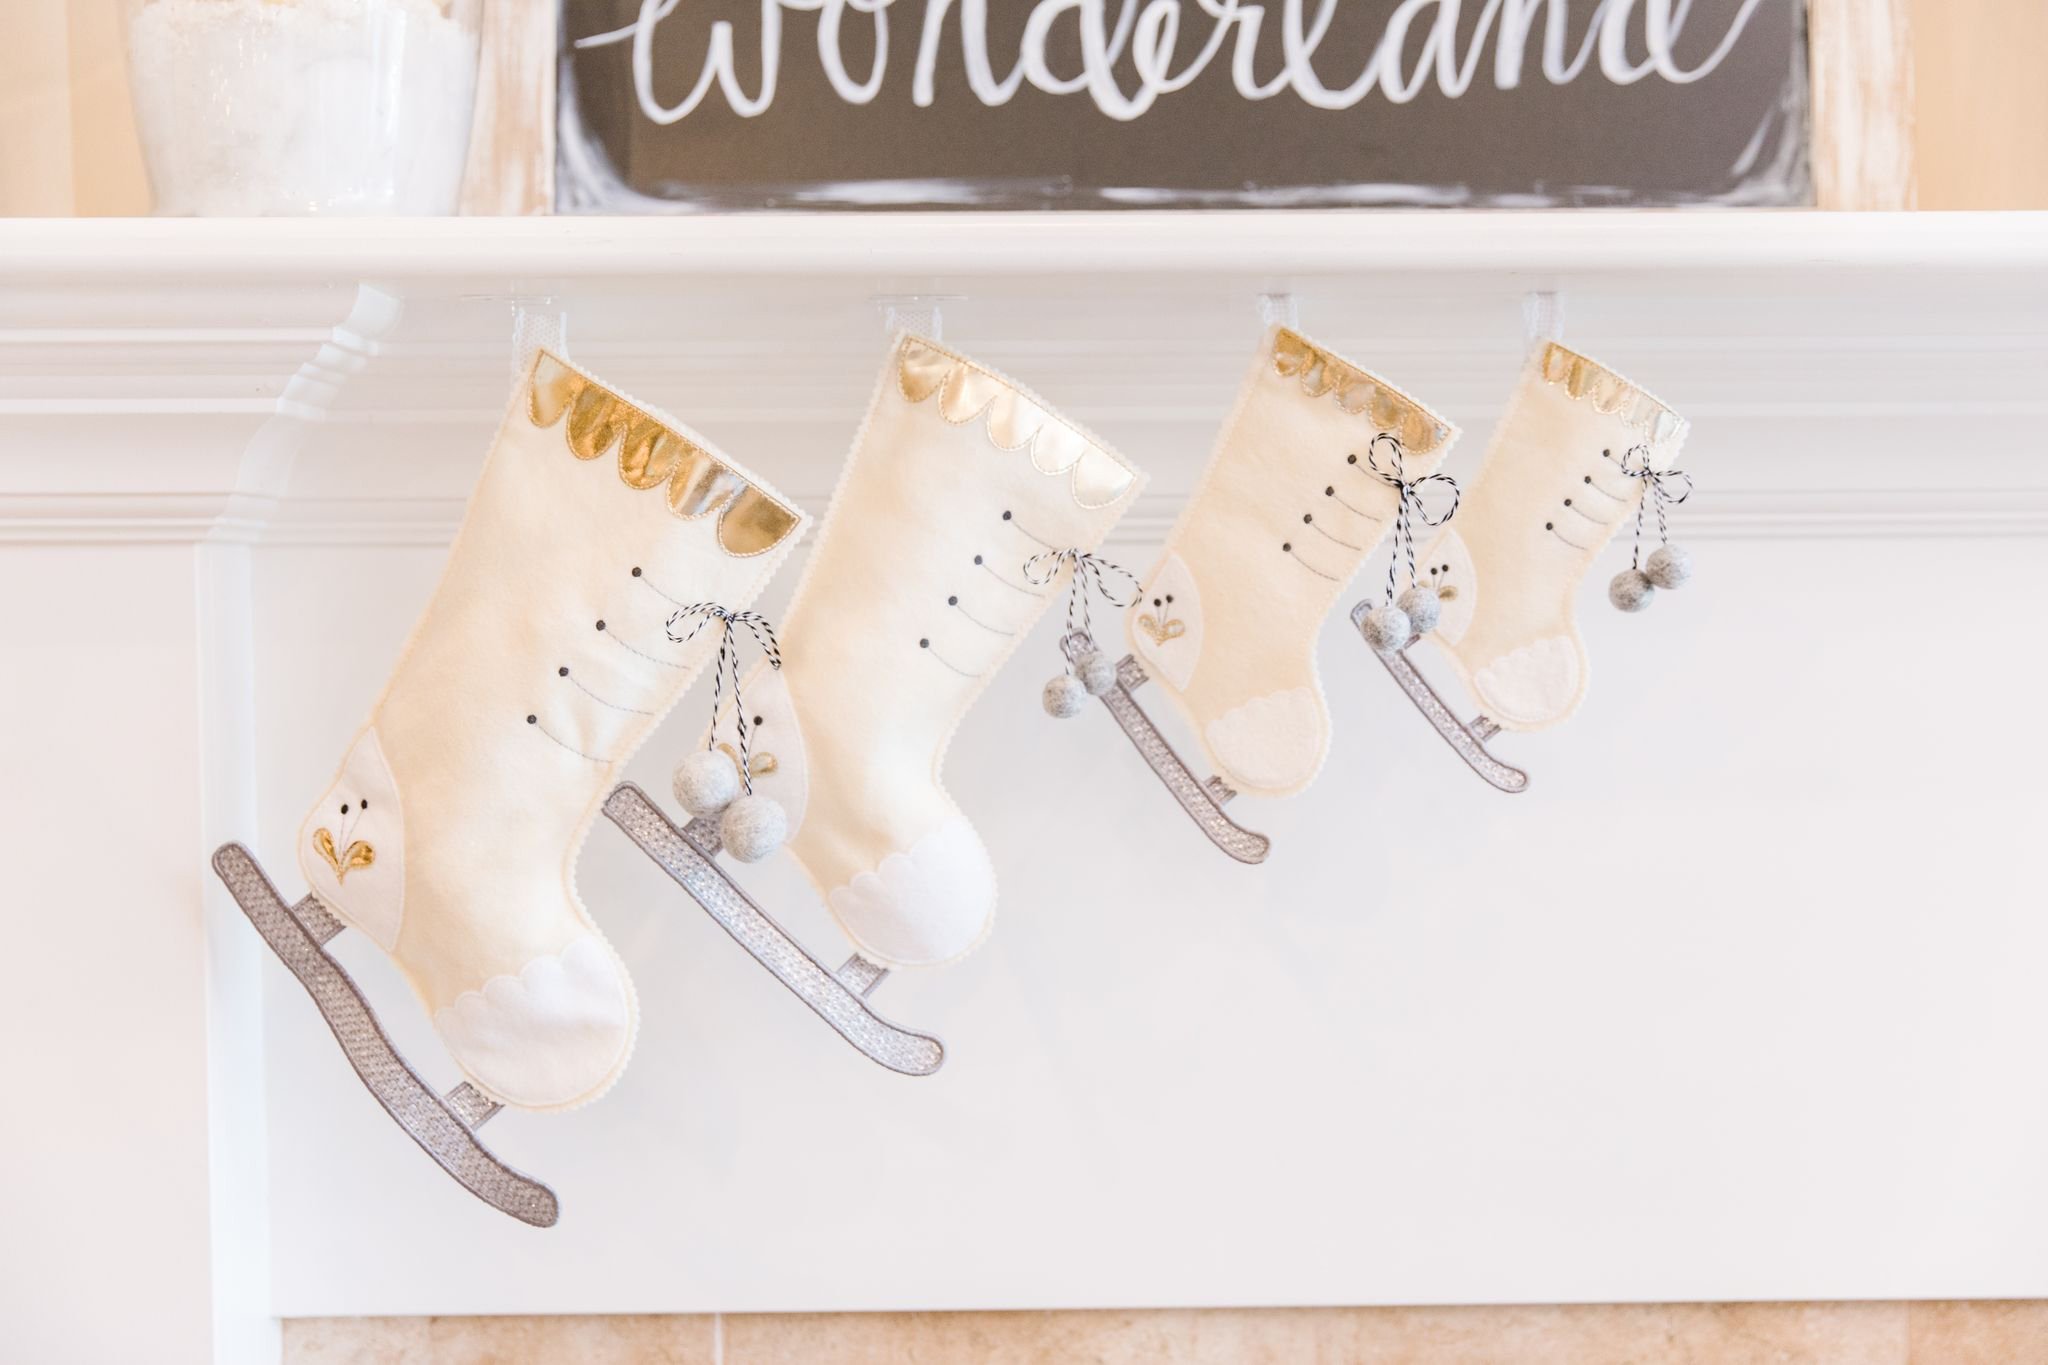
 Laced with Kimberbell Twine and Wool Felt Balls, the stocking hangs from a lovely loop of Crocheted Edge Trim. I adore the Embroidery Leather scallops at the top, and the sweet little heart at the heel! Dimensional details like these are really what sets Kimberbell projects apart. This delightful design comes in four sizes; we made the 6x10 size at the event, but the design CD also includes the other sizes. It would be SO fun to make all of them and have a whole set.
The Dream Skate Felt Stocking came together easily, right in-the-hoop. Adding the blade was a piece of cake, and a quick trim with pinking shears was the finishing touch. (I actually finished mine with just regular scissors, because I was in the mood for a clean, straight edge that day.)
Dear Santa Bench Buddy
You know, I cannot (for the life of me!) figure out what my favorite project from this event is. Two seconds ago, as I was typing about the stocking, I thought, "Yep, the skate was definitely my favorite project." But now I'm wondering if I like the Dear Santa Bench Buddy best! (Or maybe it's the cardinal or the calendar?) Anyway, you know it's a good event when you love ALL of the projects. Take a look at this petite pillow:
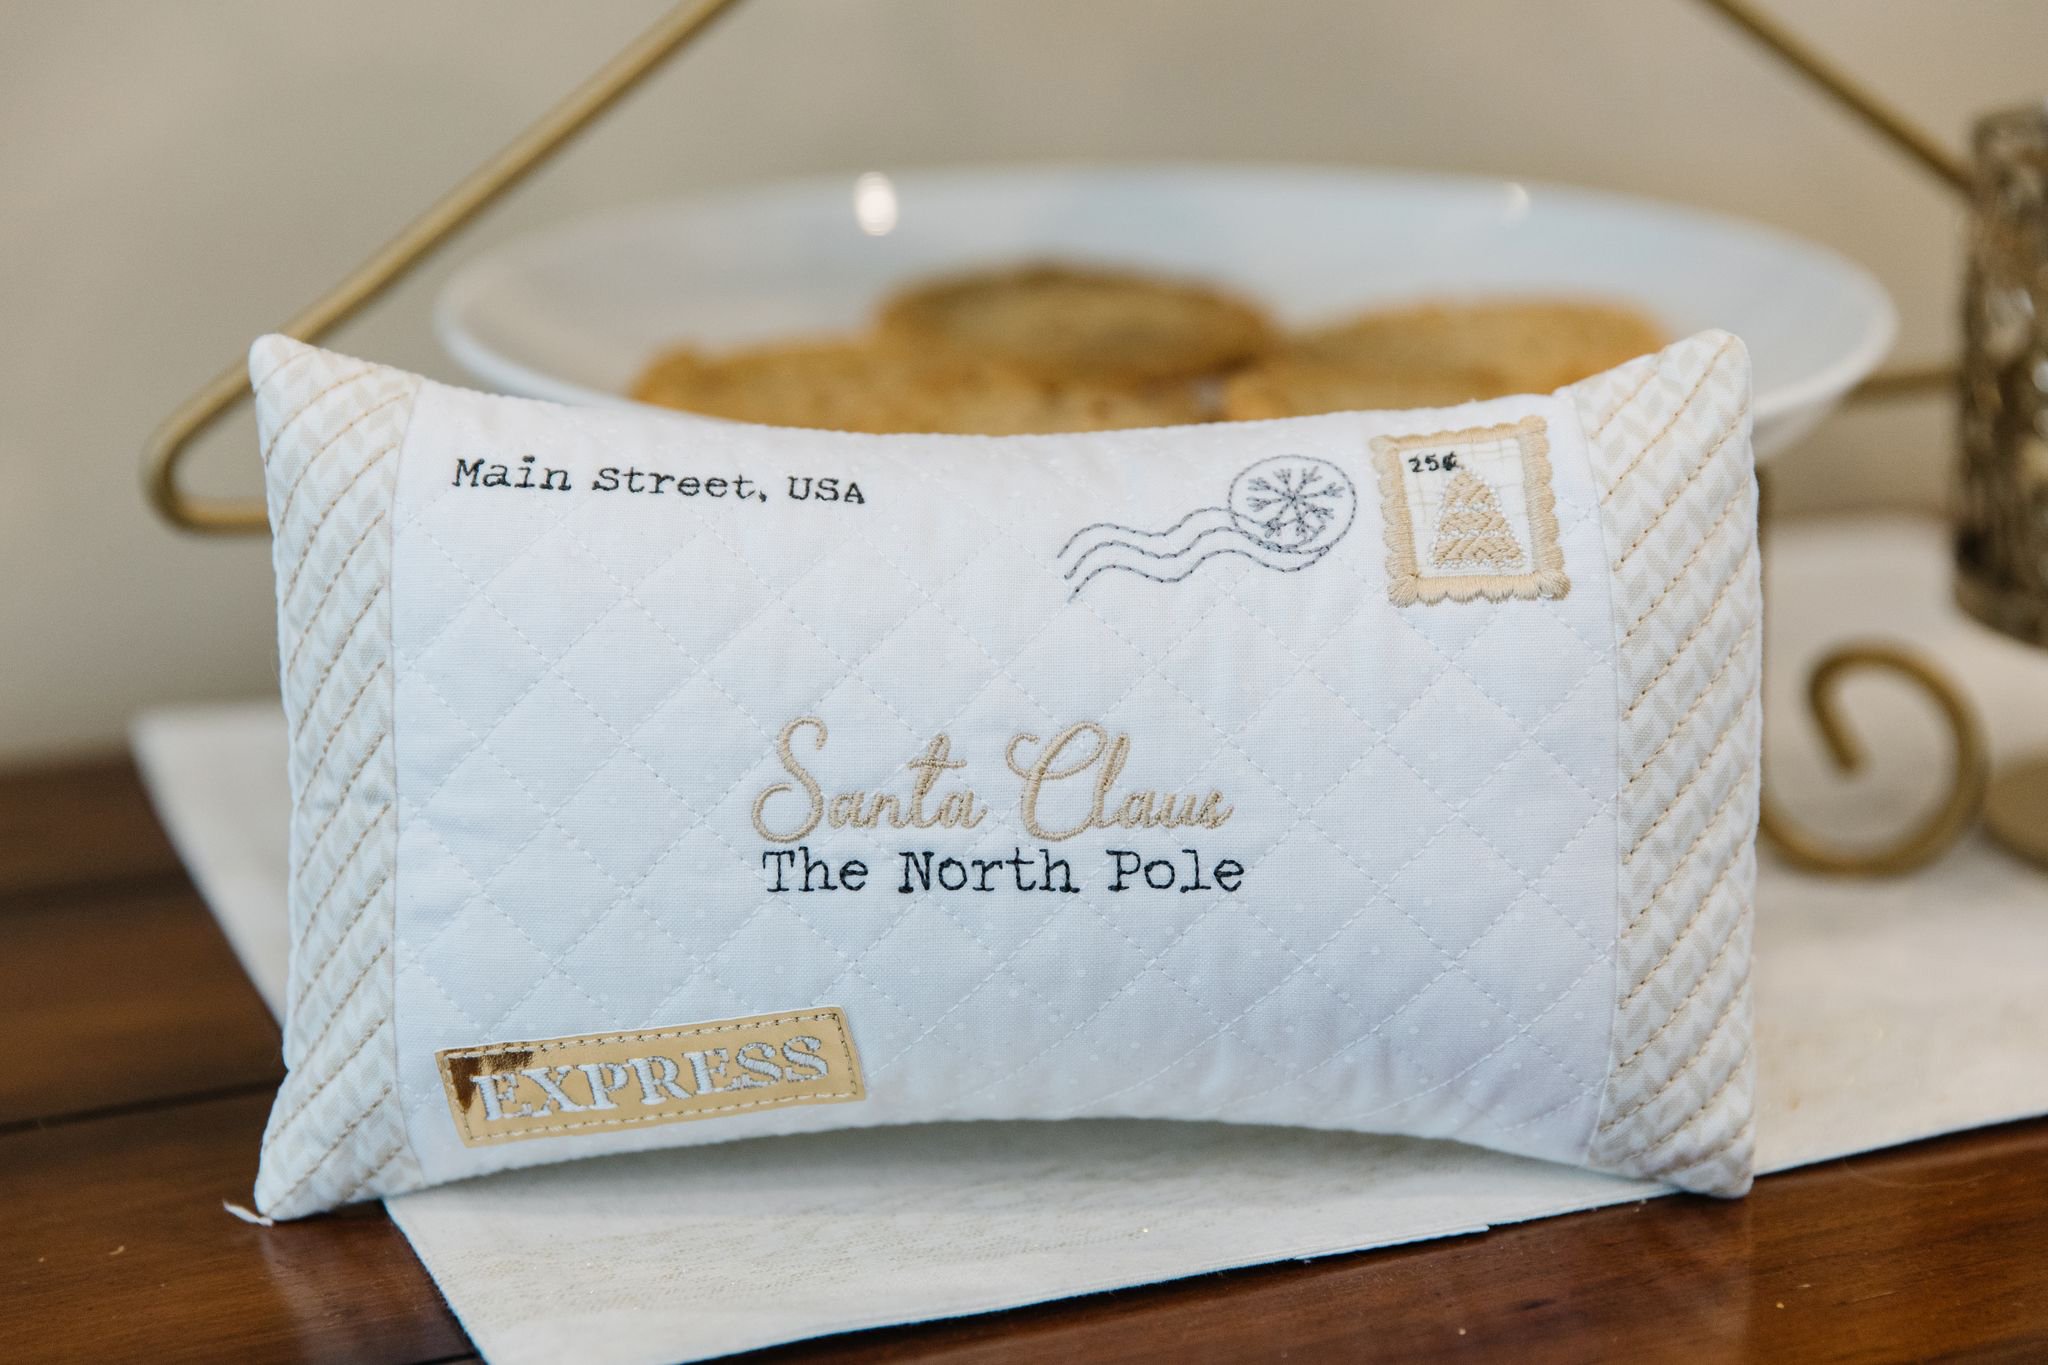
 The Dear Santa Bench Buddy is made entirely in-the-hoop. Have you ever made a Bench Buddy? I have to say, now that I've made one and know first-hand how easily they come together, I'm kind of itching to make more of these little pillows. Kimberbell has a set of Bench Buddies for every month of the year (for both sewing and machine embroidery). How fun it would be to make ALL of them and put them in my entryway for each holiday and season! Yep, I'm thinking Bench Buddies are my new project. But I digress.
Back to Dear Santa. I love the tiny postage stamp and the gold Embroidery Leather "Express" sticker. And the quilting! The crosshatch background quilting is offset so beautifully by the diagonal postage stripe stitching. It's put together and embroidered in-the-hoop, then all you do is turn the whole thing right side out and insert the 9 1/2" by 5 1/2" Pillow Insert (included in your Project Kit). I couldn't be more pleased with how my Dear Santa Bench Buddy turned out.
December Days Advent Calendar (Part Two)
 Next, we set out to finish the December Days Advent Calendar, including the Mini & Merry Lace Ornaments for the pockets. The front of my calendar was already done, so all that was left was to insert the Fairy Lights and then put the whole thing together. Now, because of a family commitment, I actually had to miss the last couple of hours of the event. But I wasn't worried; I knew that everything was being recorded and I could catch the last part as soon as I got back. (That's another wonderful perk of virtual events--the ability to watch the recording!)
Our instructor guided us through poking holes through the eyelet stitches, inserting the fairy lights, and adding a pocket for the switch to the back of the calendar. Using a sewing machine, we then stitched the front and back together and added the wooden dowel and Crocheted Edge Trim. My elegant, twinkly, December Days Advent Calendar was complete! (My kids were thrilled when I turned on the lights. Talk about a wow factor!)
Mini & Merry Lace Ornaments
Our last project of the day was to stitch Mini & Merry Lace Ornaments for the calendar pockets. The design file is a set of 12 ornaments: two poinsettias, two snowflakes, two peppermint candies, two bulbs, two swirly ornaments, and two candy canes. If you want 24 ornaments, you simply stitch the file twice. Or you could fill half of your calendar pockets with Mini & Merry Lace Ornaments for the tree, and the other half with treats or stickers or other fun surprises! These lace ornaments are made in a 4x4 hoop (they are very small; the biggest is about an inch high) and stitched on two sheets of wash-away stabilizer. After embroidering on the machine, you simply dissolve the stabilizer and voila!
Contests, Games, and the Bonus CD
 You know, attending an event isn't just cranking out stitches all day. I mean, even though the projects are rewarding in and of themselves, quilt shops often go the extra mile to make things even more fun! My quilt shop set the tone with Christmas music, costumes, and winter decor. They also sprinkled the event with contests and games so attendees could engage with the instructors and each other. All in all, we had a wonderlandiful time!
Every Kimberbell Event also has an exclusive Bonus CD for attendees who spend $100 or more in the Kimberbell Pop-up Shop. The Bonus CD for Winter Wonderland is called Seasonal Sentiments. These giftable designs are perfect for family and friends!
The Empty Bag
This may sound a little cheesy, but bear with me. :) At the end of an event, I love looking at my empty Project Kit bag. Why? I like reflecting on how packaged fabric scraps and embellishments were transformed into projects that I can be proud of. It's the same way I feel when I've taken raw ingredients from my pantry and turned them into a delicious cake! It's experiencing the joy of creativity, and it's deeply satisfying. So, here are the projects I made. Some of the stitches are uneven, and they're not perfect. But they're mine. And I made them with my own two hands.

I find all of this talk about creativity inspiring. So, are you ready for a second verse? (Remember, this is the "Walking in a Winter Wonderland" tune!)
Well, my projects are done
And I've had lots of fun!
From the skate to the lights,
Nothing delights
Like stitching in a Winter Wonderland.
I hope you'll experience the joy of creativity™ at a Kimberbell Event soon. Until then, please enjoy making Kimberbell's Winter Wonderland Mug Cake!


