Congratulations! You just bought a home embroidery machine and are ready to Experience the Joy of Creativity™. There's so much to look forward to, from home decor to gifts and more!
But...where do you start?
As with anything new (and truly worthwhile), there's a learning curve to your new hobby. But the good news is you've got a whole machine embroidery community just waiting to help and support you! You might start by joining our Kimberbellas (and Fellas, too) Facebook group to share knowledge, ideas, tricks, and more.
Let's get started with some basics about needles, thread, stabilizer, embroidery machine file formats, and embroidery field sizes.
The Finer "Points" of Needles
Understanding needles makes a big difference in machine embroidery results. Here are a few key "points" to keep your needle knowledge sharp:
Needle Anatomy
Needles are made up of six parts:
- Shank: The upper part of the needle that fits inside the needle bar of your machine.
- Blade (Shaft): The lower portion of the needle from the shank to the point. The groove, the eye, the scarf, and the point are all part of the blade.
- Groove: The hollow indentation in front of the blade. The blade acts as the final guide, keeping the thread close to the needle until it passes through the eye.
- Eye: The hole that carries the top thread through the needle to meet with the bobbin thread below.
- Scarf: The indentation on the back of the needle. The scarf allows the bobbin casing to come near enough to the eye to catch the thread and form a stitch.
- Point: The very tip of the needle that pierces the fabric and delivers the stitch.
Tip: Commercial embroidery machines have a completely round shank, while home embroidery machine needles are round on one side and flat on the other. When using a home embroidery machine needle, insert the needle with the flat side facing away from you.
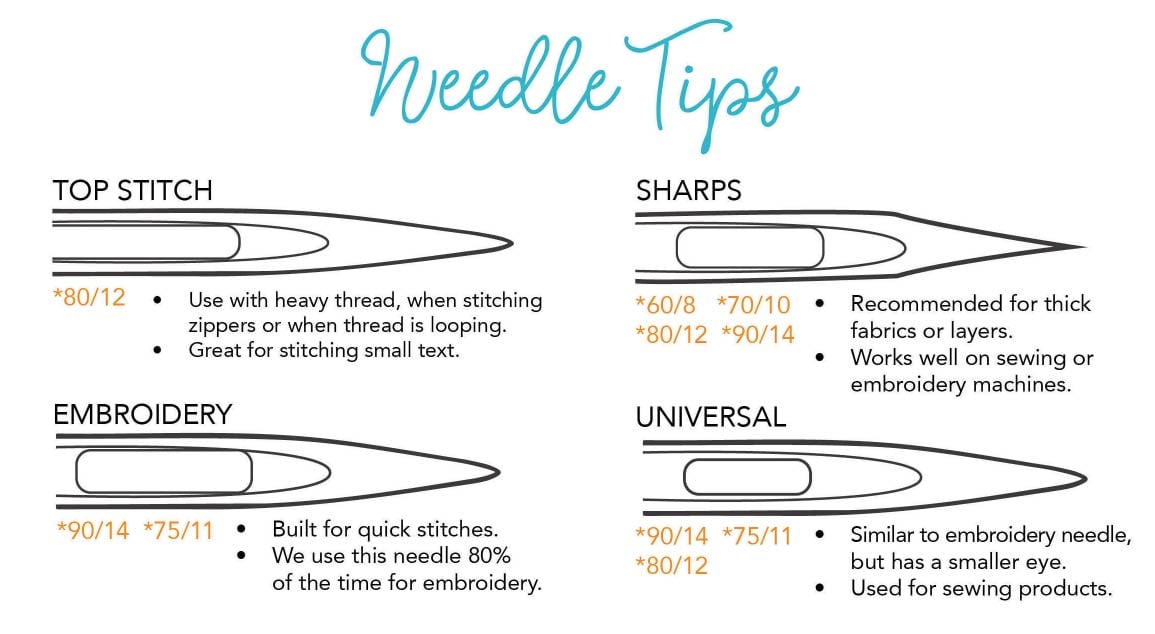
Needles come in a variety of styles for different uses:
- Sharp Needles: Have a very sharp point that precisely pierces the fabric. Use a sharp needle for tightly-woven cottons or when stitching through puffy foam, thick layers, denim, etc.
- Ballpoint Needles: Have a slightly rounded tip that pushes the fabric fibers aside instead of piercing. Use a ballpoint needle for knits or delicate fabrics.
- Universal Needles: Fall between a sharp and a ballpoint and can be used on either wovens or knit fabrics. Universal needles have a smaller eye. When using a universal needle, make sure your bobbin thread is at least 60 wt or smaller and slow your machine down!
- Specialty Needles: There are a variety of specialty needles available for specific projects, including leather, metallic threads, hemstitching, and more.
Needle Sizes
When looking at needle size, you’ll see two numbers separated by a slash. The larger number is the European number based on the metric system (the shank’s diameter relative to a millimeter). The smaller number is the American number (an assigned number).
The most commonly used needle size for machine embroidery is the 75/11 needle, which is often the size that comes with an embroidery machine. At Kimberbell, we use a 75/11 embroidery needle 80% of the time! Other common needle sizes for machine embroidery include 80/12 and 90/14.
Tip: Choose the smallest needle appropriate for the fabric.
Tip: Change your needle after eight hours of embroidery!
Unraveling the Mysteries of Thread
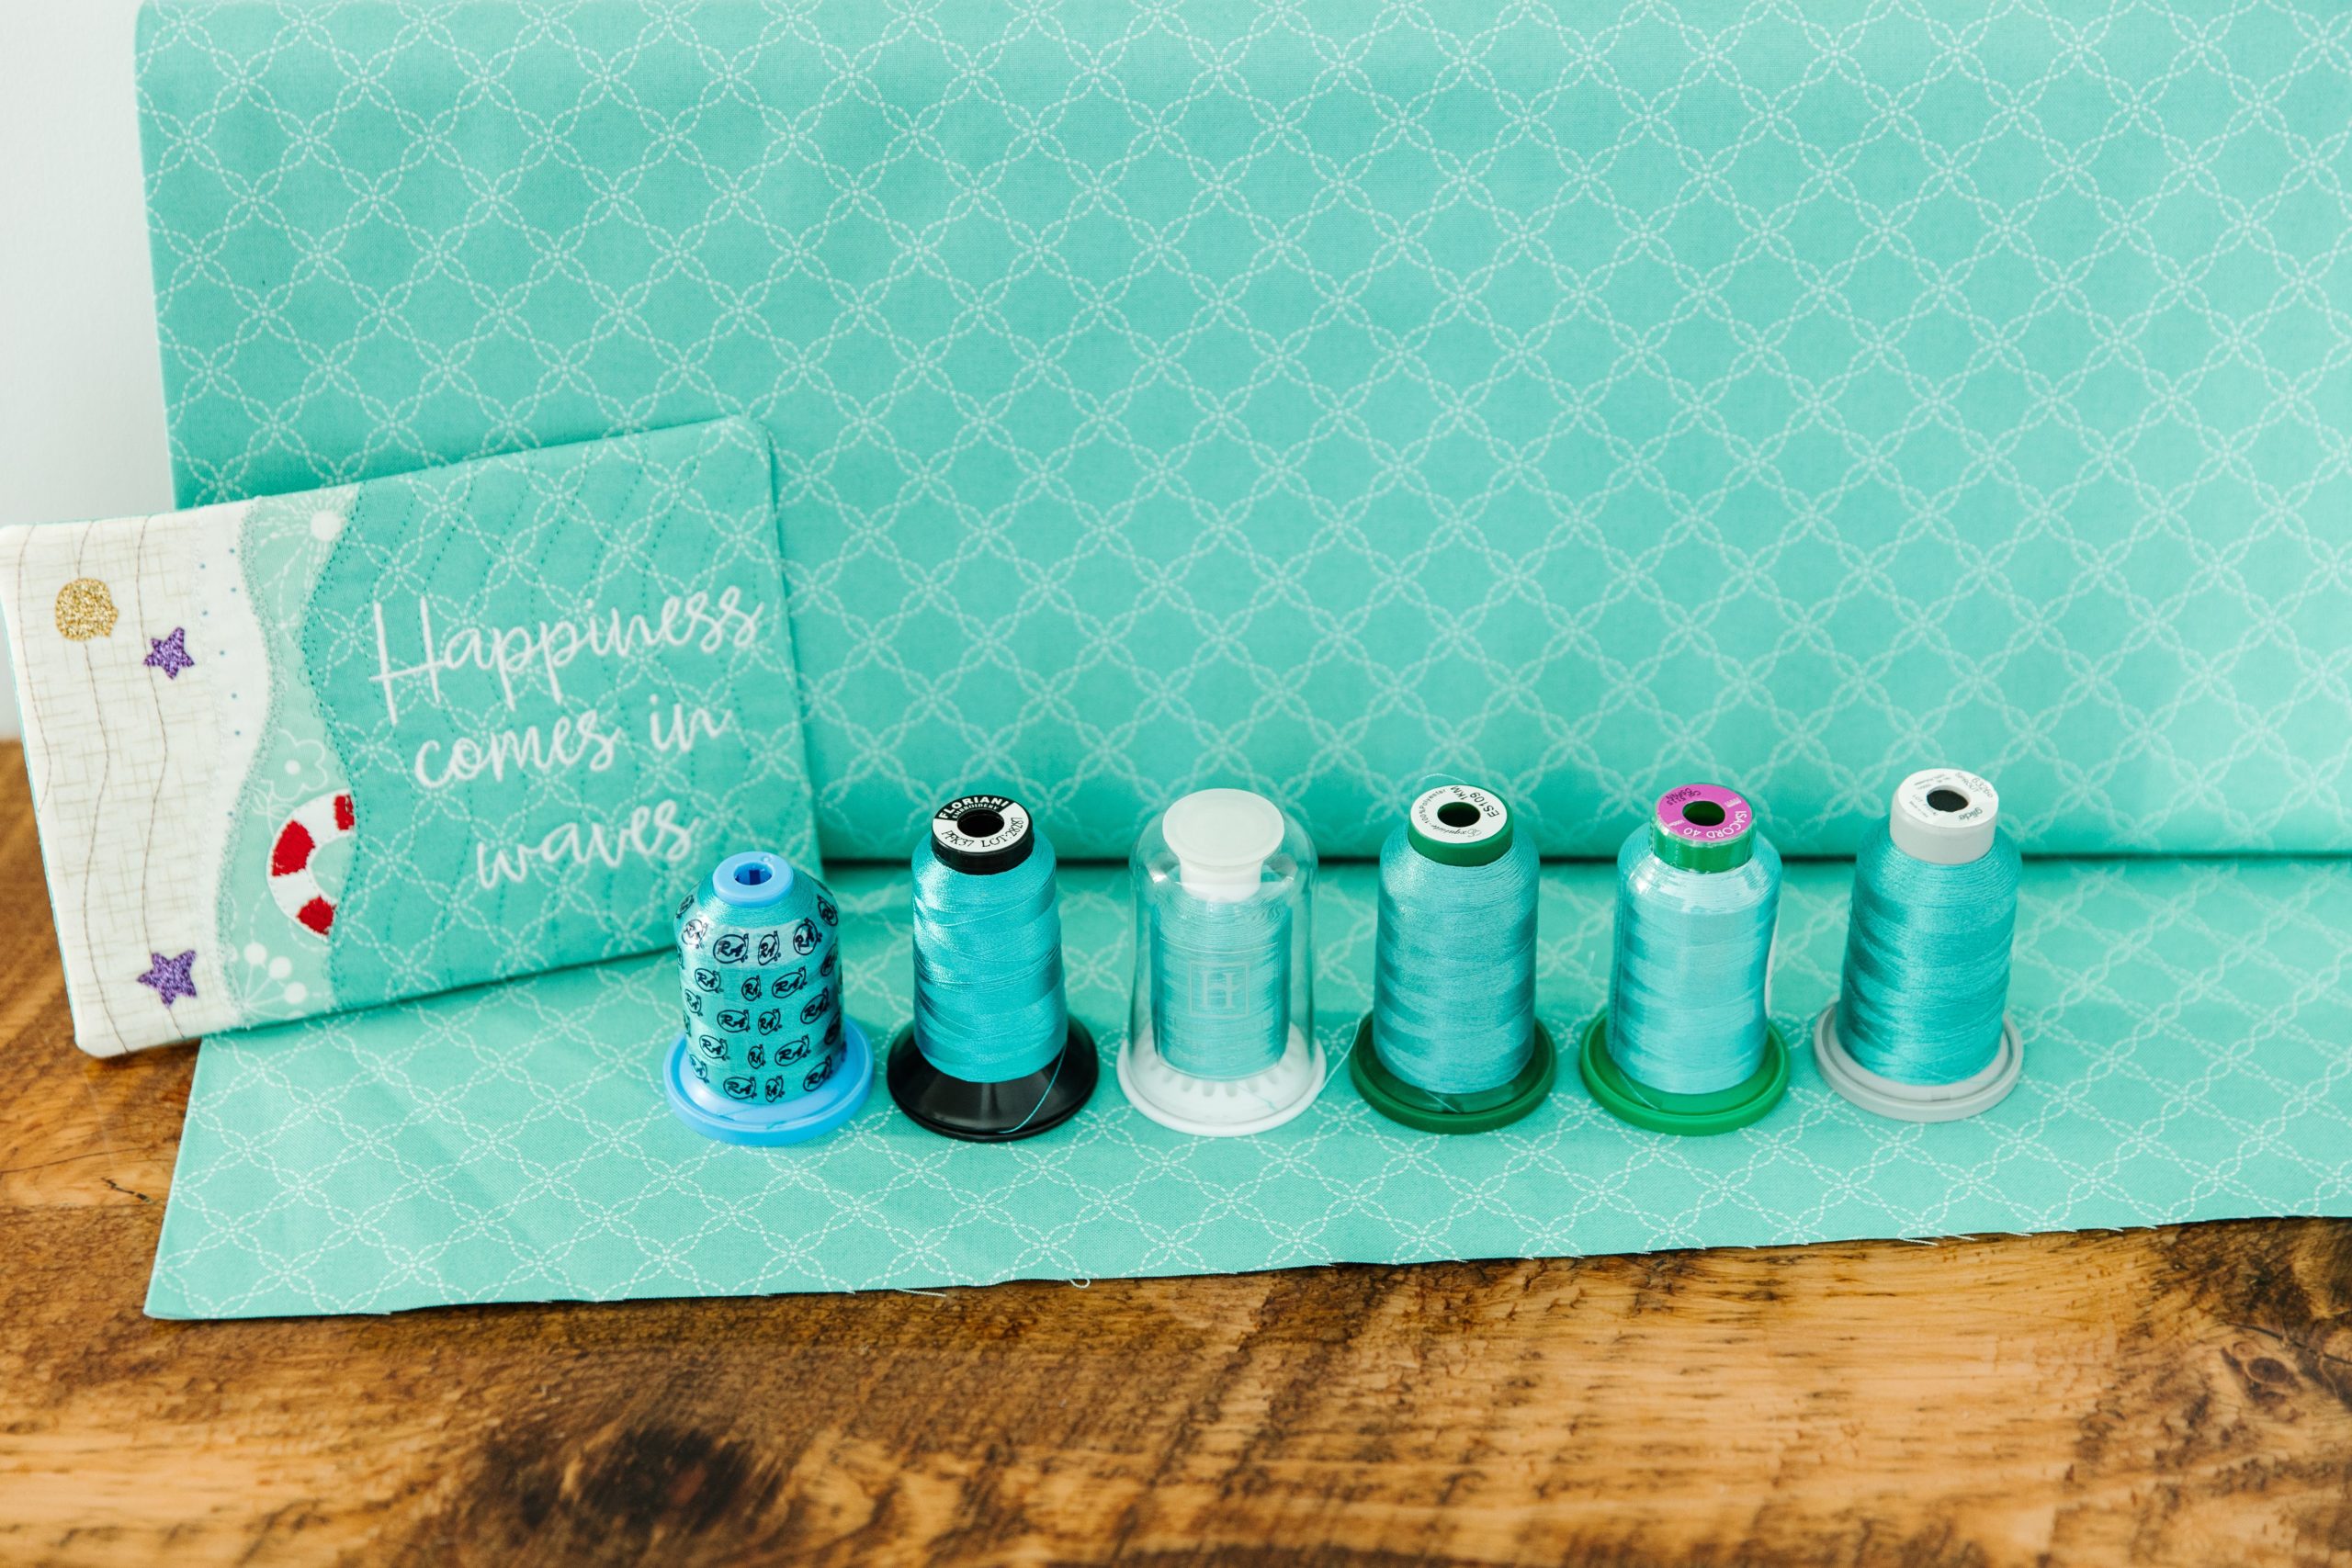
For the machine embroidery enthusiast, shopping for thread is like being a kid in a candy store. But when faced with such a delicious assortment, how do you know which spools to choose? (As much as we’d like to buy them all…)
Before selecting colors, first narrow your choices down to the thread type and weight suitable for your project. Here’s a rundown on thread types, weights, and other basics to get you started.
Thread Types
- Rayon: Soft, shiny, and available in a wide variety of colors
- Polyester: Lustrous, strong, and colorfast (We use polyester thread most of the time at Kimberbell)
- Cotton: Made with natural fibers, has a matte finish
- Metallic: Glitzy, eye-catching, made with metal foil that can twist or kink. Adjust tensions when using!
- Specialty Thread: Many types available, including water-soluble, glow in the dark, mylar, wool, chenille, and more
- Bobbin Thread: Available in cotton, spun polyester, filament polyester in prewound spools or wind your own
Tip: At Kimberbell, we generally use a 40 wt top thread with a 60 or 90 wt bobbin thread.
Tip: Match your thread colors with Kimberbell's Thread Conversion Chart!
Thread Tension & Breaks
Tension is the tautness of your thread, which can be adjusted on both the machine and the bobbin case. Generally speaking, when looking at the underside of a satin stitch, about ⅔ of the thread should be needle thread and ⅓ should be bobbin thread.
Tip: For more information about preventing and troubleshooting thread breaks, click HERE!
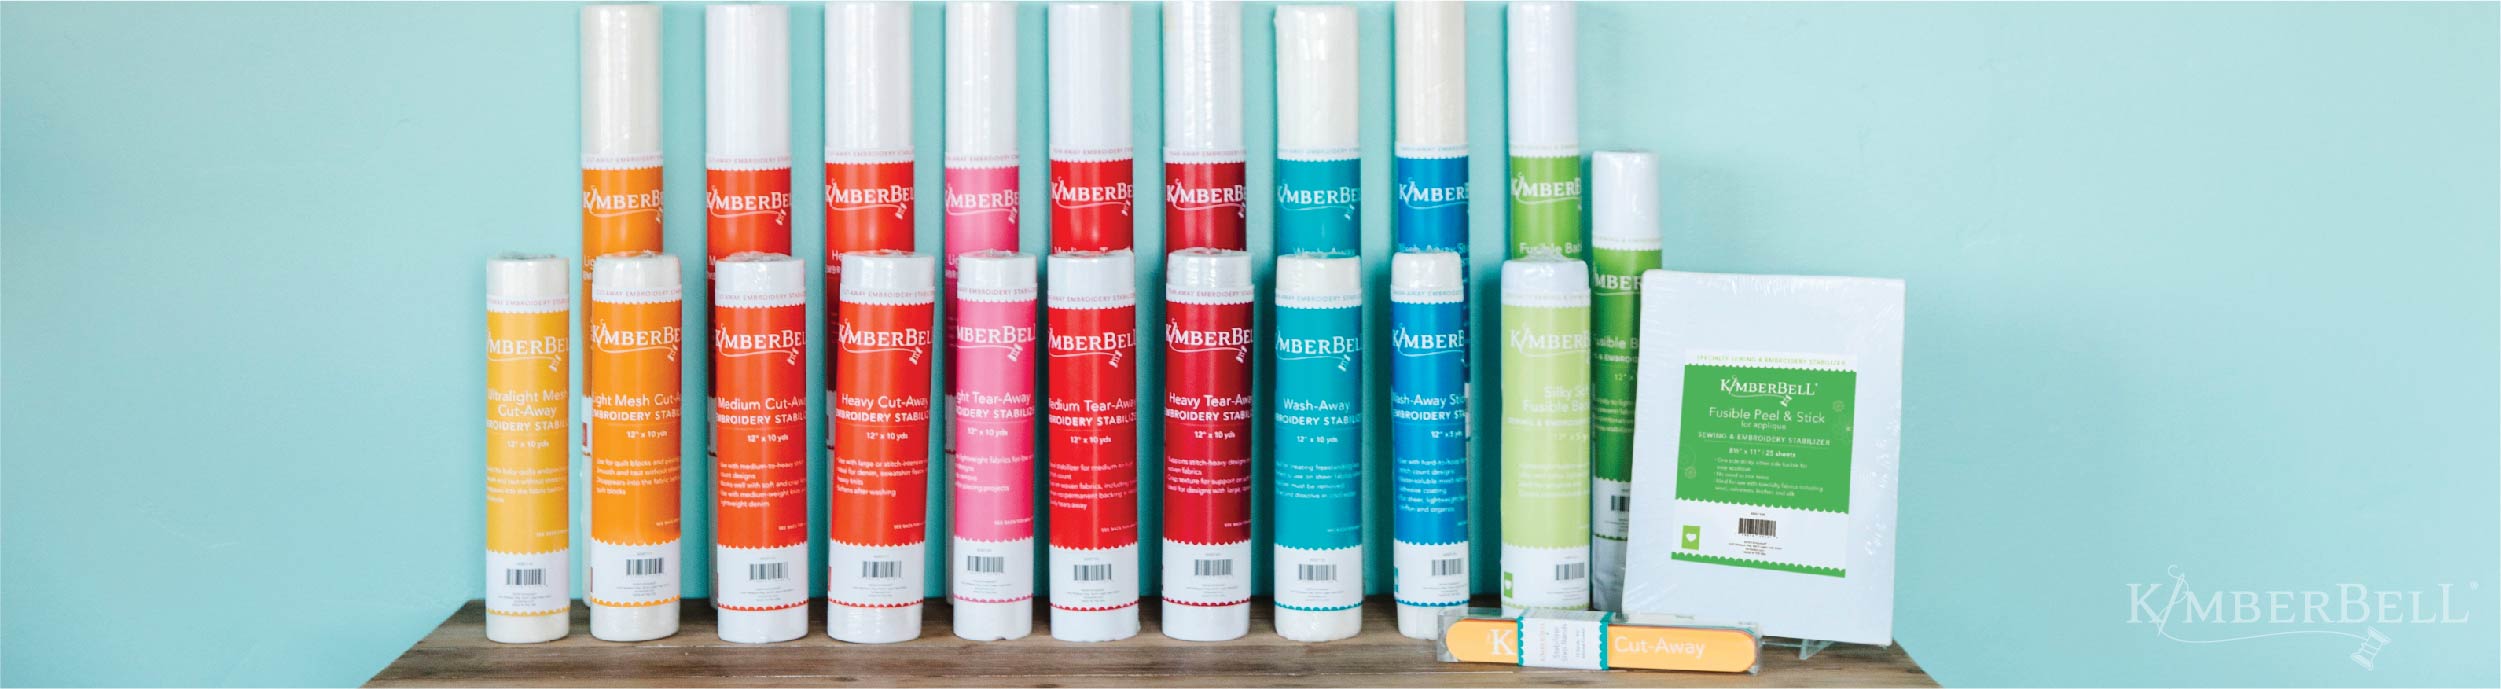
All About Stabilizer
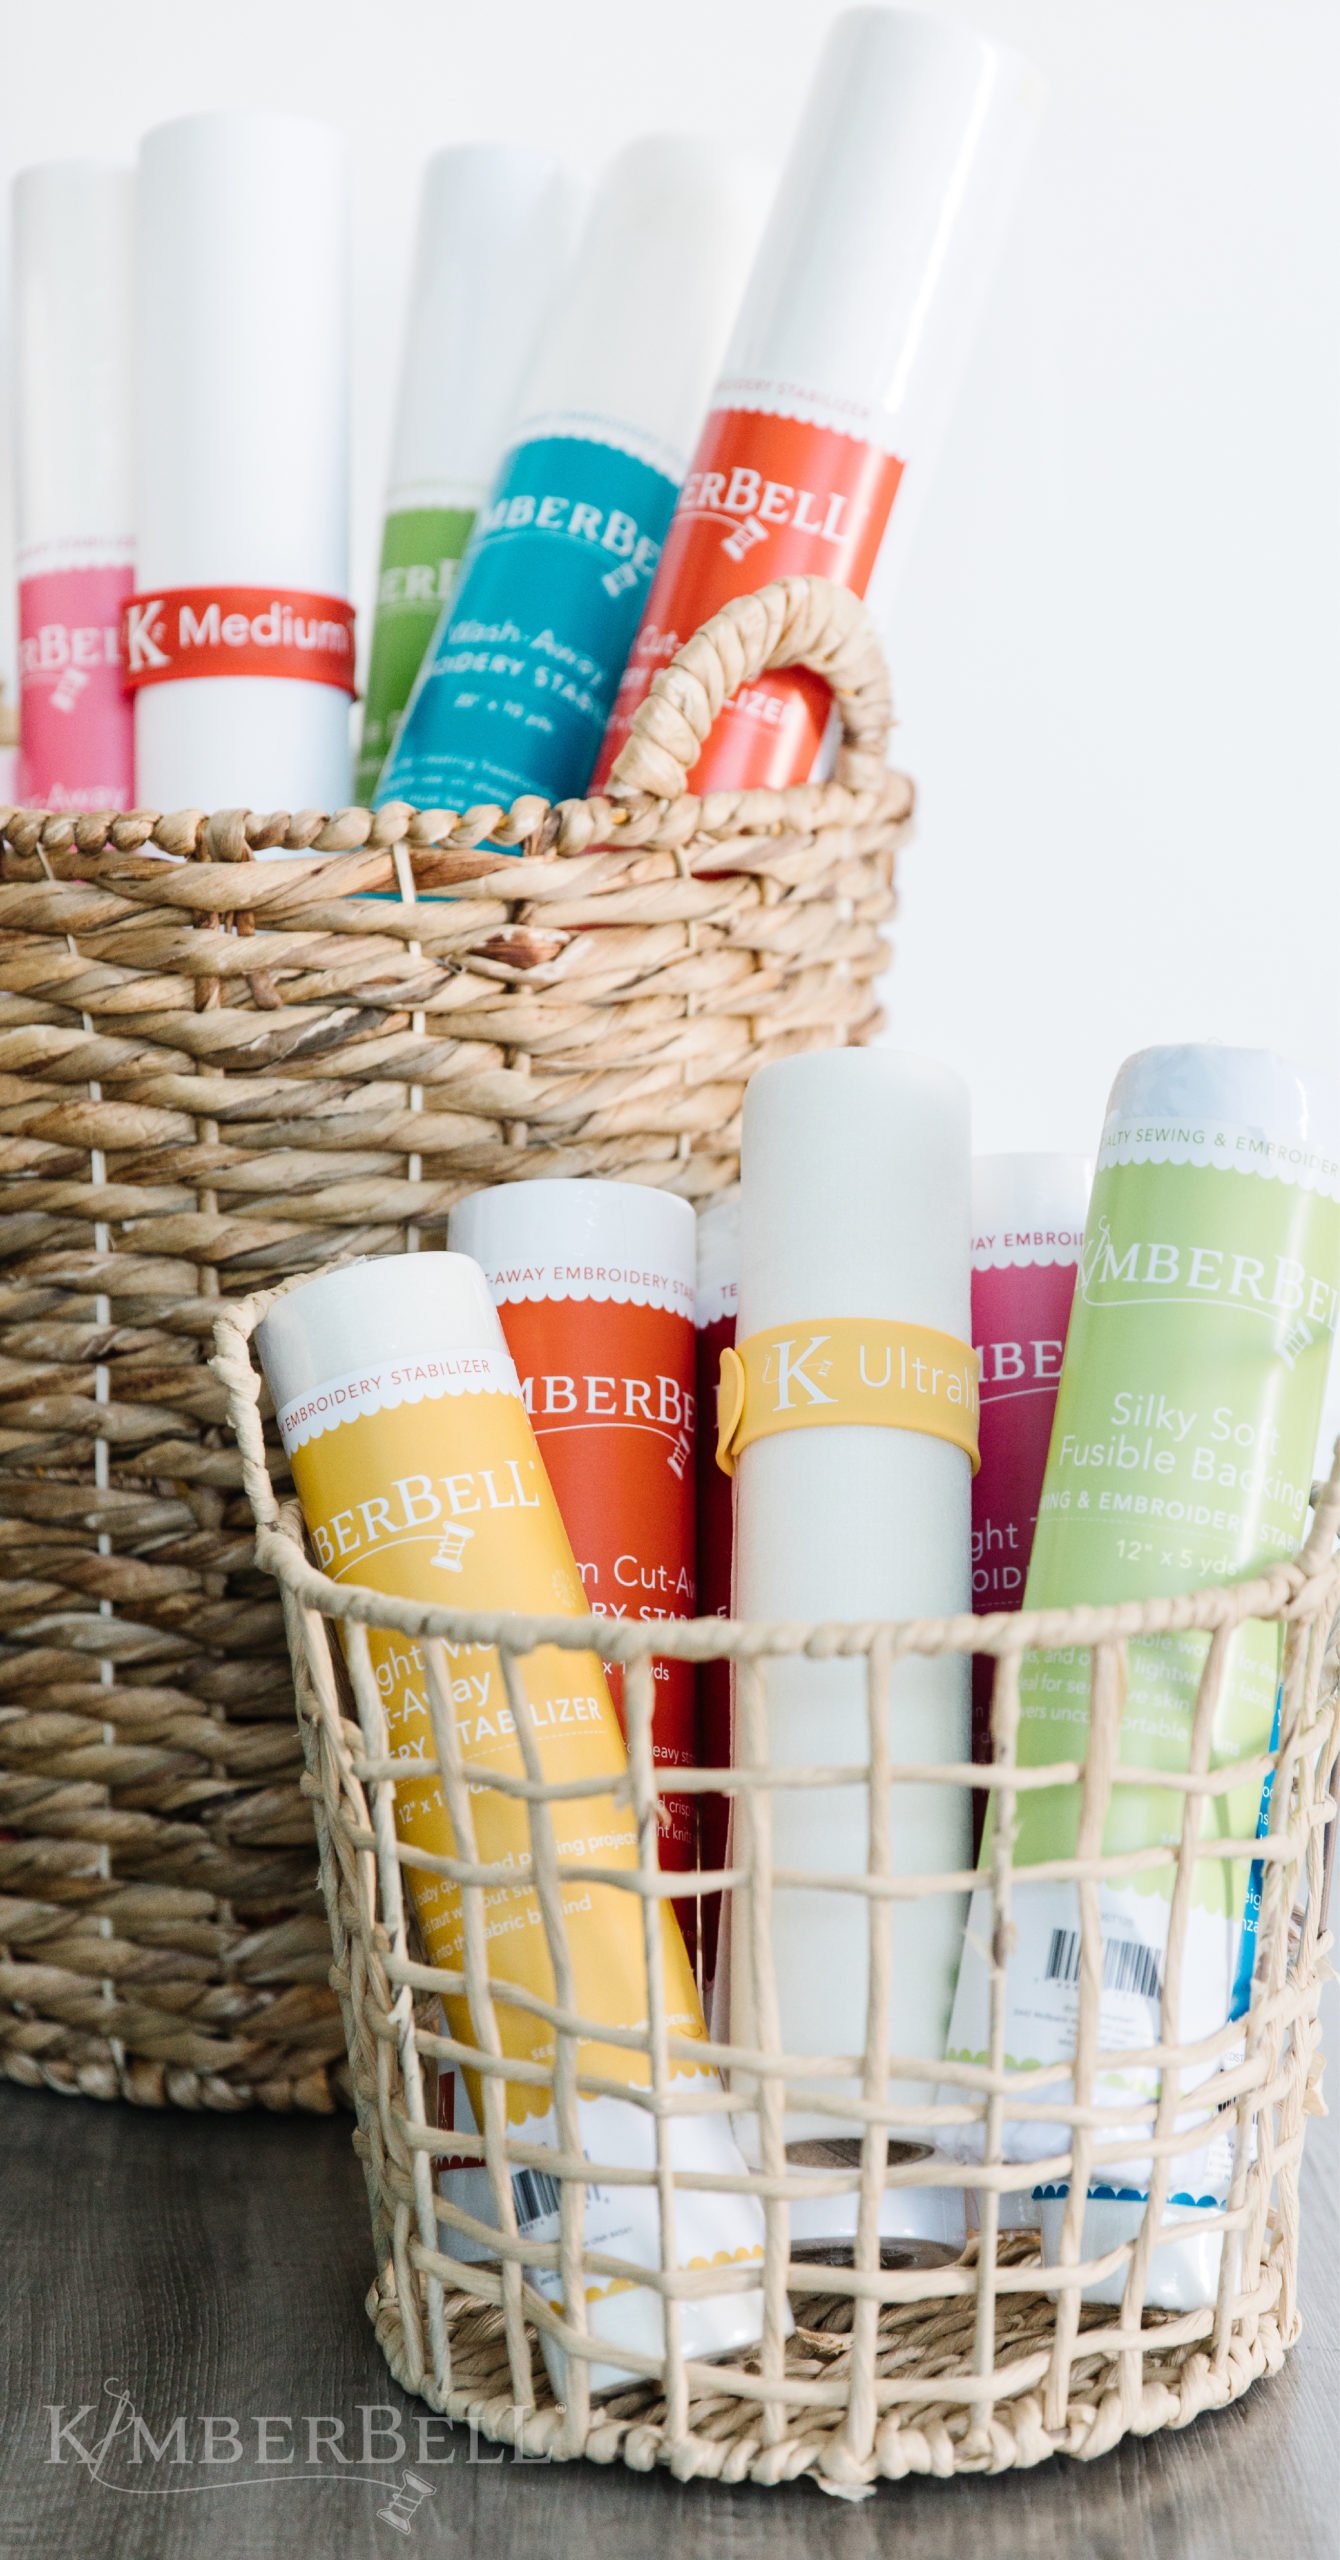
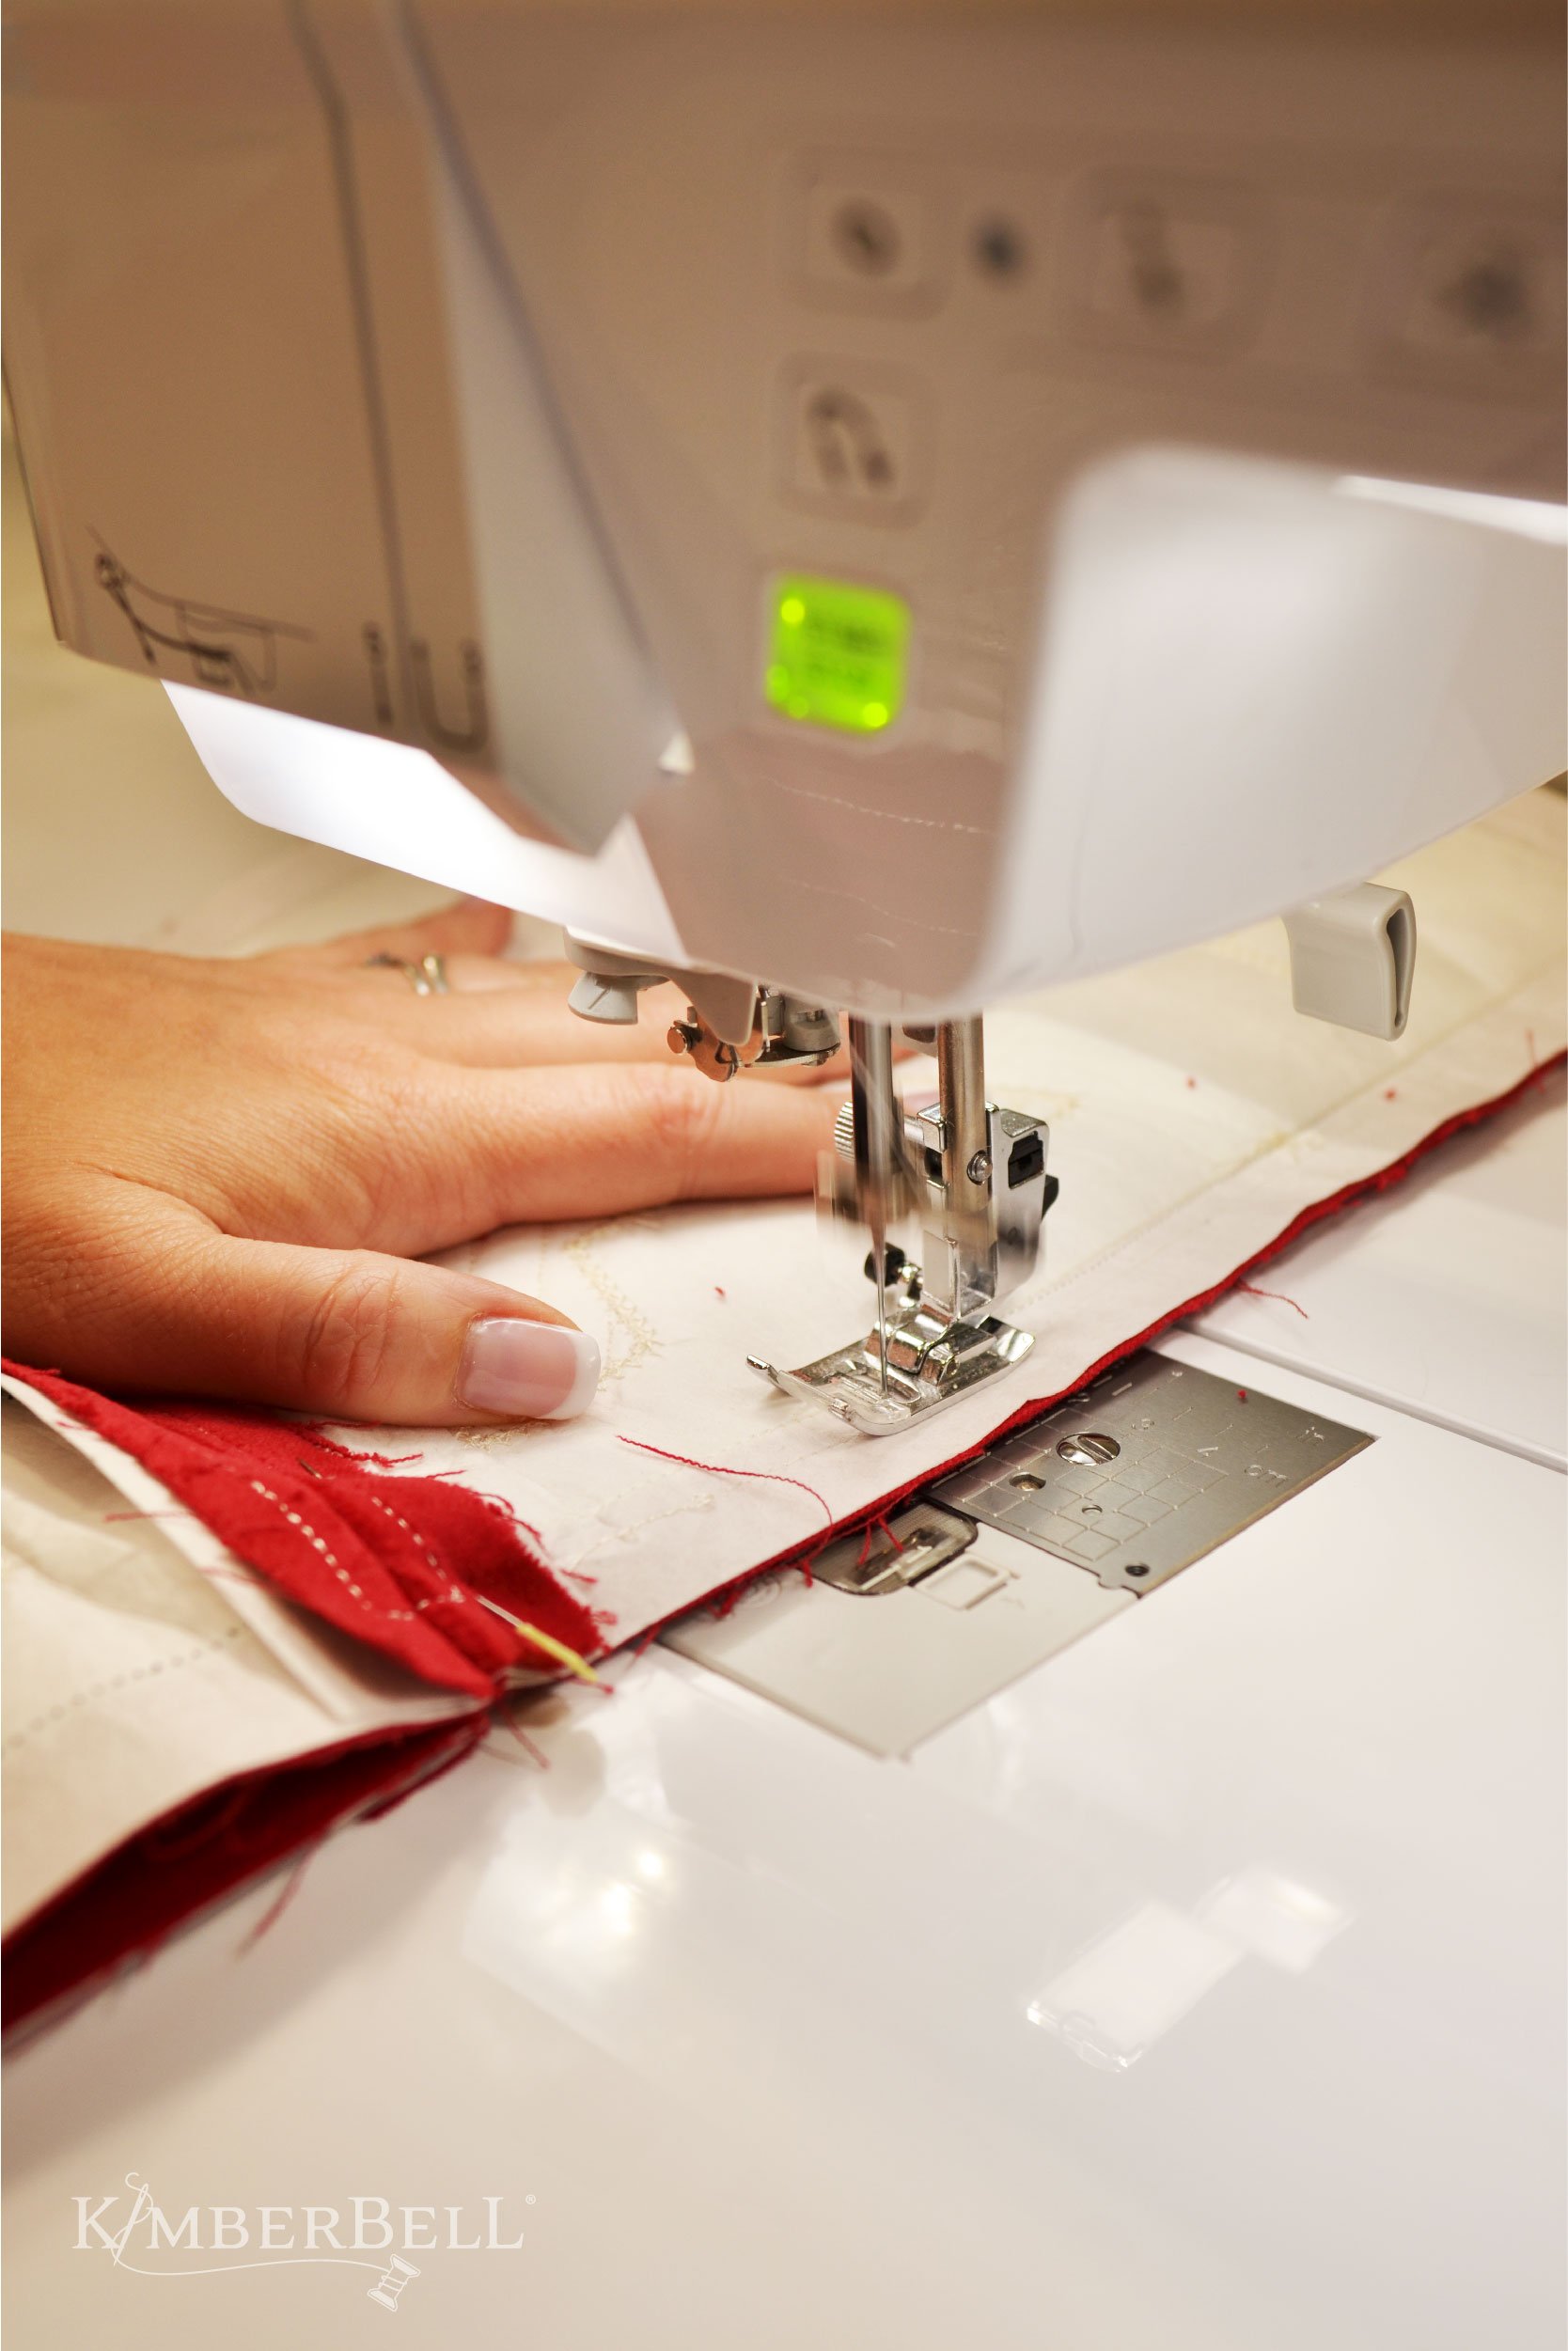
Quality stabilizer is a crucial part of machine embroidery and a key player for many quilting and sewing projects as well. Why? Well, it’s simple: as a needle pokes fabric, the fibers have to shift around to make room for the stitches. The continual push and pull can result in distortion, gaps, uneven stitches, puckering, and a whole host of other problems. The right stabilizer plays an important part in reinforcing fabric, reducing shifting, and providing a solid foundation for stitches.
There are four general classifications of stabilizers:
- Tear-Away
- Cut-Away
- Wash-Away
- Speciality
Tear-Away
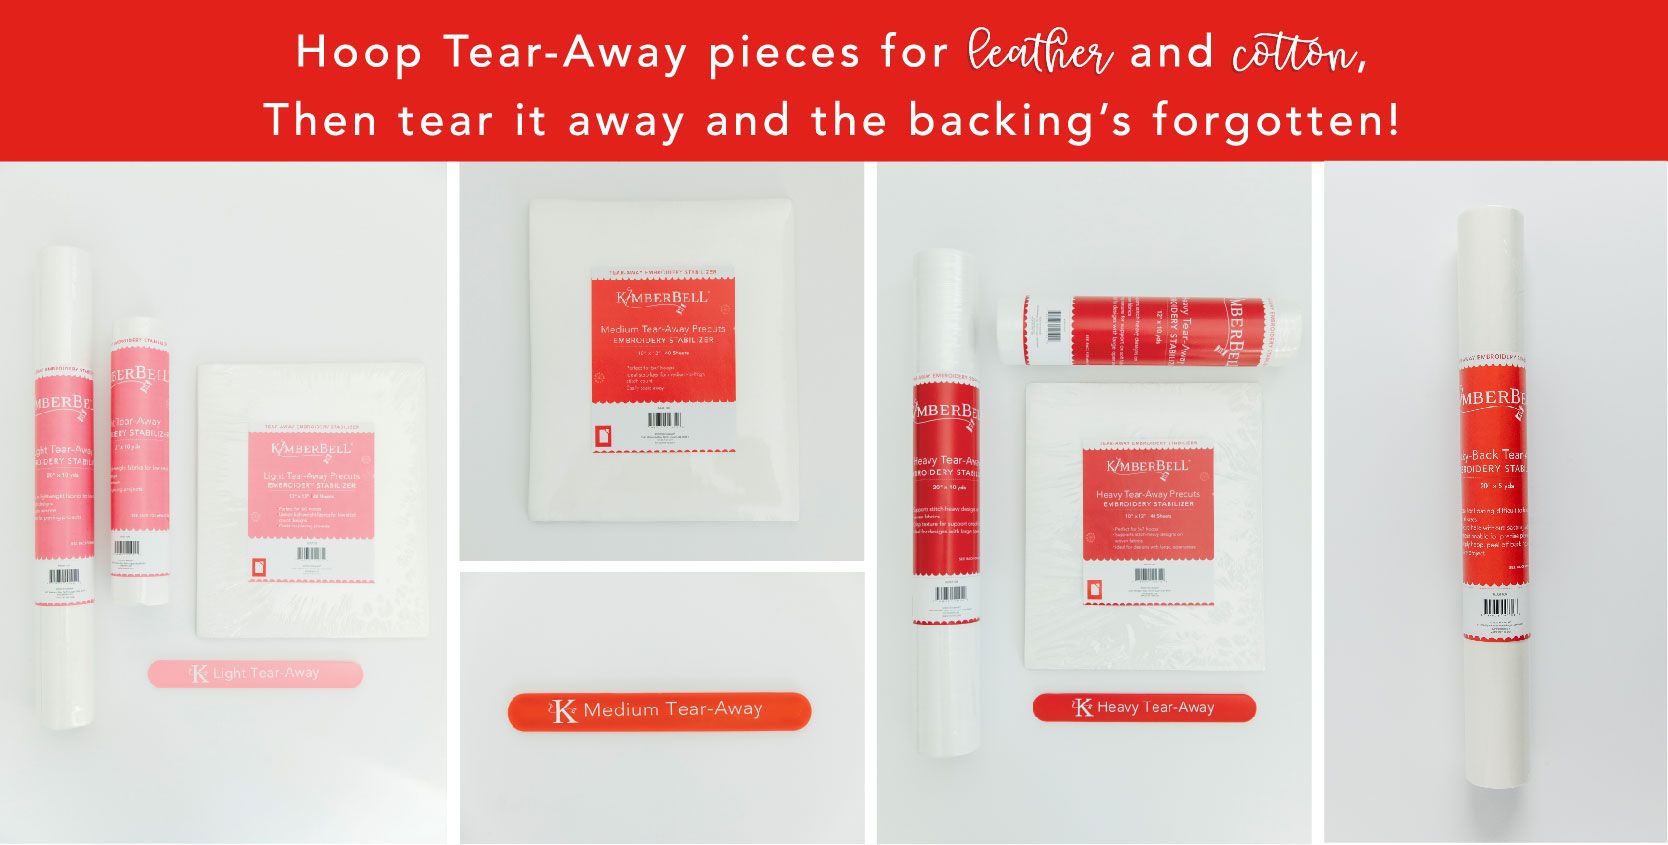
As its name implies, Tear-Away is stabilizer that tears easily and neatly away from embroidered areas. Choose Kimberbell Tear-Away (labeled in shades of red) when stitching on tightly woven, non-stretch fabrics such as cotton, denim, vinyl, leather, felt, terry cloth, chambray, poplin, canvas, and anything else that’s not stretchy.
Choose these weights of Tear-Away for the following stitch counts:
- Light Tear-Away for lightweight fabrics and designs with a low stitch count (12,000 stitches or less)
- Medium Tear-Away for medium-to-high stitch count designs (approximately 15,000 to 25,000 stitches)
- Heavy Tear-Away for designs with a heavy stitch count (think 25,000 stitches or more)
Read more about Kimberbell Tear-Away HERE.
Tip: The more stitches in the design, the heavier the stabilizer should be!
Cut-Away
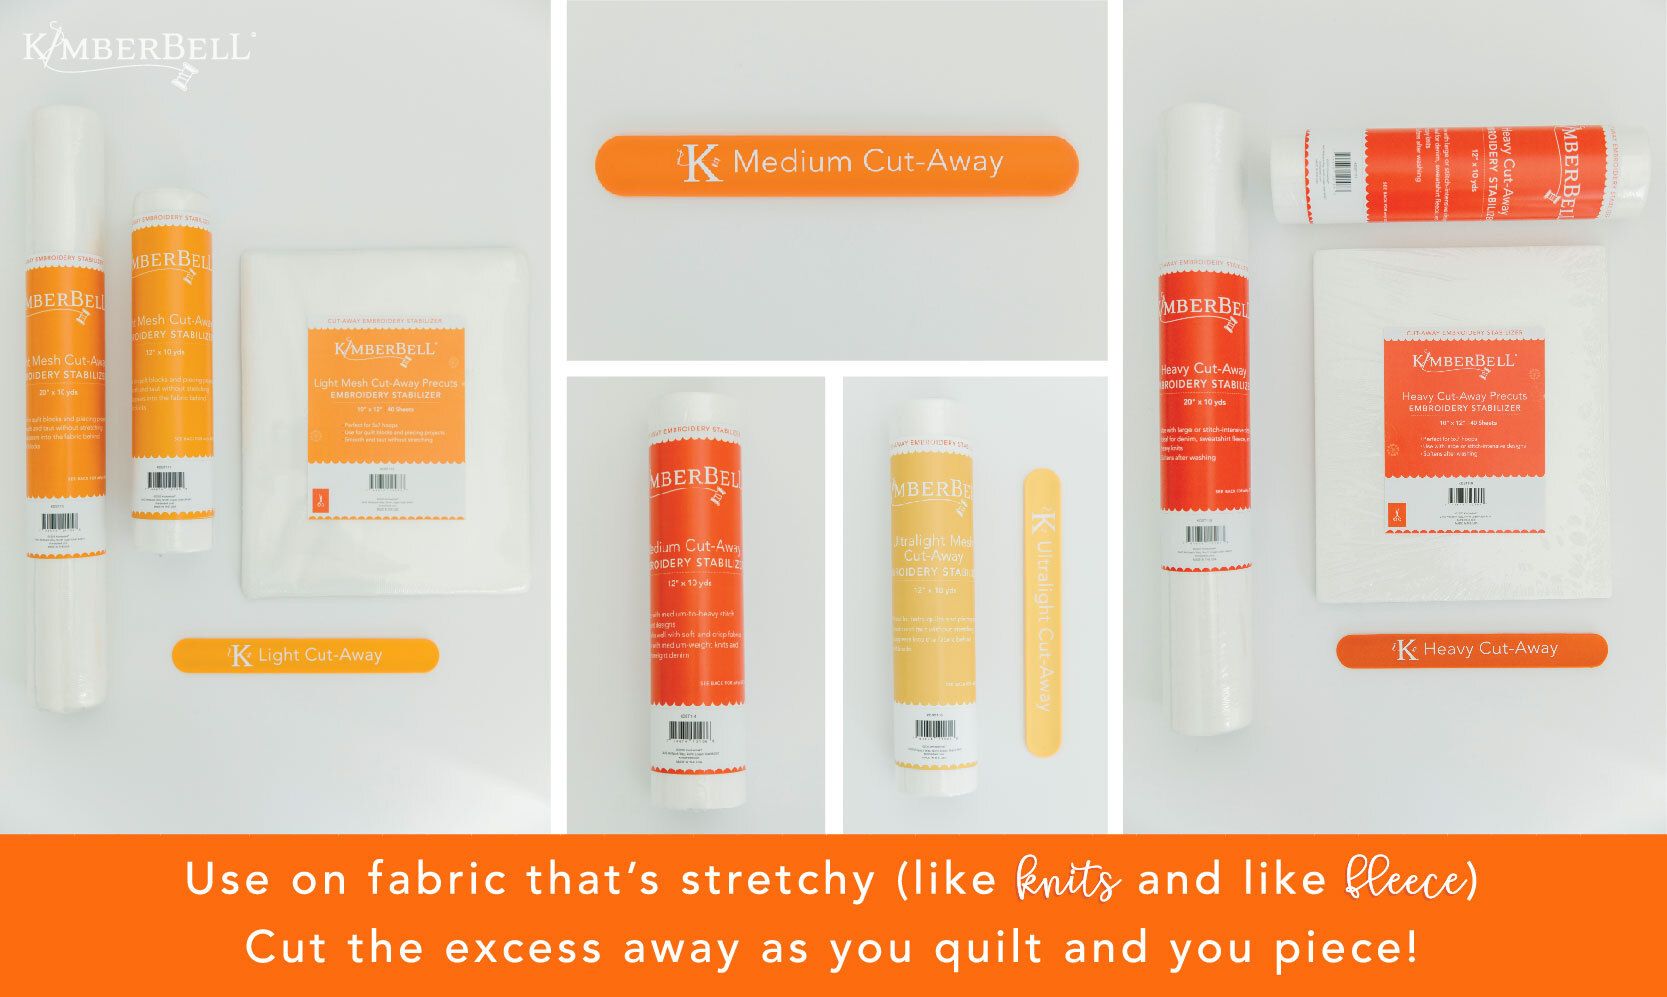
Kimberbell Cut-Away (labeled in shades of orange) is a fibrous material and does not tear, so you have to trim the excess stabilizer with scissors. Because it stays smooth and taut, choose Cut-Away for loosely woven or stretchy fabrics. Remember, fabric is continually pushed and pulled during embroidery, and you need stabilizer to reinforce the fabric and create that solid foundation!
Kimberbell Cut-Away comes in many weights:
- Ultralight Mesh Cut-Away for lightweight fabrics and designs with a low stitch count (12,000 stitches or less)
- Light Mesh Cut-Away for lightweight fabrics and designs with a low stitch count (12,000 stitches or less)
- Medium Cut-Away for medium-to-high stitch count designs (approximately 15,000 to 25,000 stitches)
- Heavy Cut-Away for designs with a heavy stitch count (think 25,000 stitches or more)
Choose Kimberbell Cut-Away when stitching on stretch fabrics such as: T-shirts, knits, sweatshirts, twill weaves, spandex blends, most wearables, and other stretchy fabrics.
Also choose Cut-Away for projects where you want stabilizer to remain and give continued reinforcement. For example, use Kimberbell Cut-Away for Mug Rugs, Noel’s Quilted Stockings, Happy Hoop Decor, Keepsake Clasp Purses, Annika’s Throw Pillows, and more! Kimberbell Cut-Away softens after washing.
Learn more about Kimberbell Cut-Away HERE.
Tip: While Cut-Away is always used for fabrics with stretch, it’s also used with other fabrics for a variety of projects!
Wash-Away
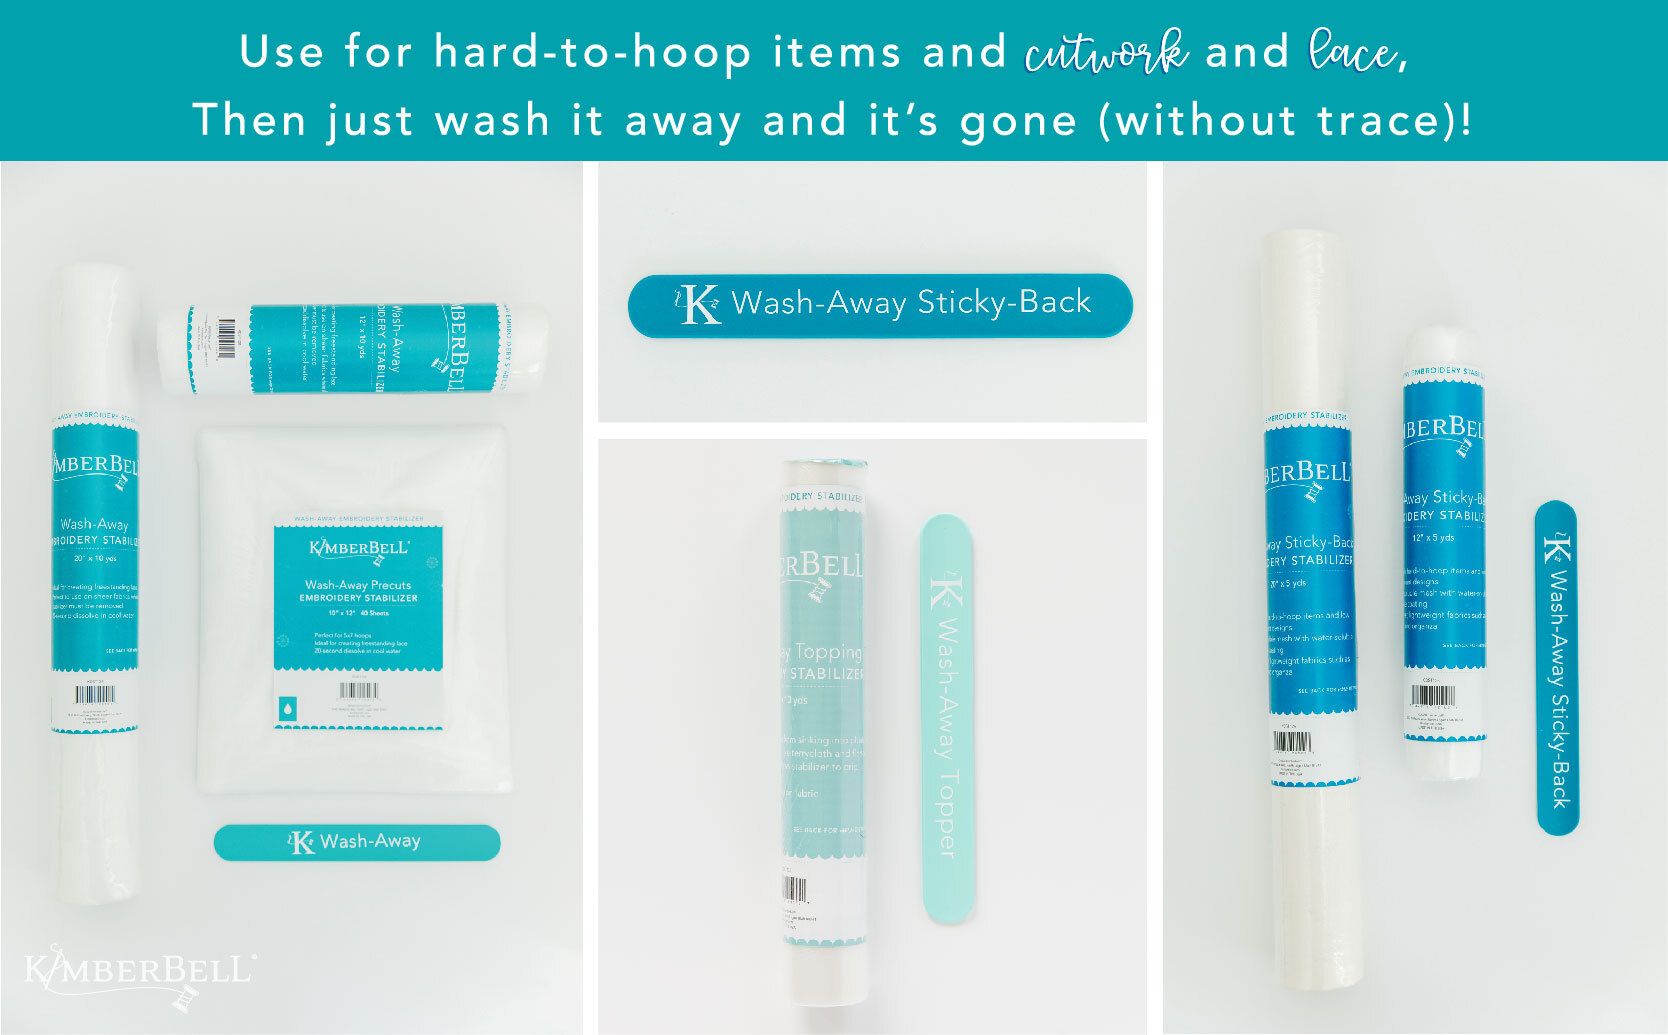
You might think of Wash-Away as the fairy godmother of stabilizers: it’s there when you need support, provides exactly what you’re looking for, and then POOF! It disappears, leaving you with a fairy-tale result. So, what is Wash-Away, exactly?
Made from a chemical starch, Wash-Away is a thin, fibrous, pliable stabilizer that completely dissolves in water. Kimberbell Wash-Aways are labeled in shades of blue, so they’re recognizable at a glance. Our color-coded system makes shopping so easy! Use Kimberbell Wash-Away on delicate or sheer fabrics such as chiffon, organza, batiste, etc. OR when a project will be seen from the back as well as the front. Wash-Away is also ideal for freestanding lace, cutwork, baskets, reverse applique, and more!
Tip: Check out Kimberbell's color-coded Slap Bands to keep stabilizer rolls tidy, labeled, and easy to find!
Learn more about Kimberbell Wash-Away HERE.
Specialty Stabilizer
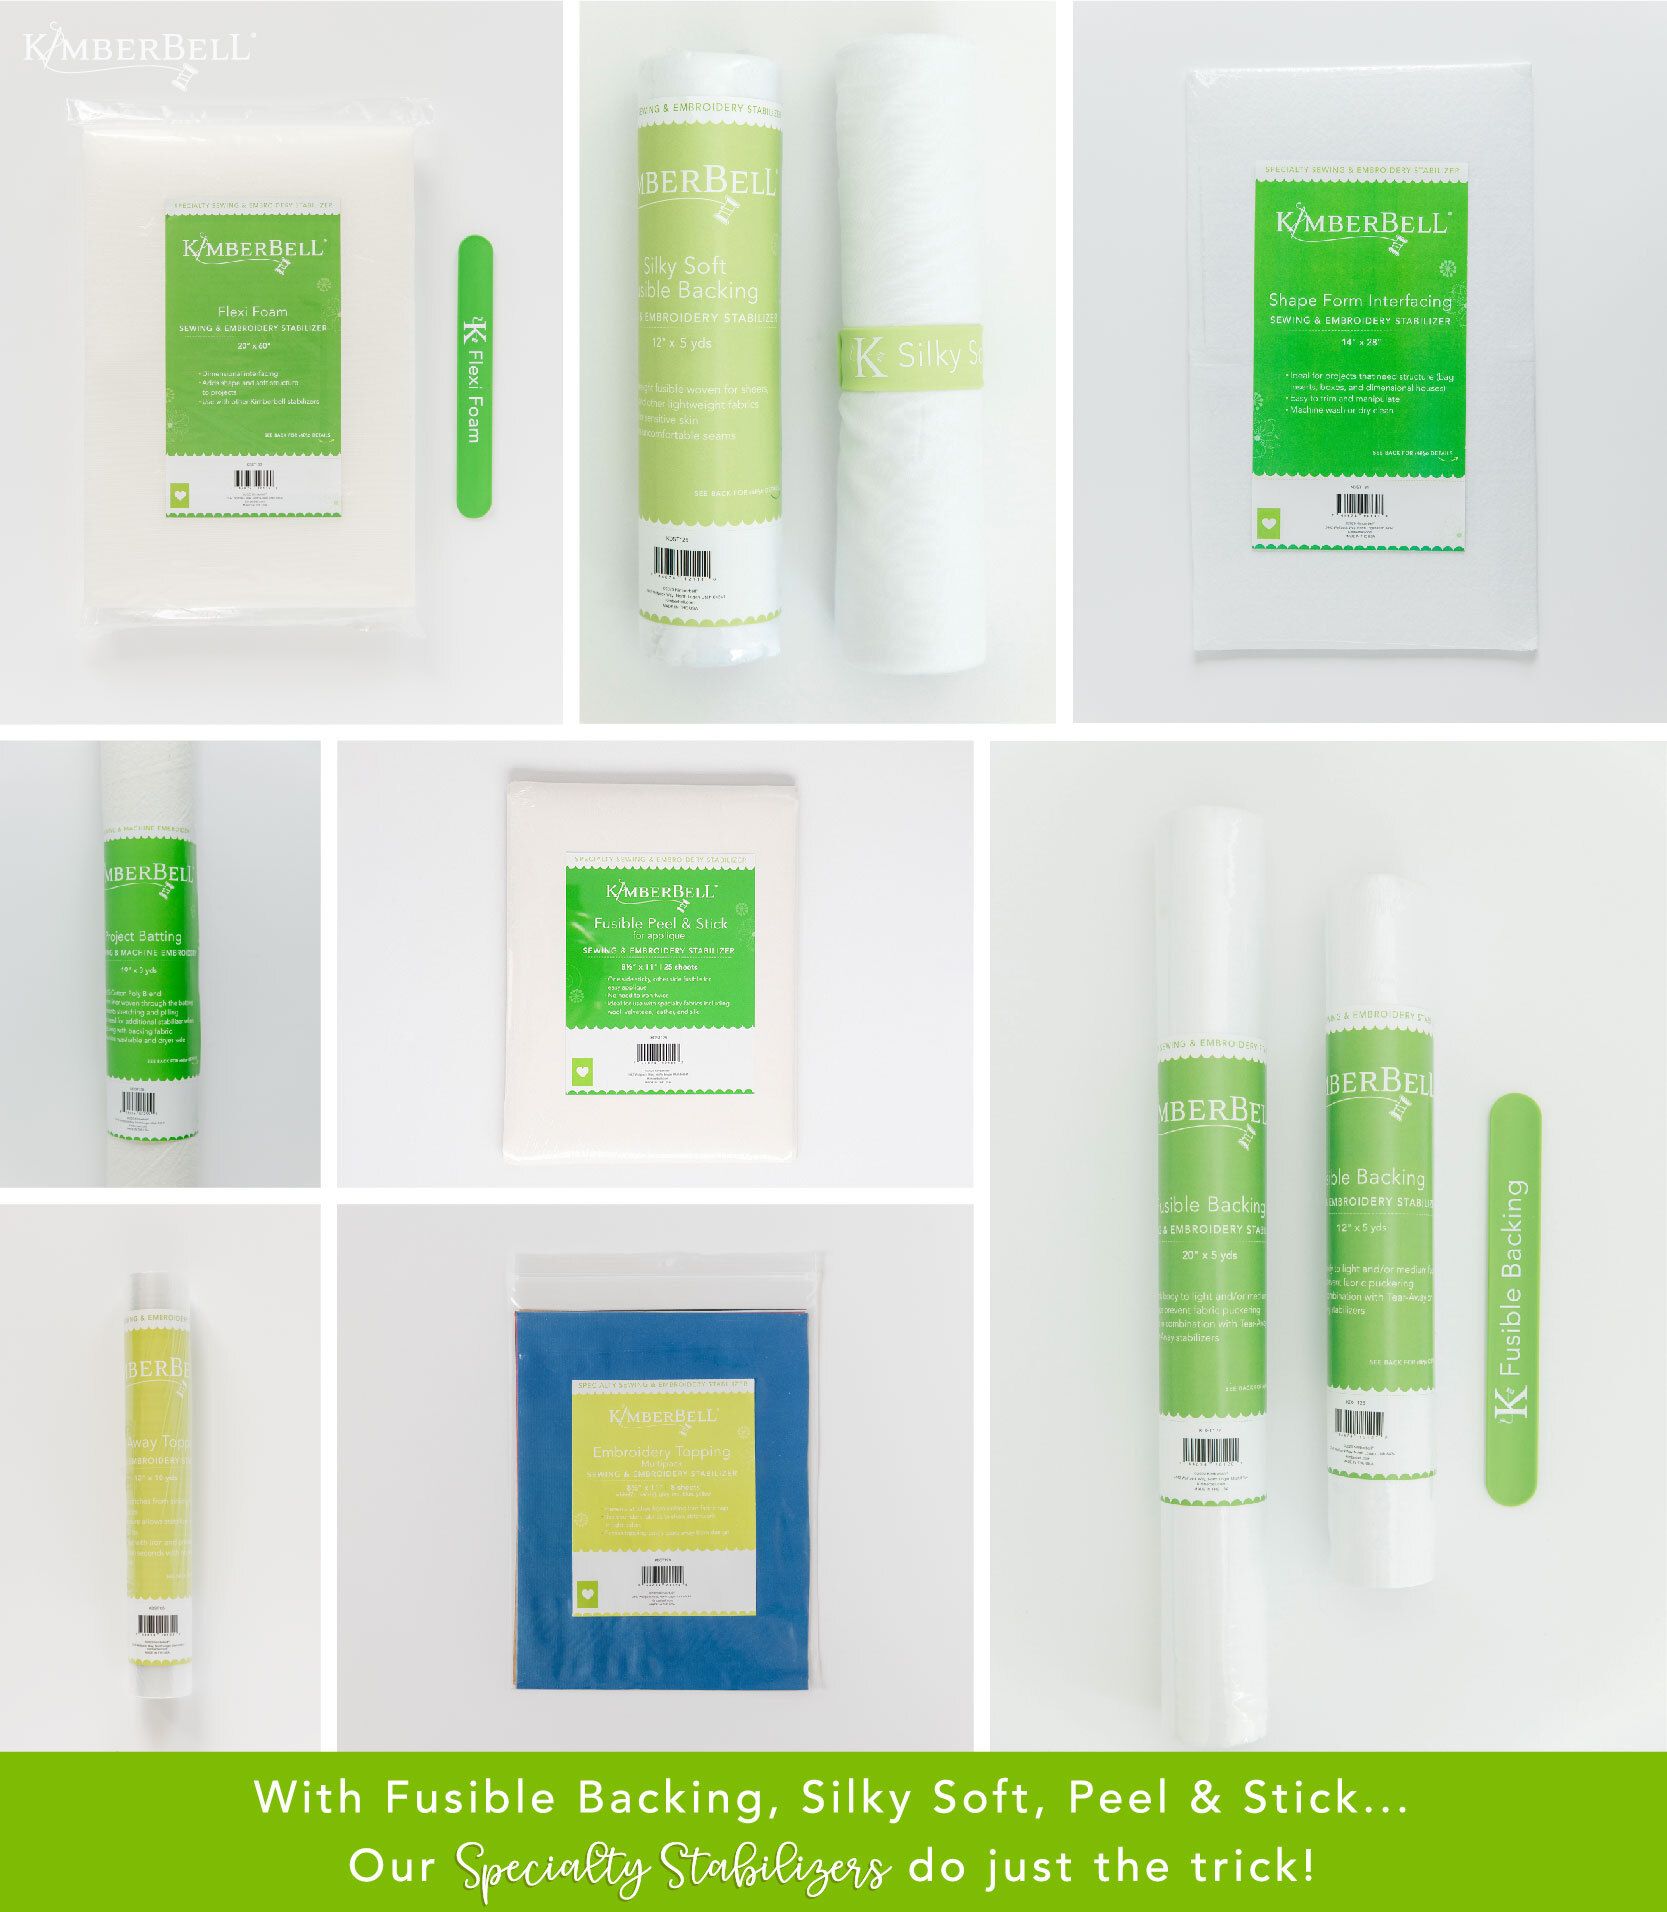
Specialty Stabilizers do not replace Tear-Away, Cut-Away, or Wash-Away; rather, they are used with these stabilizers for unique, specific (and might I add very cool) purposes. Choose from Silky Soft Fusible Backing, Fusible Backing, Fusible Peel & Stick, Embroidery Topping Multipack, Shape Form Interfacing, Flexi Foam, Iron-Away Topping, Project Batting, and more for a variety of projects!
Read more about Kimberbell Specialty Stabilizer HERE.
Find the Kimberbell Stabilizer line at your favorite quilt shop!
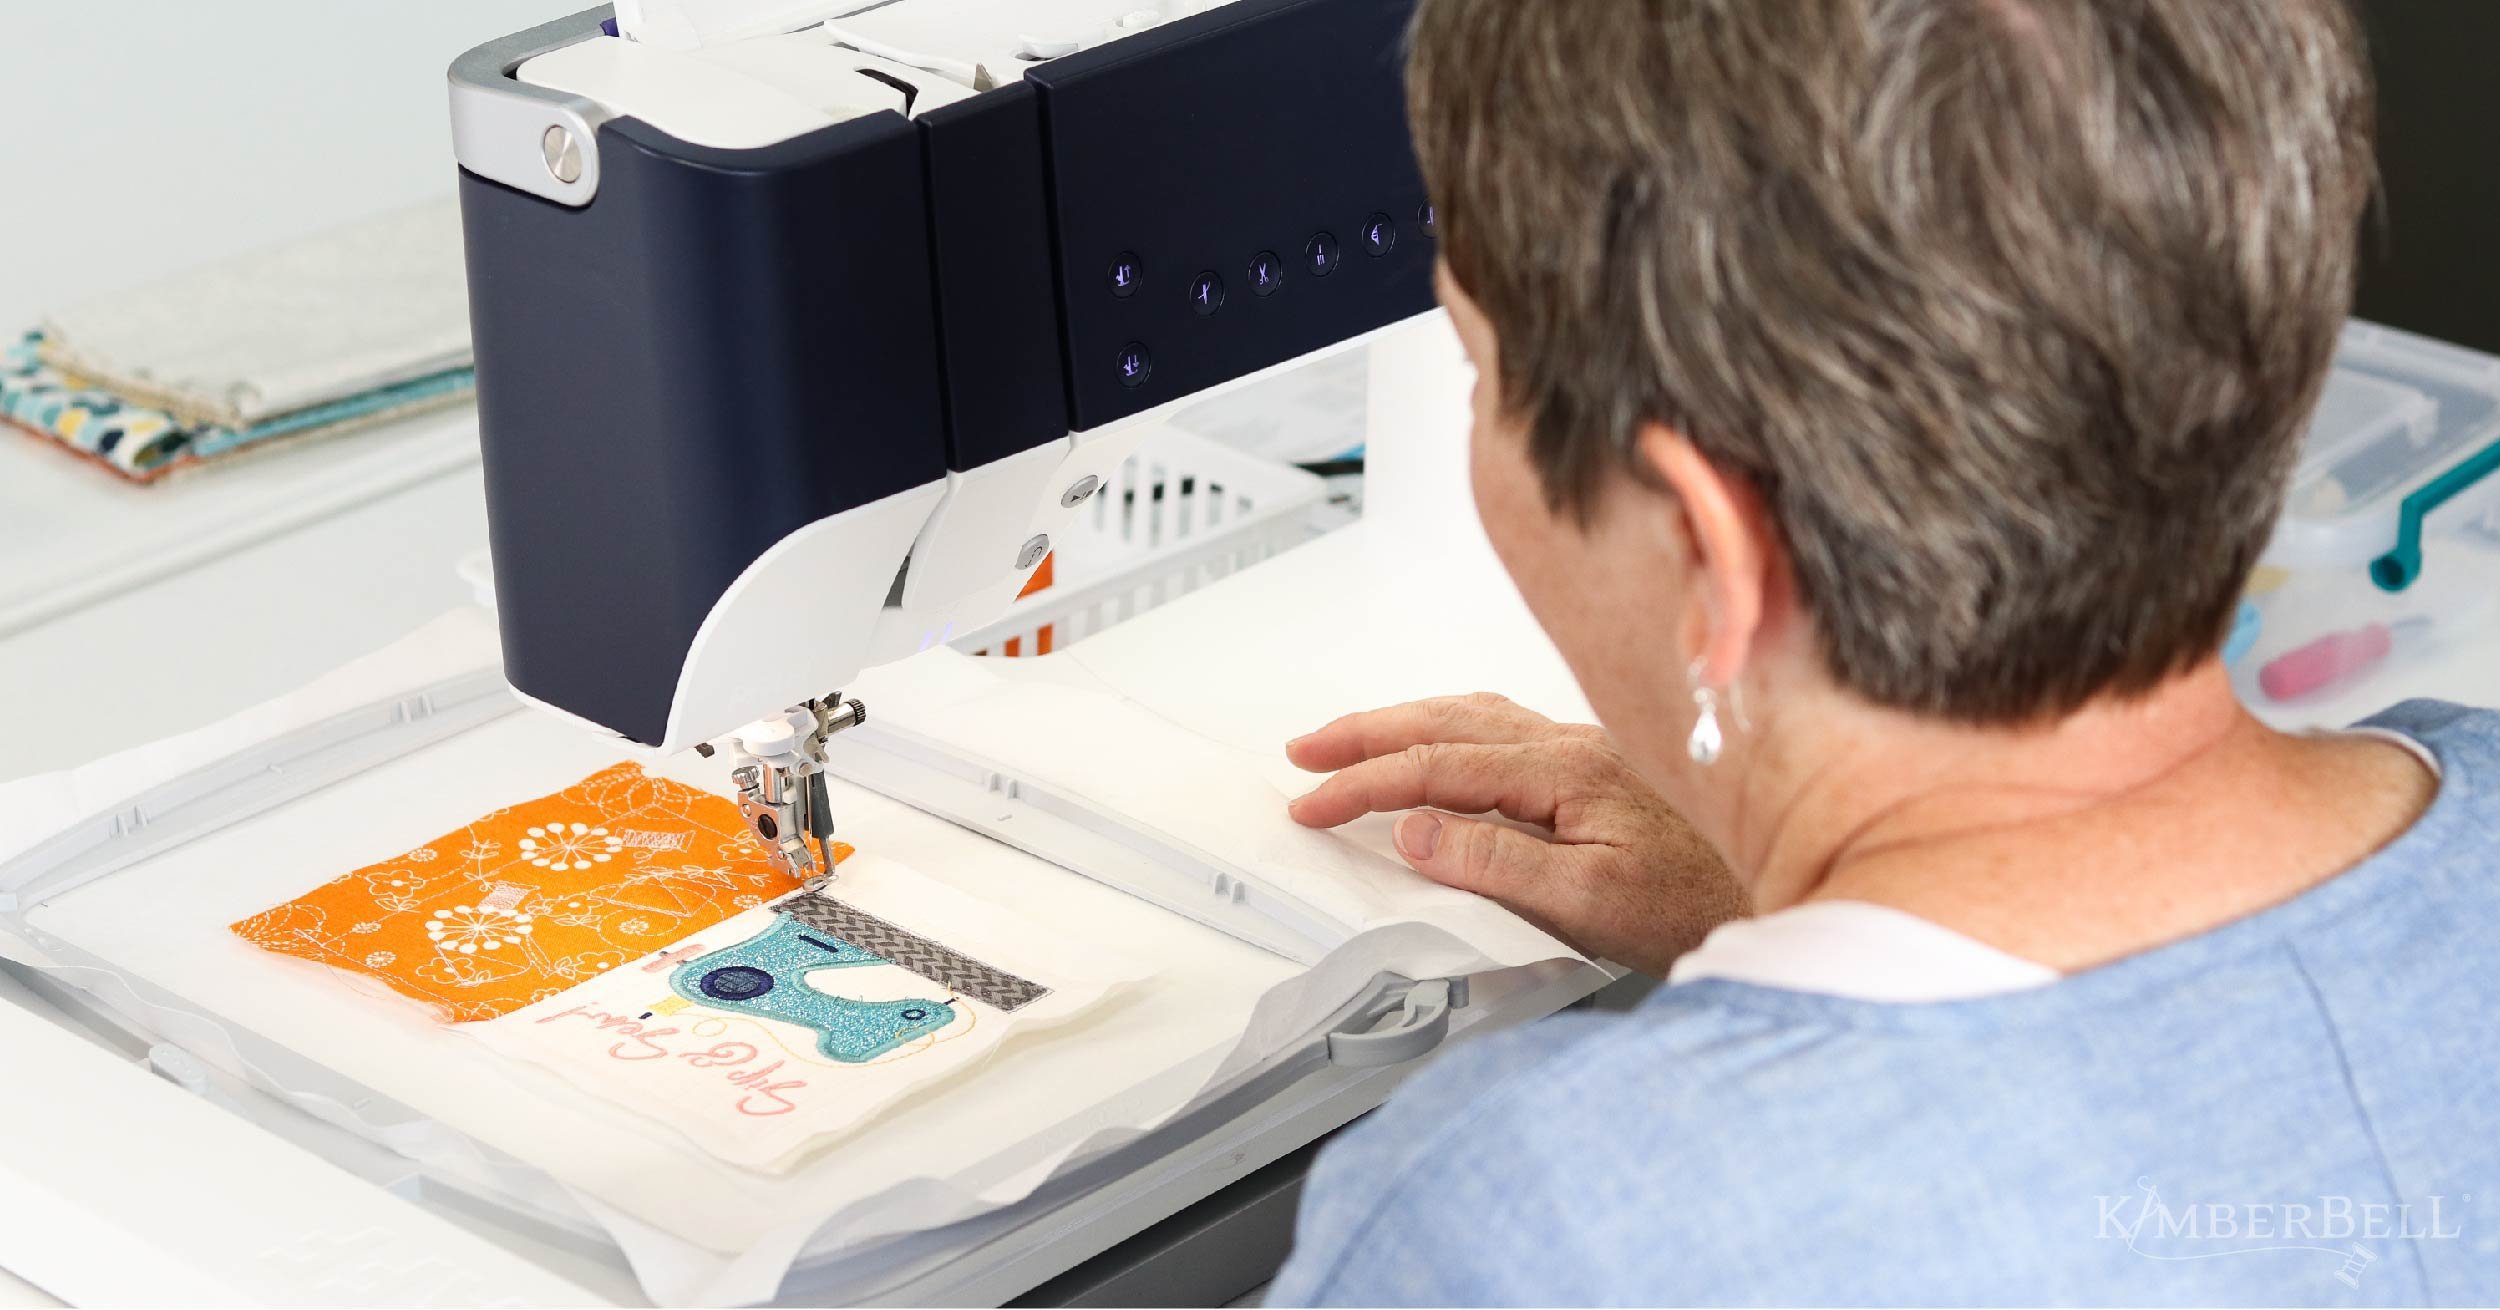
Embroidery Machine File Formats
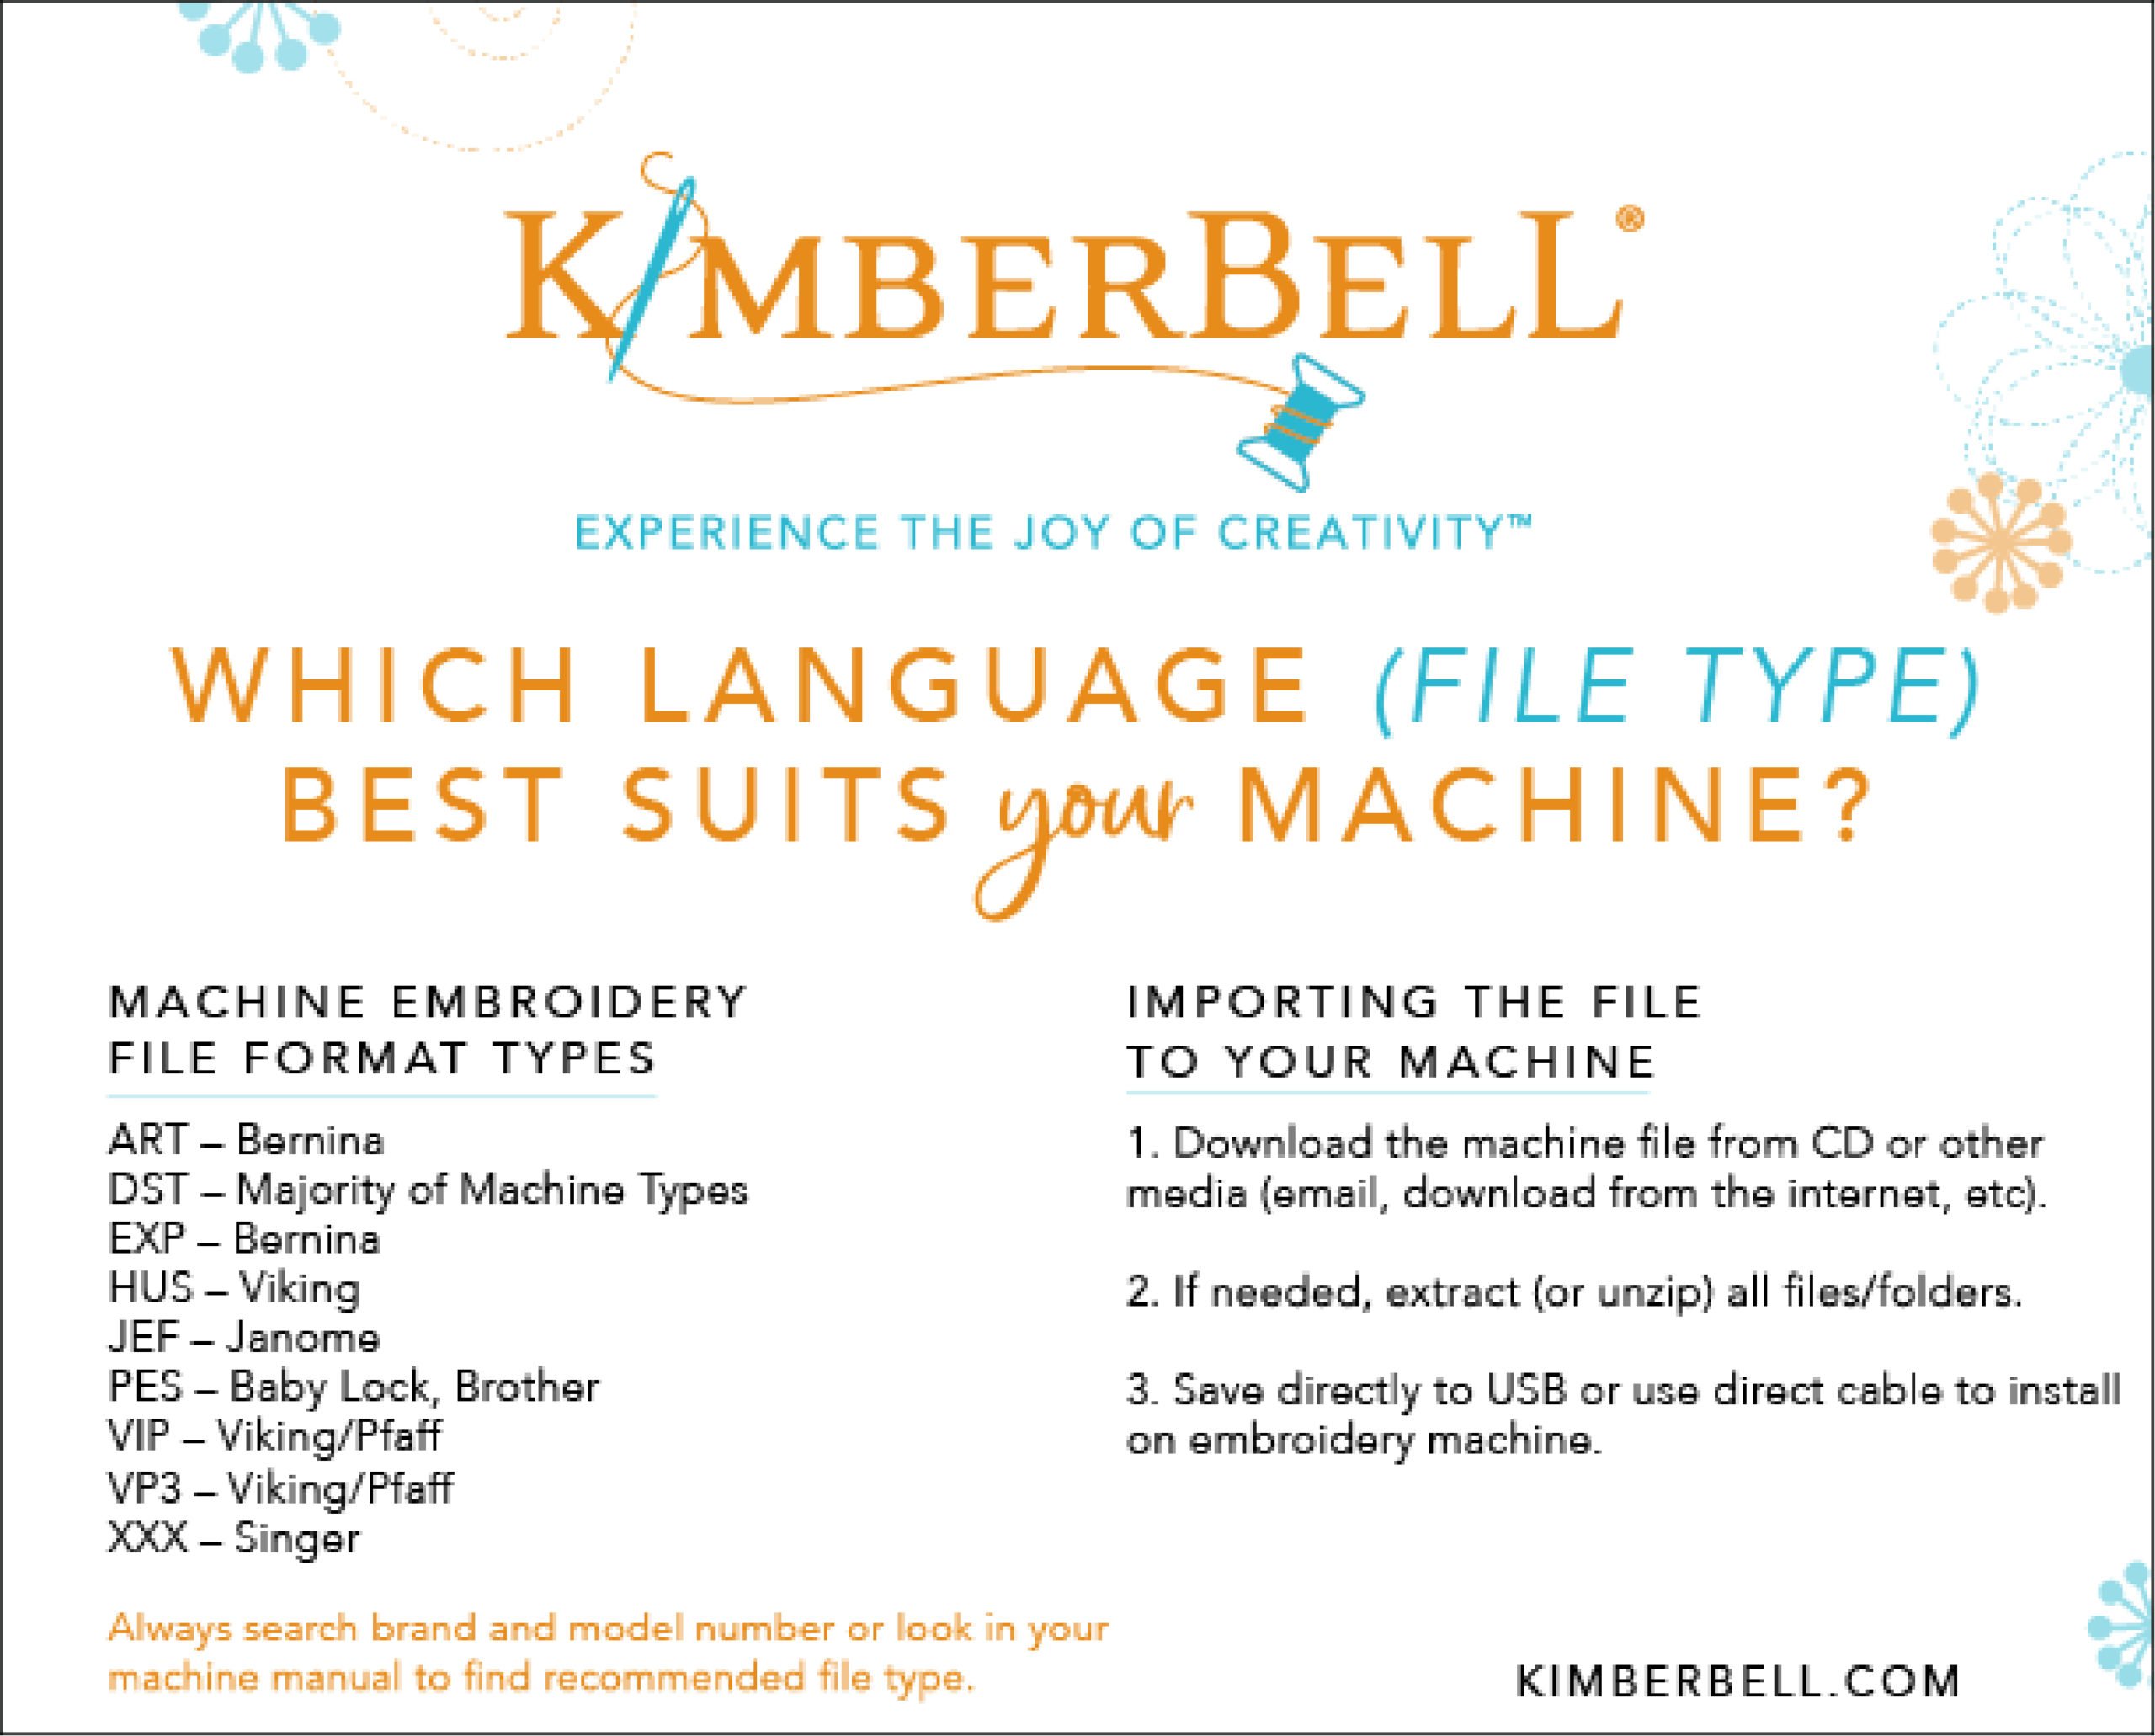
Each embroidery machine has its own special language, or file format. Your machine may read (and somewhat understand) other languages, but it will always perform better when an embroidery design is in the machine’s native format.
Think of it this way: If English is your primary language, you’re always going to communicate the very best in English—even if you learn a second or third language. Although you may be somewhat conversant in Chinese, chances are you won’t catch every single nuance because it’s not your native tongue. Embroidery machines are the same way; they perform best when a design is in their primary language. Otherwise, misinterpretation is bound to happen.
Which Language Does My Machine “Speak?”
The best way to learn your machine’s language (file format) is to check your manual. You can also look up the machine’s name, make, and specific model number, including the file type you’re trying to find. Again, it's always best to use the native format as shown on the table above!
Embroidery Field Sizes
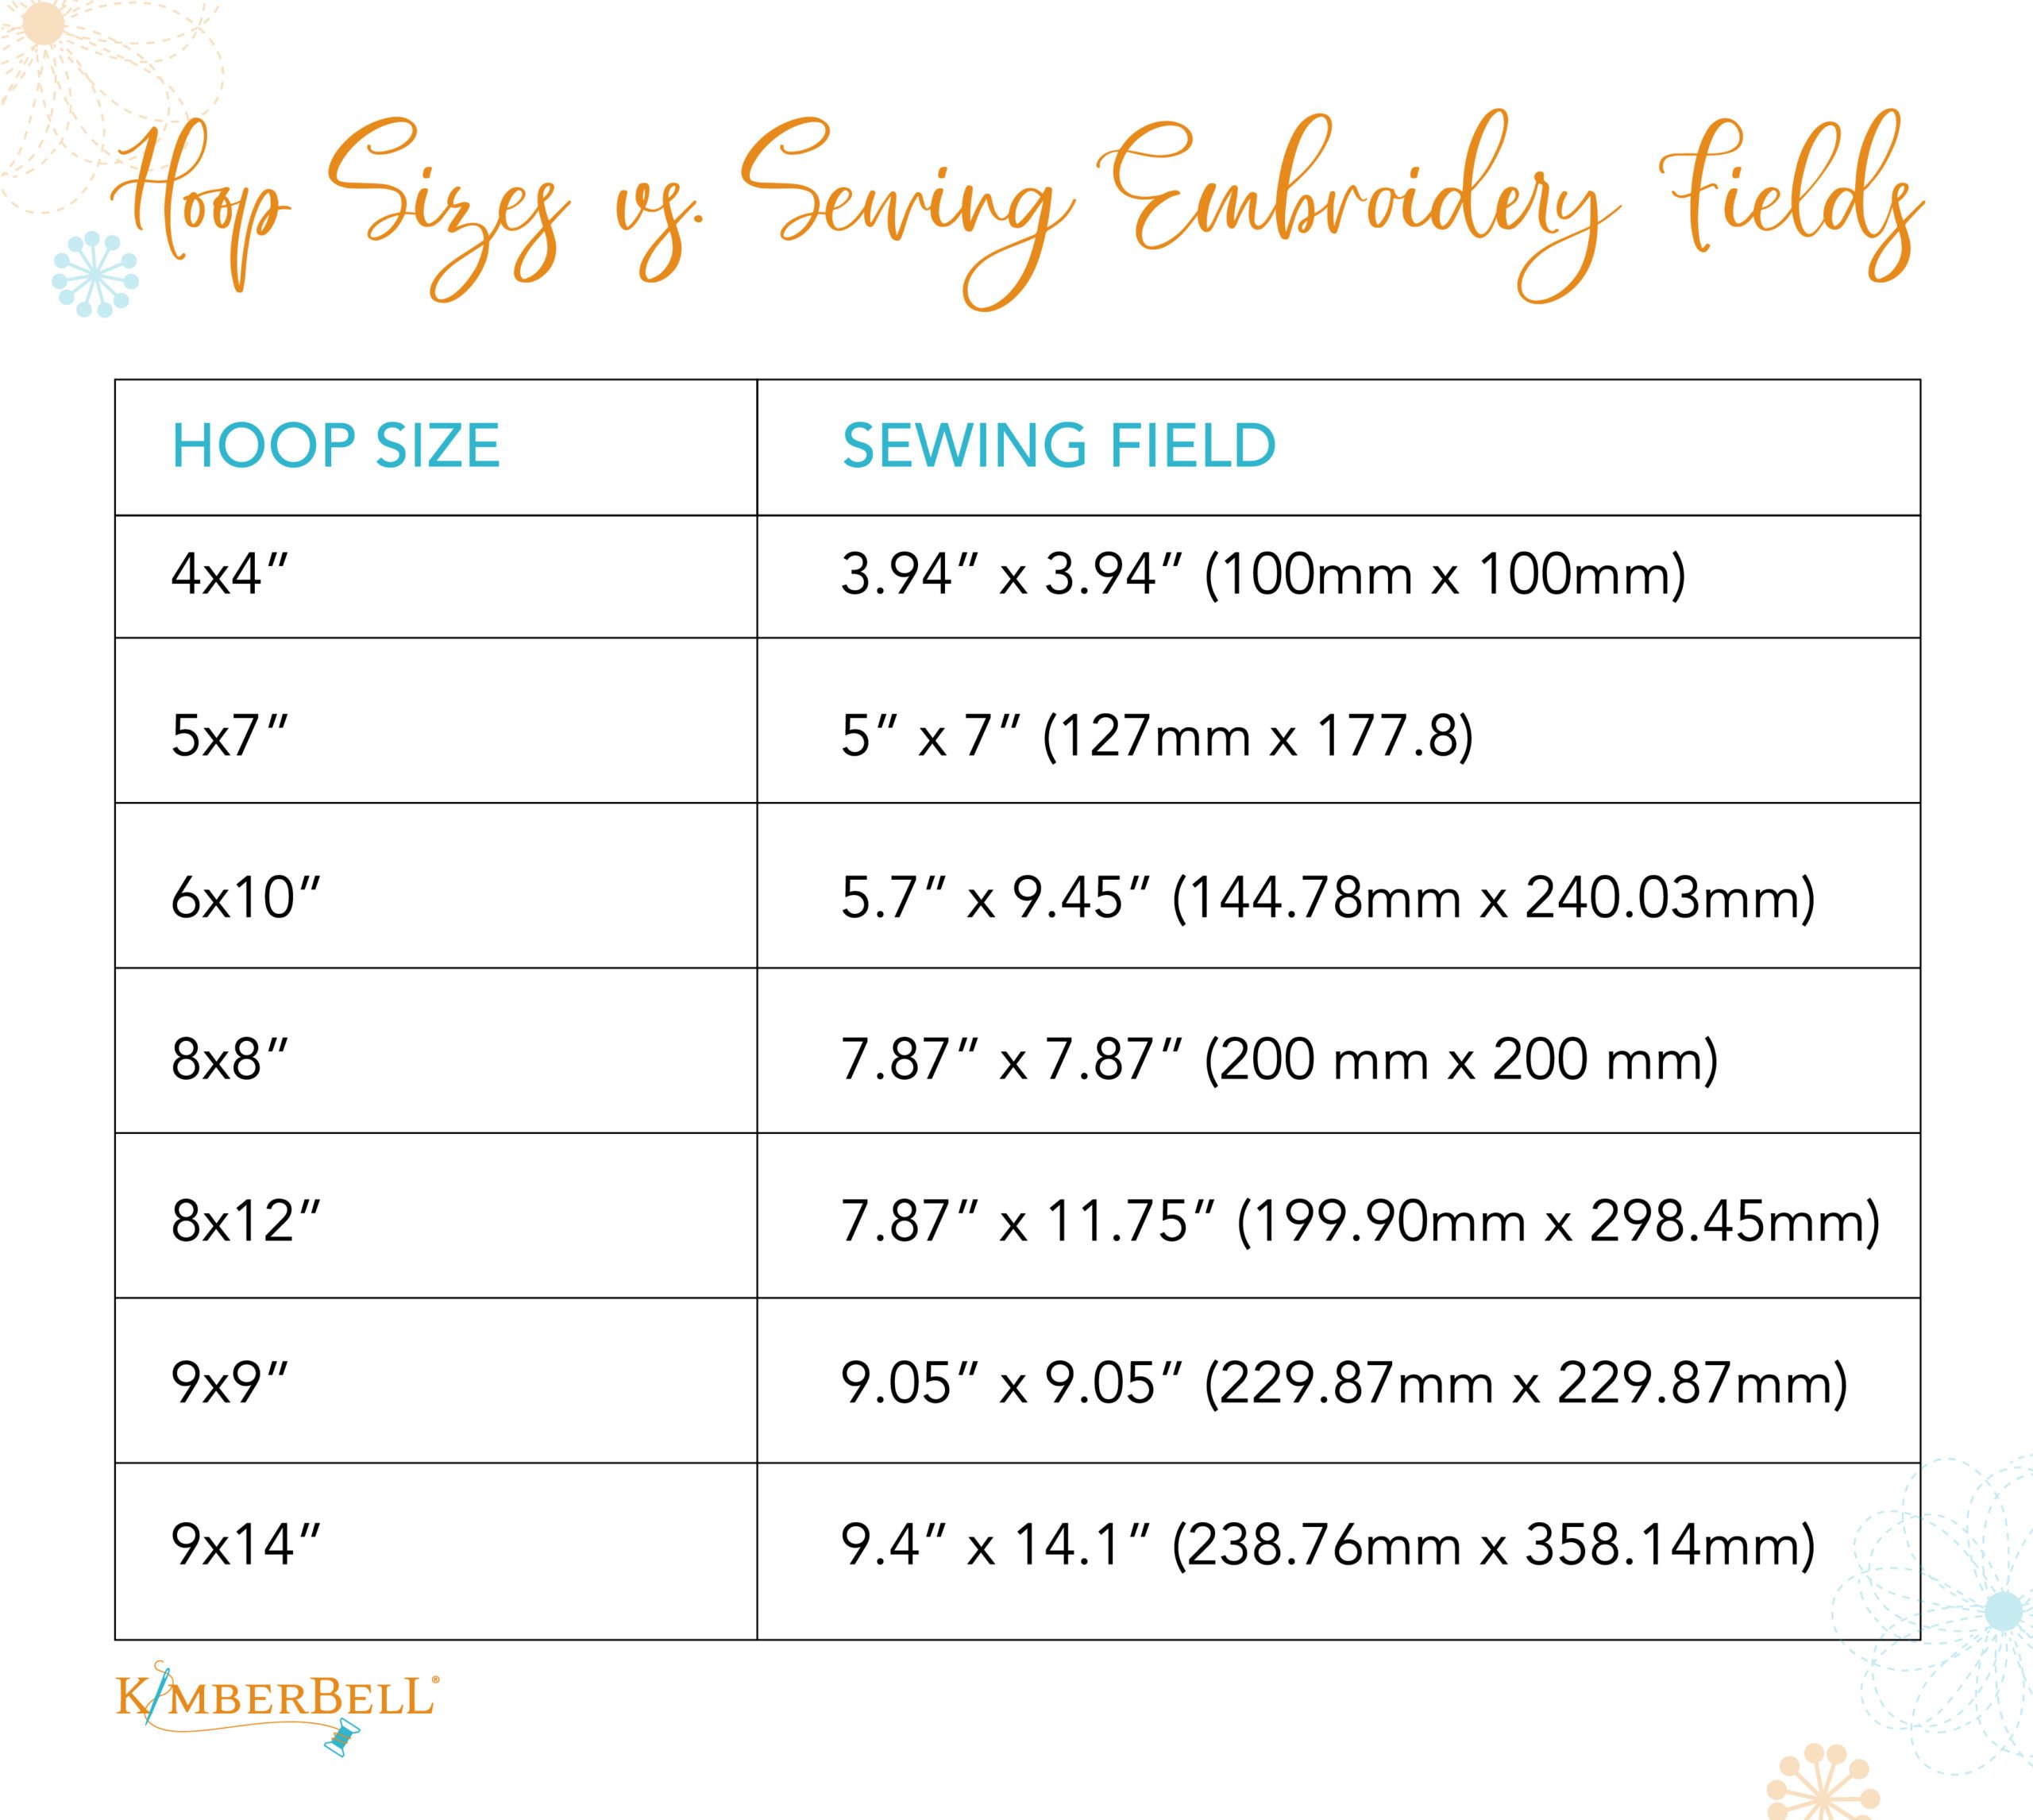
If you’re new to machine embroidery, you might be thinking that your hoop size is the same thing as your sewing/embroidery field. After all, the hoop size is how big a design can go, right?
Well…not quite. In order to accommodate the mechanics of the presser foot and needle, the sewing field is usually smaller than the physical hoop. The machine simply cannot stitch too closely to the edge of the inner hoop (without colliding) so there must be a buffer on all sides of the embroidery design.
Some machines take more than one hoop size, so be sure to check your manual! Entry-level machines generally use smaller hoops only, while top-of-the-line machines can fit several sizes.
Additional Resources
While we've covered just a few of the basics here, there's always more to learn! Be sure to check out these helpful articles as well:
- Machine Embroidery Glossary of Terms
- 10 Helpful Tips Every Embroiderer Should Know
- Sewing Rooms on a Budget
- Troubleshooting Thread Breaks
Welcome to the wonderful world of machine embroidery. Please join our Kimberbellas (and Fellas, Too) Facebook Group to ask questions, glean wisdom, and share your own creations! Also be sure to visit Kimberbell Designs on Facebook for Tuesday Tips with Kimberbell (every Tuesday at 2:00 p.m. Mountain Time). :)
We can't wait to take this journey with you!