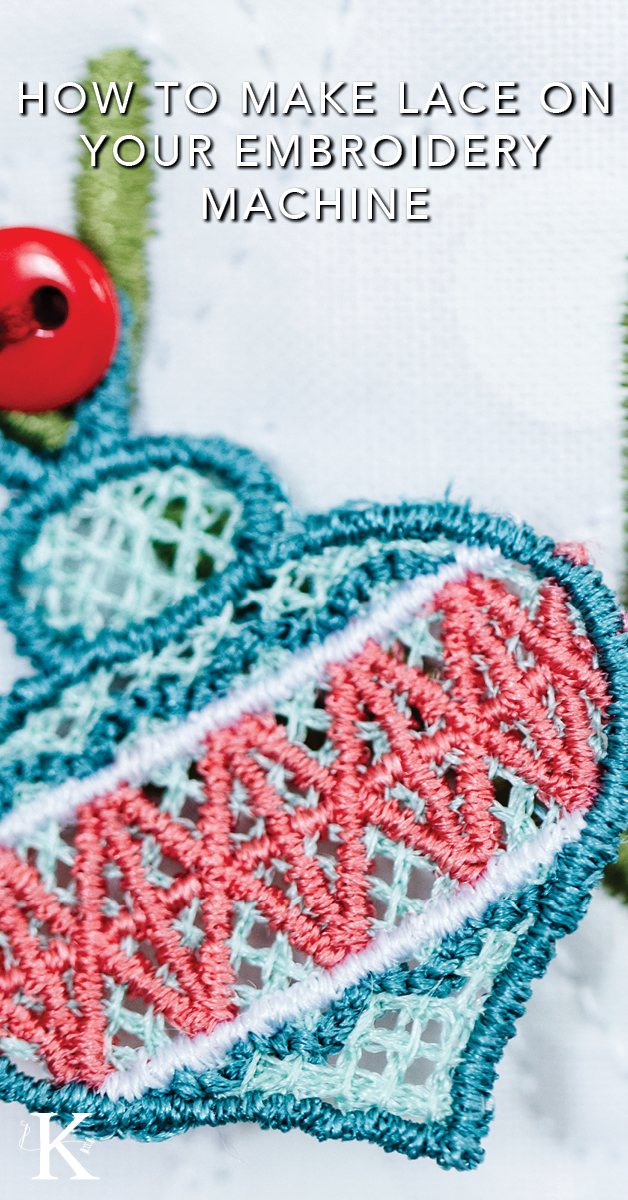
Simply Sophisticated
Freestanding lace may look sophisticated, but it's actually very simple to make! Here are Kimberbell's 8 tips for making any lace project on your home embroidery machine:
8 Tips for Making Lace
- Choose a hoop closest in size to your design.
- Hoop two layers of Kimberbell's Wash-Away Stabilizer. (Make sure layers are taut in the hoop!)
- Use a size 75/11 machine embroidery needle.
- Match the bobbin and top threads. (With lace, you see the front AND the back!)
- Cut the bobbin thread between each color stop.
- Do NOT combine color stops. Lace is created in layers, with one color building on another.
- Slow your machine speed down while stitching.
- Do NOT resize your lace designs. They need to stitch out at their originally digitized size!
Now that we've reviewed our finest lace tips, I'll show you step-by-step how it's done. These particular lace designs come from Kimberbell's Cup of Cheer Advent Quilt. (They hang on the tree on days 7, 8, and 9.) 🎄
You can find more stunning lace designs in Kimberbell Lace Studio, our North Pole Tier Tray machine embroidery event, and more!
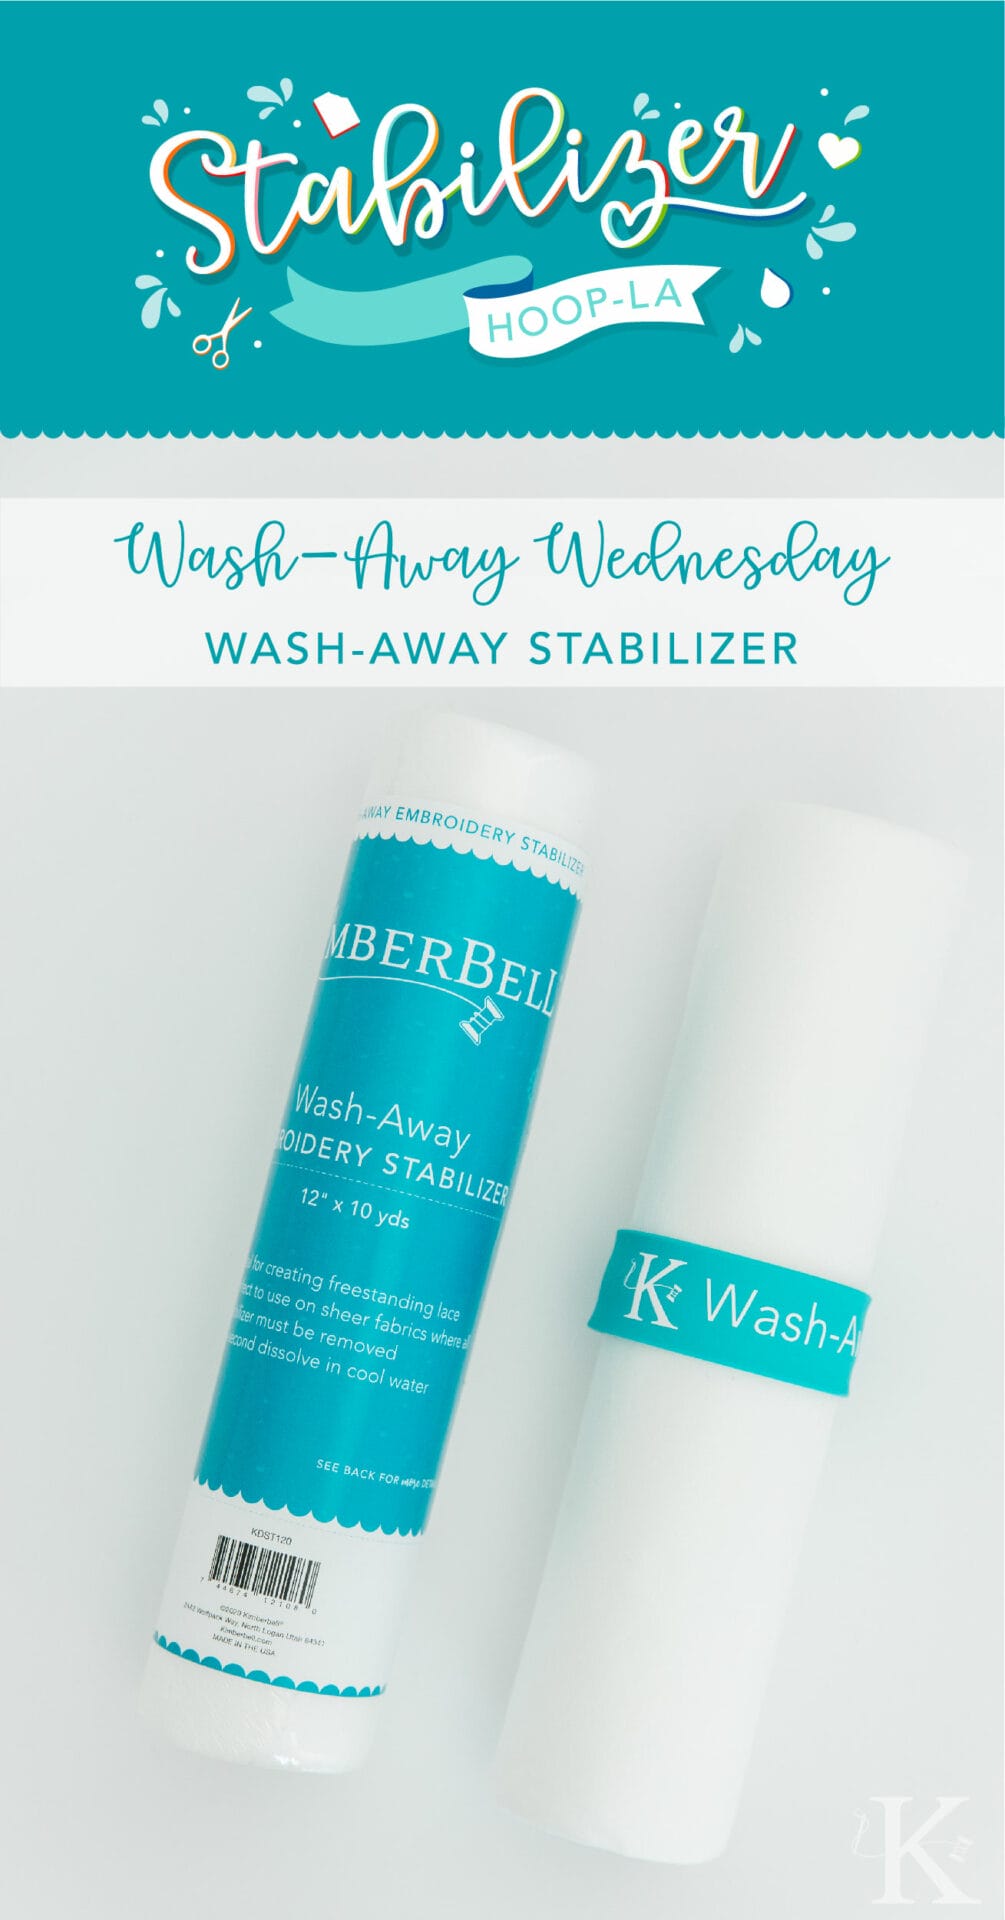
Step One: Hoop Stabilizer
Hoop two pieces of Kimberbell Wash-Away Stabilizer and pull it nice and taut. (Kimberbell Wash-Aways are labeled in shades of blue and can be found at your favorite quilt shop.)
.jpg?width=1333&height=2000&name=Blog-Images-Template%20(1).jpg)
Step Two: Change Bobbin Thread
Remember that you'll see both the front AND the back of your lace, so be sure to change your bobbin thread to match the top.
.jpg?width=1333&height=2000&name=Blog-Images-Template%20(3).jpg)
Step Three: Stitch Design
Following all the steps and color stops in your Kimberbell instructions, stitch your lace design directly on the Wash-Away.
.jpg?width=1333&height=2000&name=Blog-Images-Template%20(4).jpg)
Step Four: Trim Stabilizer
When embroidery is complete, trim your stabilizer about 1/8" away from the stitching. (Trimming is a breeze with Kimberbell Deluxe Scissors & Tools!)
-1.jpg?width=1333&height=2000&name=Blog-Images-Template%20(6)-1.jpg)
Step Five: Rinse Design
Rinse your design with cool water for about 20 seconds. You can either hold it under a stream of running water OR give it a little soak.
.jpg?width=1333&height=2000&name=Blog-Images-Template%20(7).jpg)
Step Six: Lay Flat to Dry
Place your lace designs flat on a paper towel to soak up the excess water.
.jpg?width=1333&height=2000&name=Blog-Images-Template%20(8).jpg)
And that's all there is to it! Your stabilizer will completely disappear, leaving only the beautiful, intricate lace behind. Find Kimberbell's Cup of Cheer Advent Quilt, Wash-Away, and Deluxe Scissors & Tools at your favorite quilt shop!
Click below to see Kim's video tutorial and happy lacemaking! 😊