Texture brings life to your stitches in ways that can surprise and delight. You can achieve depth through strategic layering, clever fabric choices, and stitch combinations that play with light and shadow. The best part? Your embroidery machine already has most of the tools you need to create these stunning dimensional effects.
If you’re ready to dive into the world of textured embroidery, check out our dimensional design tips for creating texture in embroidery. These techniques will help you learn the art of creating designs that capture attention and showcase your skills in bold new ways.
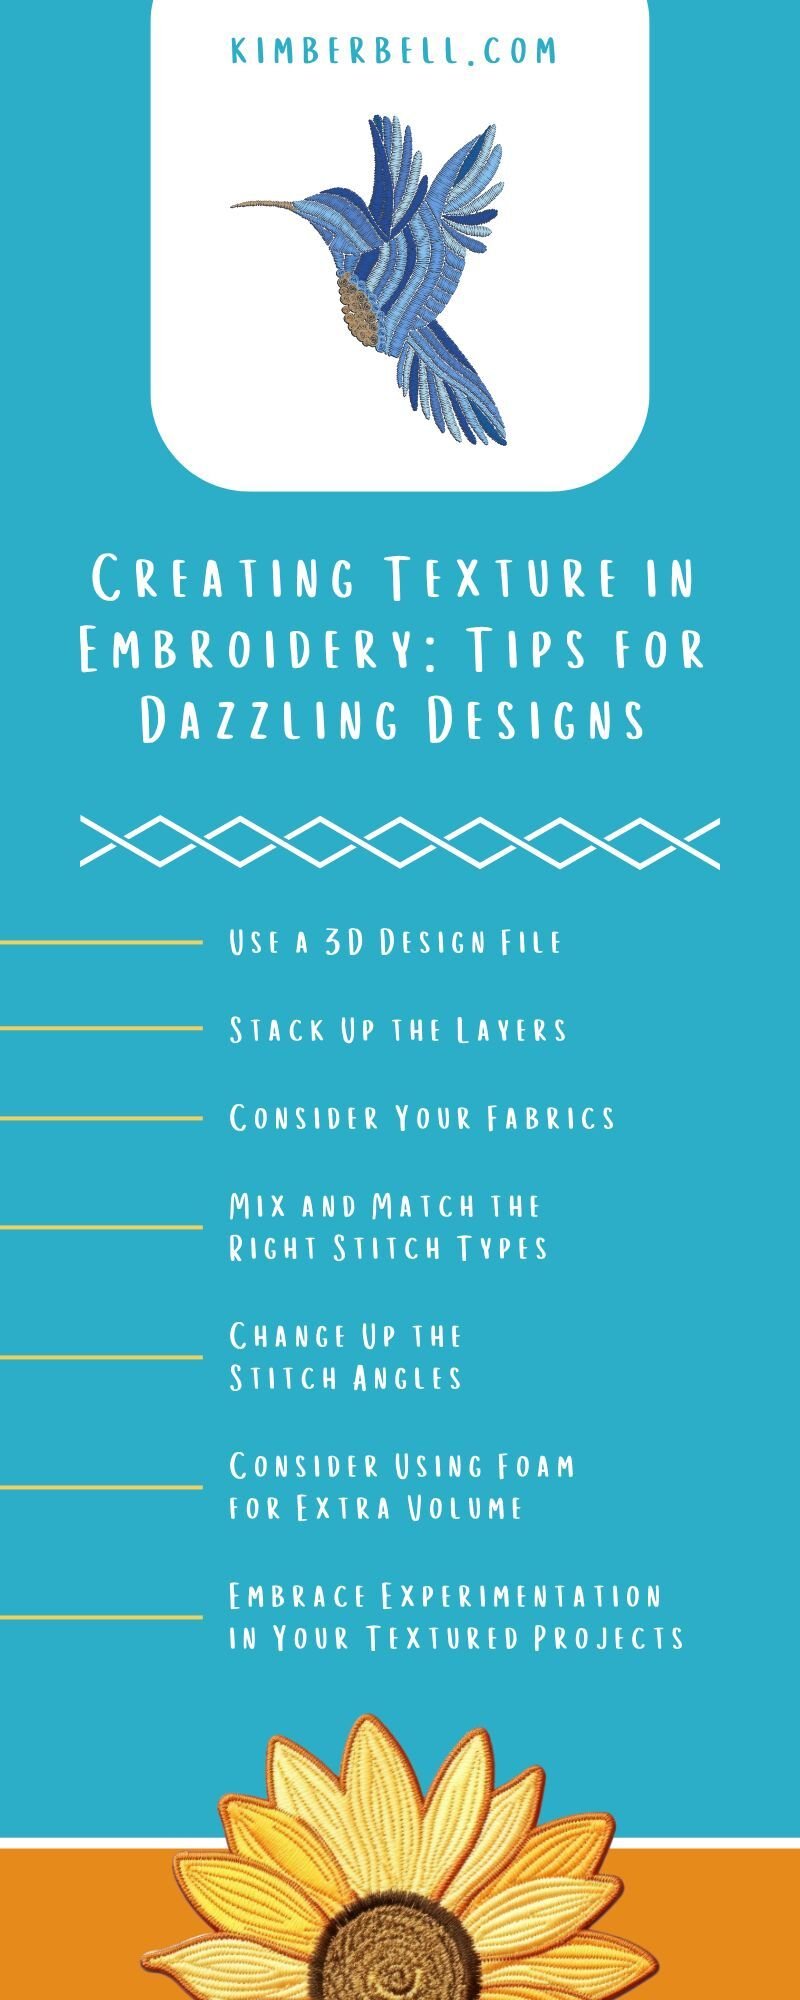
Use a Digital Design File
Digital machine embroidery designs contain special programming that creates natural texture and depth during the stitching process. These files differ from standard flat designs because they include specific stitch sequences, densities, and techniques built directly into the programming.
Quality digital designs feature strategic stitch placement that creates shadows and highlights, giving your finished piece realistic depth. The programming accounts for thread tension, fabric movement, and layer buildup in ways that standard designs simply can’t match. When you select these specialized files, you’re setting yourself up for success from the very first stitch.
Stack Up the Layers
You can create texture in embroidery by combining multiple design elements, each stitched at different stages of your project. Start with a base layer that establishes your overall design, then add subsequent layers that create visual interest and physical dimension.
Thread choice plays a crucial role in successful layering. Combine different thread weights within the same design to create natural variation. Heavier threads produce bold, prominent areas, while lighter threads provide subtle background details. This interplay between thread weights mimics the natural variation you see in handcrafted textiles.
Color coordination between your layers enhances the dimensional effect. Use gradual color changes to create the illusion of depth, moving from darker shades in recessed areas to lighter tones on raised surfaces. This technique tricks the eye into perceiving even more dimension than what actually exists in your stitching.
Consider Your Fabrics
Different materials respond uniquely to dimensional stitching techniques, and understanding these characteristics helps you achieve the desired effect. Dense fabrics like canvas or heavy cotton provide excellent stability for complex textural work, while lighter fabrics create softer, more flowing dimensional effects.
Pile fabrics such as velvet or corduroy add instant texture, even before you begin stitching. When you embroider with these materials, your stitches interact with the existing fabric texture to create incredibly rich, complex surfaces. The pile height affects how your threads sit on the surface, creating natural shadows and highlights.
Consider the fabric’s stretch properties when planning textured designs. Non-stretch fabrics maintain crisp, defined edges on dimensional elements, while fabrics with some give create softer, more organic-looking textures. Both approaches have their place depending on the aesthetic you want to achieve in your finished piece.
Mix and Match the Right Stitch Types
Running stitches create clean, defined lines that work well for outlining dimensional elements or creating linear texture patterns. These simple stitches build up beautifully when layered at different angles or densities.
Single stitches offer precision control over texture placement. You can use them to create stippling effects, add random texture elements, or build up specific areas that need extra dimension. The individual control over each stitch placement allows for incredibly detailed textural work.
Straight stitches excel at creating geometric patterns and structured texture elements. Vary the length and spacing of straight stitches to create rhythm and movement across your design surface. Long straight stitches catch light differently than short ones, adding another layer of visual interest to your work.
Satin stitches provide smooth, lustrous areas that contrast beautifully with more textured elements. Use them strategically to create focal points or to balance areas of heavy texture with smoother surfaces. The contrast between different stitch types enhances the overall textural impact of your design.
Change Up the Stitch Angles
When you vary the angles of your stitches across different areas of a design, you create natural-looking variations in color and texture, even when using identical thread colors. For instance, parallel stitches create smooth, flowing surfaces that appear lighter or darker depending on the viewing angle.
The cool optical effect of parallel stitching adds sophistication to your designs without requiring additional colors or thread changes. Strategic angle changes can make a single color appear to be multiple shades.
Crossing stitch angles within the same design area builds up thread density while creating complex light reflection patterns. This technique works particularly well for creating the appearance of woven textures or fabric-like surfaces in your embroidery.
Random angle variations create organic, natural-looking textures that mimic surfaces found in nature. This approach works well with floral elements, animal fur, or landscape features where perfect geometric patterns would look artificial.
Consider Using Foam for Extra Volume
Foam is a fantastic way to add volume and dimension to your machine embroidery projects. It works best with satin stitches or dense stitch patterns that completely cover the foam material.
As your machine stitches through the foam, the thread builds up on top, creating a raised effect while the foam provides stable support. Once you’ve completed the stitching, you can gently remove the excess foam, leaving behind beautifully raised embroidered elements.
Different foam thicknesses let you customize the level of dimension in your embroidered projects. Use thinner foam for subtle effects or thicker foam for bold, three-dimensional designs.
Embrace Experimentation in Your Textured Projects
Every textured embroidery project teaches you something new about the possibilities your machine offers. Keep detailed notes about successful combinations of techniques, threads, and fabrics so you can replicate your favorite effects in future projects. Taking photos documents your experiments, capturing the subtle textural effects that might be difficult to describe in words.
Test new technique combinations on scraps before committing to final projects. The interaction between different textural elements can create unexpected results, both positive and challenging. These test runs help you understand how various techniques work together and allow you to refine your approach before working on important pieces.
Stitch Up to the Challenge of Dimensional Designs
Now that you have our dimensional design tips for creating texture in embroidery, you can proceed with confidence. With the right techniques and tools, you’re ready to turn every project into a stunning magnum opus with delightful depth and texture.
At Kimberbell, we’re here to support your journey with our high-quality threads, stabilizers, and accessories specifically designed for textural and dimensional embroidery. When you choose quality materials, you set yourself up for success.