
When you think of a SPOOKY SOIREE, what comes to mind? Fa-boo-lous costumes? Food that's "to die for?" Well, I attended Kimberbell's Spooky Soiree one-day machine embroidery event just the other week, and what can I say? I had a simply enchanting time. And the fun all began when I signed up through my favorite quilt shop. Now, some certified shops hold Kimberbell Events in-store, others are doing them virtually, and some are doing both. Choose what suits your needs the best and contact them to register!
 The Event Project Kit
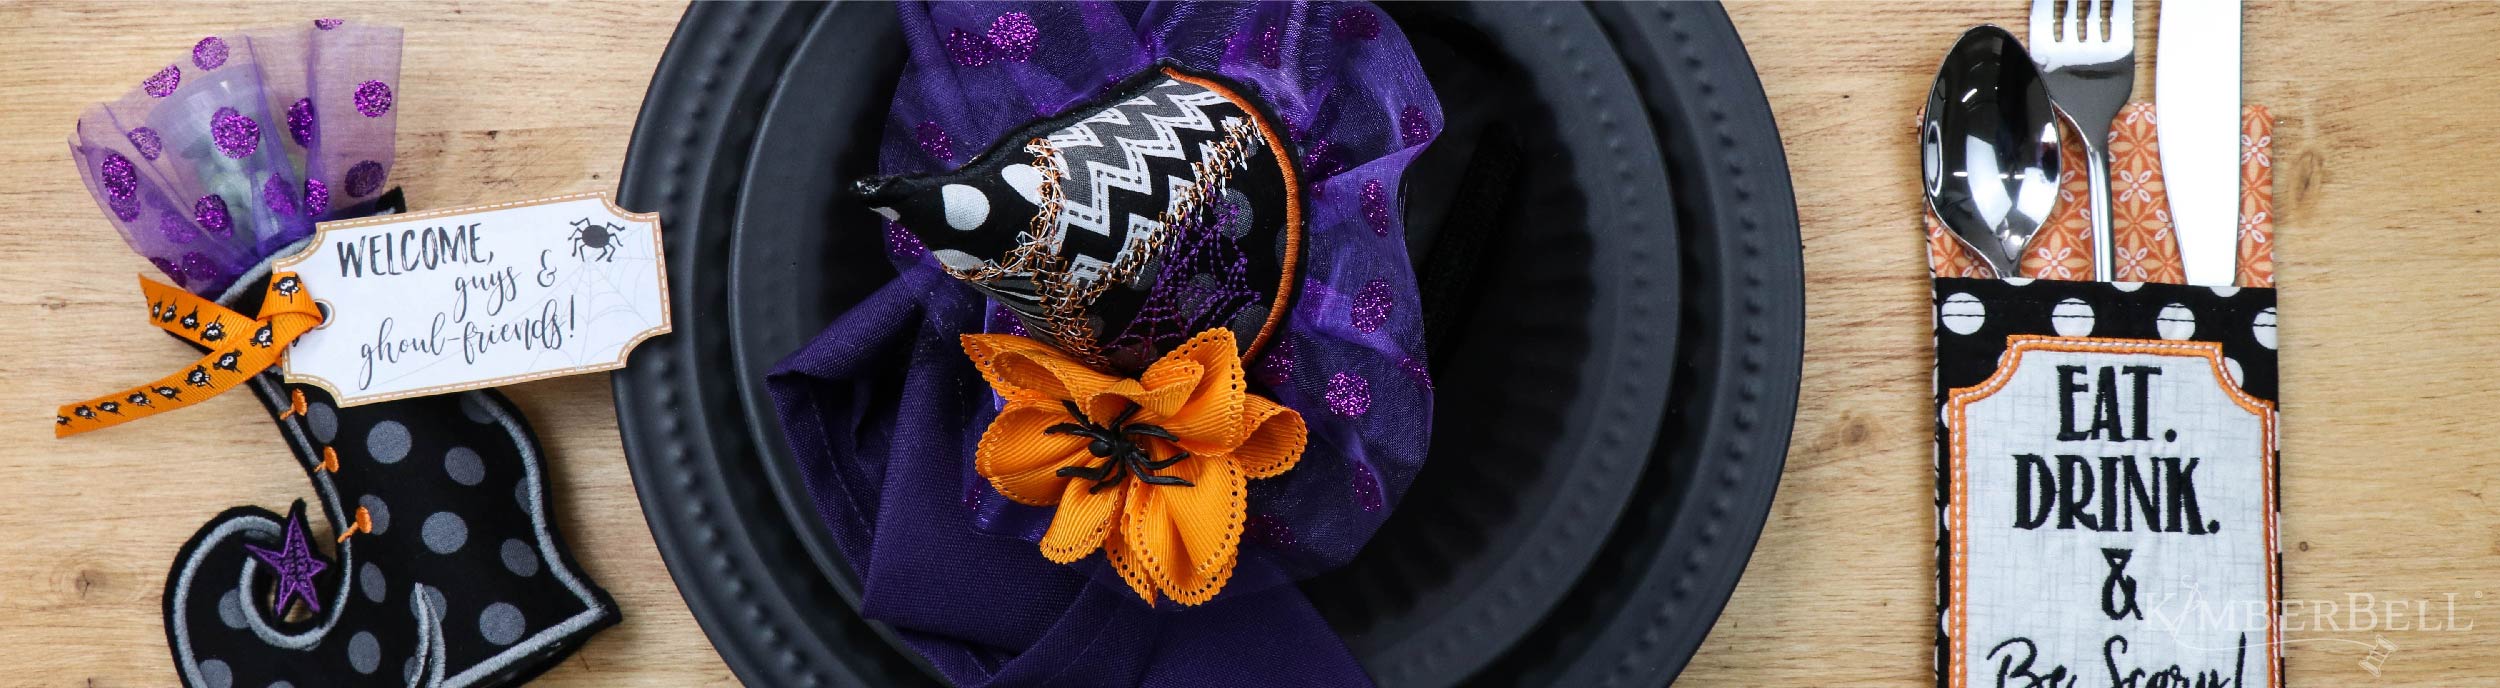
Attending a Kimberbell Event is a real treat. (Yes, Halloween puns will haunt this post.) After registering for Spooky Soiree through your quilt shop, you'll be given the Event Project Kit, including the design CD, pre-cut fabric kits, embellishments, full-color instructions, Kimberbell Paper Tape, and your collectible event pin and lanyard. The kit includes everything you need to make the Wicked Cute Party Hat, the Ghostly Lace Coaster, the Be Scary Utensil Pocket, and Boo-tiful Boots Sweet Feet. Aren't these projects charming? Note: You'll need to provide stabilizer, thread, needles, etc.
Let's take a closer look at the goodies found in the Spooky Soiree Event Project Kit. (I tell you, I could watch this stop-motion video ALL. DAY. LONG. It never gets old, especially the spiders!)
[embed]https://youtu.be/EZxFaDXa8Zs[/embed]
My quilt shop chose to host Spooky Soiree through Zoom software, and they sent the digital invite days before the event. When the big day came, I put my laptop next to my embroidery machine, clicked the link, and I was in the class! Our teachers welcomed us, took care of initial business, and invited us to have a spook-tacular time. Then we dove into our first project: Boo-tiful Boots Sweet Feet.
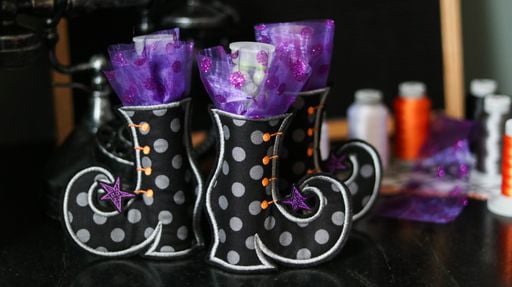 Boo-tiful Boots Sweet Feet
The design CD comes with files and cutting instructions for making either one boot or two. At the event, you make just one boot, but you can definitely make the other one later to complete the pair. Stitching the boot was really fun and (once again!) I couldn't believe how something that looks so complicated is actually very easy with the right directions in hand.
Boo-tiful Boots Sweet Feet are completed in a 5x7 hoop. When stitching is complete, simply attach the star with a glue gun and slip the Sweet Tube inside the opening! (The only thing left is to decide what creepy confections to put inside the tube. Gummy worms? Dark chocolate? So many possibilities...)
Ghostly Lace Coaster
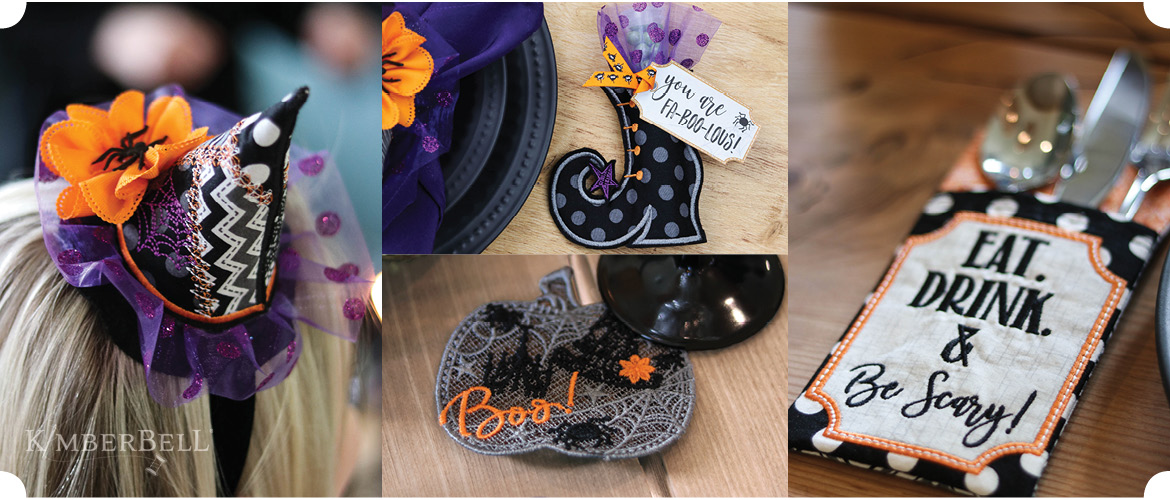
Our next project was the Ghostly Lace Coaster. Check out all of the Halloween elements found within this design! It's like an "I Spy," Kimberbell style. :)
Have you ever made freestanding lace on an embroidery machine? Well, this was my very first time. But it was really easy. You simply stitch the file in a 4x4 hoop on water-soluble stabilizer, and when you wash the stabilizer away, the lacy stitches are left behind. (Don't be tempted to do this with just any embroidery file--lace designs are digitized specifically for lace!)
A lot of attendees played around with the colors on this one. (As for myself, I fancied a purple hat and green stars.) And speaking of beautiful freestanding lace designs, check out Kimberbell's Lace Studio collection. Wow!
Wicked Cute Party Hat
After a lunch break, we got started on the Wicked Cute Party Hat. This utterly bewitching hat is made in a 6x10 hoop and once again, isn't as hard as it may seem.
First, we stitched cutting guides onto a big piece of black Embroidery Felt for the cone, outer brim, headband, and organza placement line.
Next, we pieced the patchwork in the hoop. It was fun seeing this crazy-cute design coming together!
When that was done, we gathered the Glitter Dot Organza and Pull Flower, rolled the cone, and put everything together on the headband with hot glue. Other than learning that I'm a hot mess with hot glue, my Wicked Cute Party Hat was easy to make. I look forward to wearing it with pride.
One of the benefits of attending this virtual event was the guidance I received through my computer screen. Our instructors made the projects right along with us, allowing us to see up-close shots of their hands as they worked. Through this process, we learned tips and tricks, how to troubleshoot if something went awry, and enjoyed the camaraderie that naturally happens when a class is working toward the same goal.
My quilt shop also sprinkled the event with games available on best online casinos, contests, laughter, prizes, and fun! Every Kimberbell Event also has an exclusive Bonus CD for attendees who spend $100 or more in the Kimberbell Pop-up Shop. The Bonus CD for Spooky Soiree is called Sweet Wraps for Halloween. Check out these super-cute, giftable designs:
[embed]https://youtu.be/K-Vc8iOPsmI[/embed]
Be Scary Utensil Pocket
Our last project was the Be Scary Utensil Pocket. After all, Halloween is the perfect time to "eat, drink, and be scary!"
This project is toad-ally made in a 5x7 hoop, with Kimberbell's step-by-step instructions walking you through every step. Before stitching the design, you match each fabric piece to a labeled chart included in your Event Project Kit. This handy chart makes it very easy to know which fabric will be used for each step.
In-the-hoop projects like these are so fascinating to me. You place the fabric where the instructions tell you to, push the buttons, and it all just comes together! The Be Scary Utensil Pocket fits knives, forks, spoons, and even a napkin for frightfully delightful decor.
A Magical Time
My SPOOKY SOIREE experience was simply magical! Before I knew it, the event was over. My goodness, the time flew by! Here are my projects, raw and real, with no professional camera or lighting effects:
I'm pretty proud of the way they turned out. I encourage you to talk with your favorite haunt (a.k.a. your favorite quilt shop) and sign up for a Kimberbell Event today!