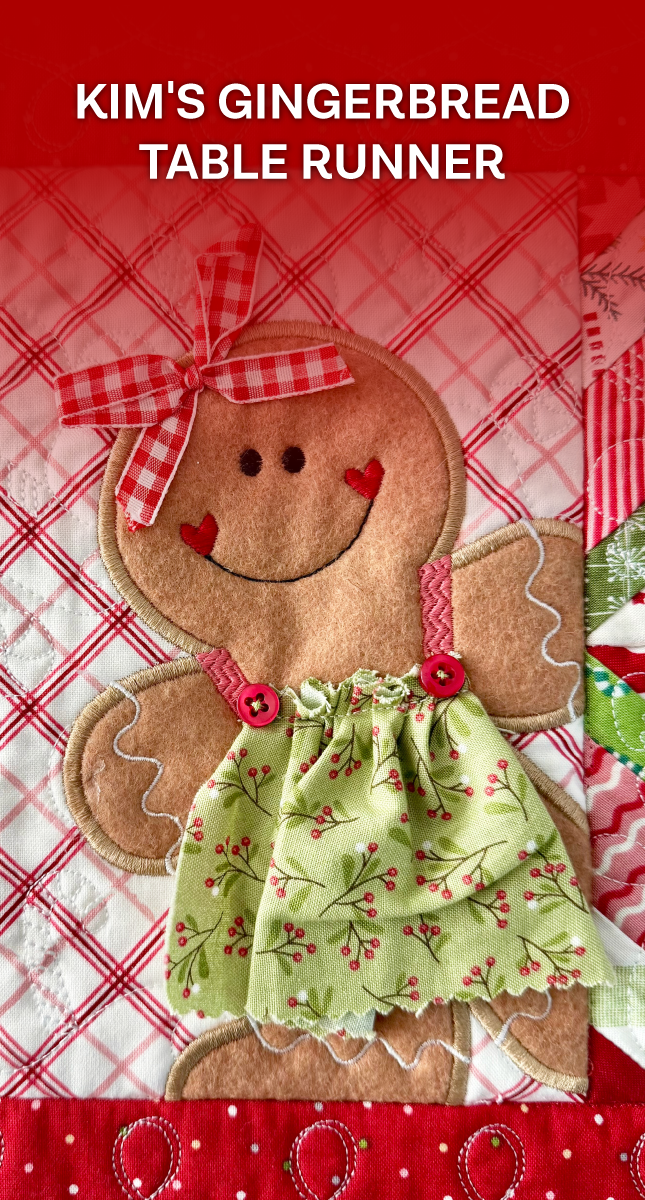
Well, friends . . .here it is! Kim's Gingerbread Table Runner from Craft Night With Kimberbell! Here's how this post will go:
- I'll share the Kimberbell products Kim used for her table runner (along with the links).
- We'll take a look at the pieced string blocks and go over how Kim added the quilting.
- I'll walk you through how Kim reimagined and quilted the gingerbread and apothecary jar blocks.
- We'll end with the link to the Craft Night With Kimberbell episode featuring this project!
BIG thanks to Kim for sharing her inspiration and instructions with all of us. 😊 Now, let's get into it!
![]()
Products Needed for Gingerbread Table Runner
- Ginger's Kitchen HERE!
- Broomhilda's Bakery HERE!
- Kimberbell Project Batting HERE!
- Gingerbread Embroidery Felt HERE!
- Christmas 1 (KDQ020) HERE!
- Christmas 2 (KDQ022) HERE!
- Christmas Border 4 (KDQ102) HERE!
- Orange Pop Rulers (Rectangle Set) HERE!
- Light Mesh Cut-Away Stabilizer HERE!
![]()
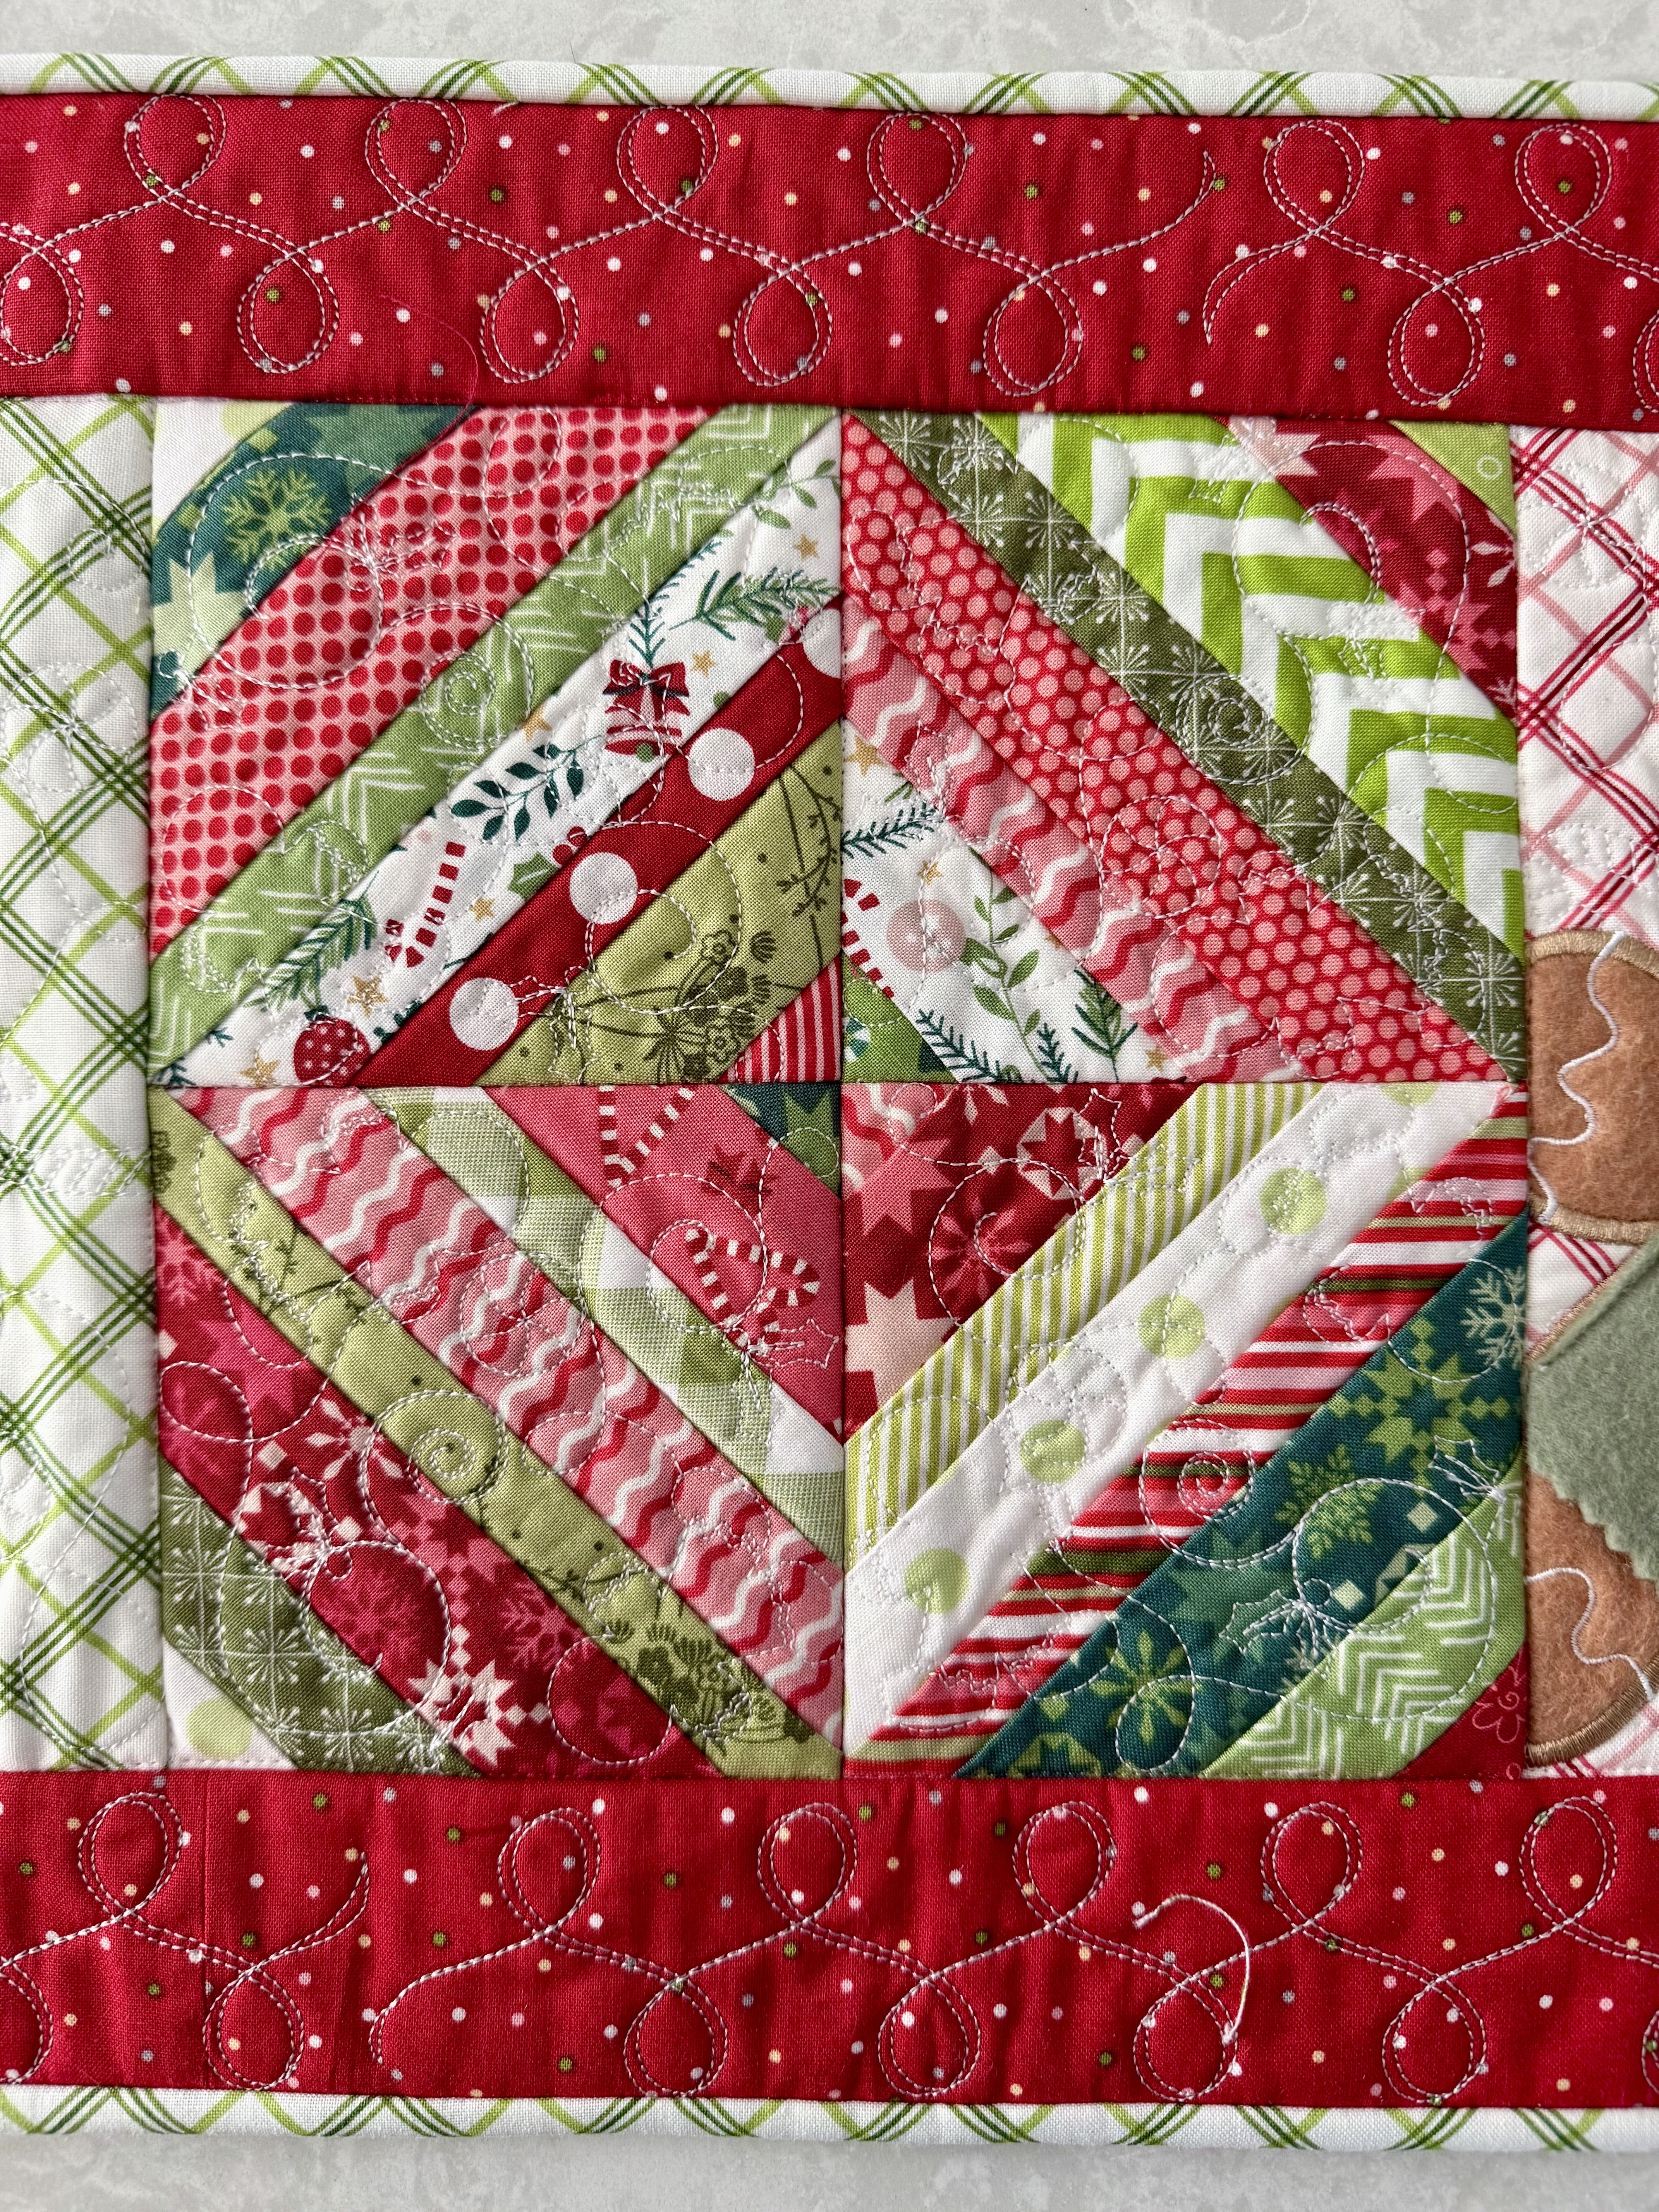
Pieced String Blocks
The Broomhilda's Bakery quilt comes with a bonus project called the Suspiciously Sweet Table Runner. This runner includes string blocks made from strips of fabric.
Here's what those blocks look like in the original project:
Reimagined Blocks
Now, below is a picture of how Kim used the pieced string blocks from Broomhilda's Bakery for her Gingerbread Table Runner! (Note: For the borders, Kim used the 2" Christmas Border 4 design.)
- Load the 4" Block-by-Block file of KDQ020 into your embroidery machine.
- Load the 4 1/2" string block piecing template from Broomhilda's Bakery.
- Make sure the files are combined.
- Hoop a sheet of Light Mesh Cut-Away stabilizer.
- Complete machine steps 1 & 2 for KDQ020 (through placing and trimming your batting).
- Skip to machine step 6 (This is your piecing template, which will now go on top of your batting.)
- Complete the steps for piecing the string block in-the-hoop.
- Go back to machine step 5. This will place the KDQ020 quilting ON TOP of your pieced block!
- Using an Orange Pop Ruler, square up the block to 4 1/2 x 4 1/2".
- Make (12) 4 1/2 x 4 1/2" string blocks as described above. (Kim used red, green, and novelty Christmas fabric strips from her stash!)
- Sew (4) blocks together in a 4-patch formation to make (3) 8 1/2 x 8 1/2" blocks.
Gingerbread Appliques
The real stars of the Gingerbread Table Runner are the gingerbread applique boy and girl! These darling designs come from Ginger's Kitchen Bench Pillow.
Here's how the gingerbread appliques look within the original project:
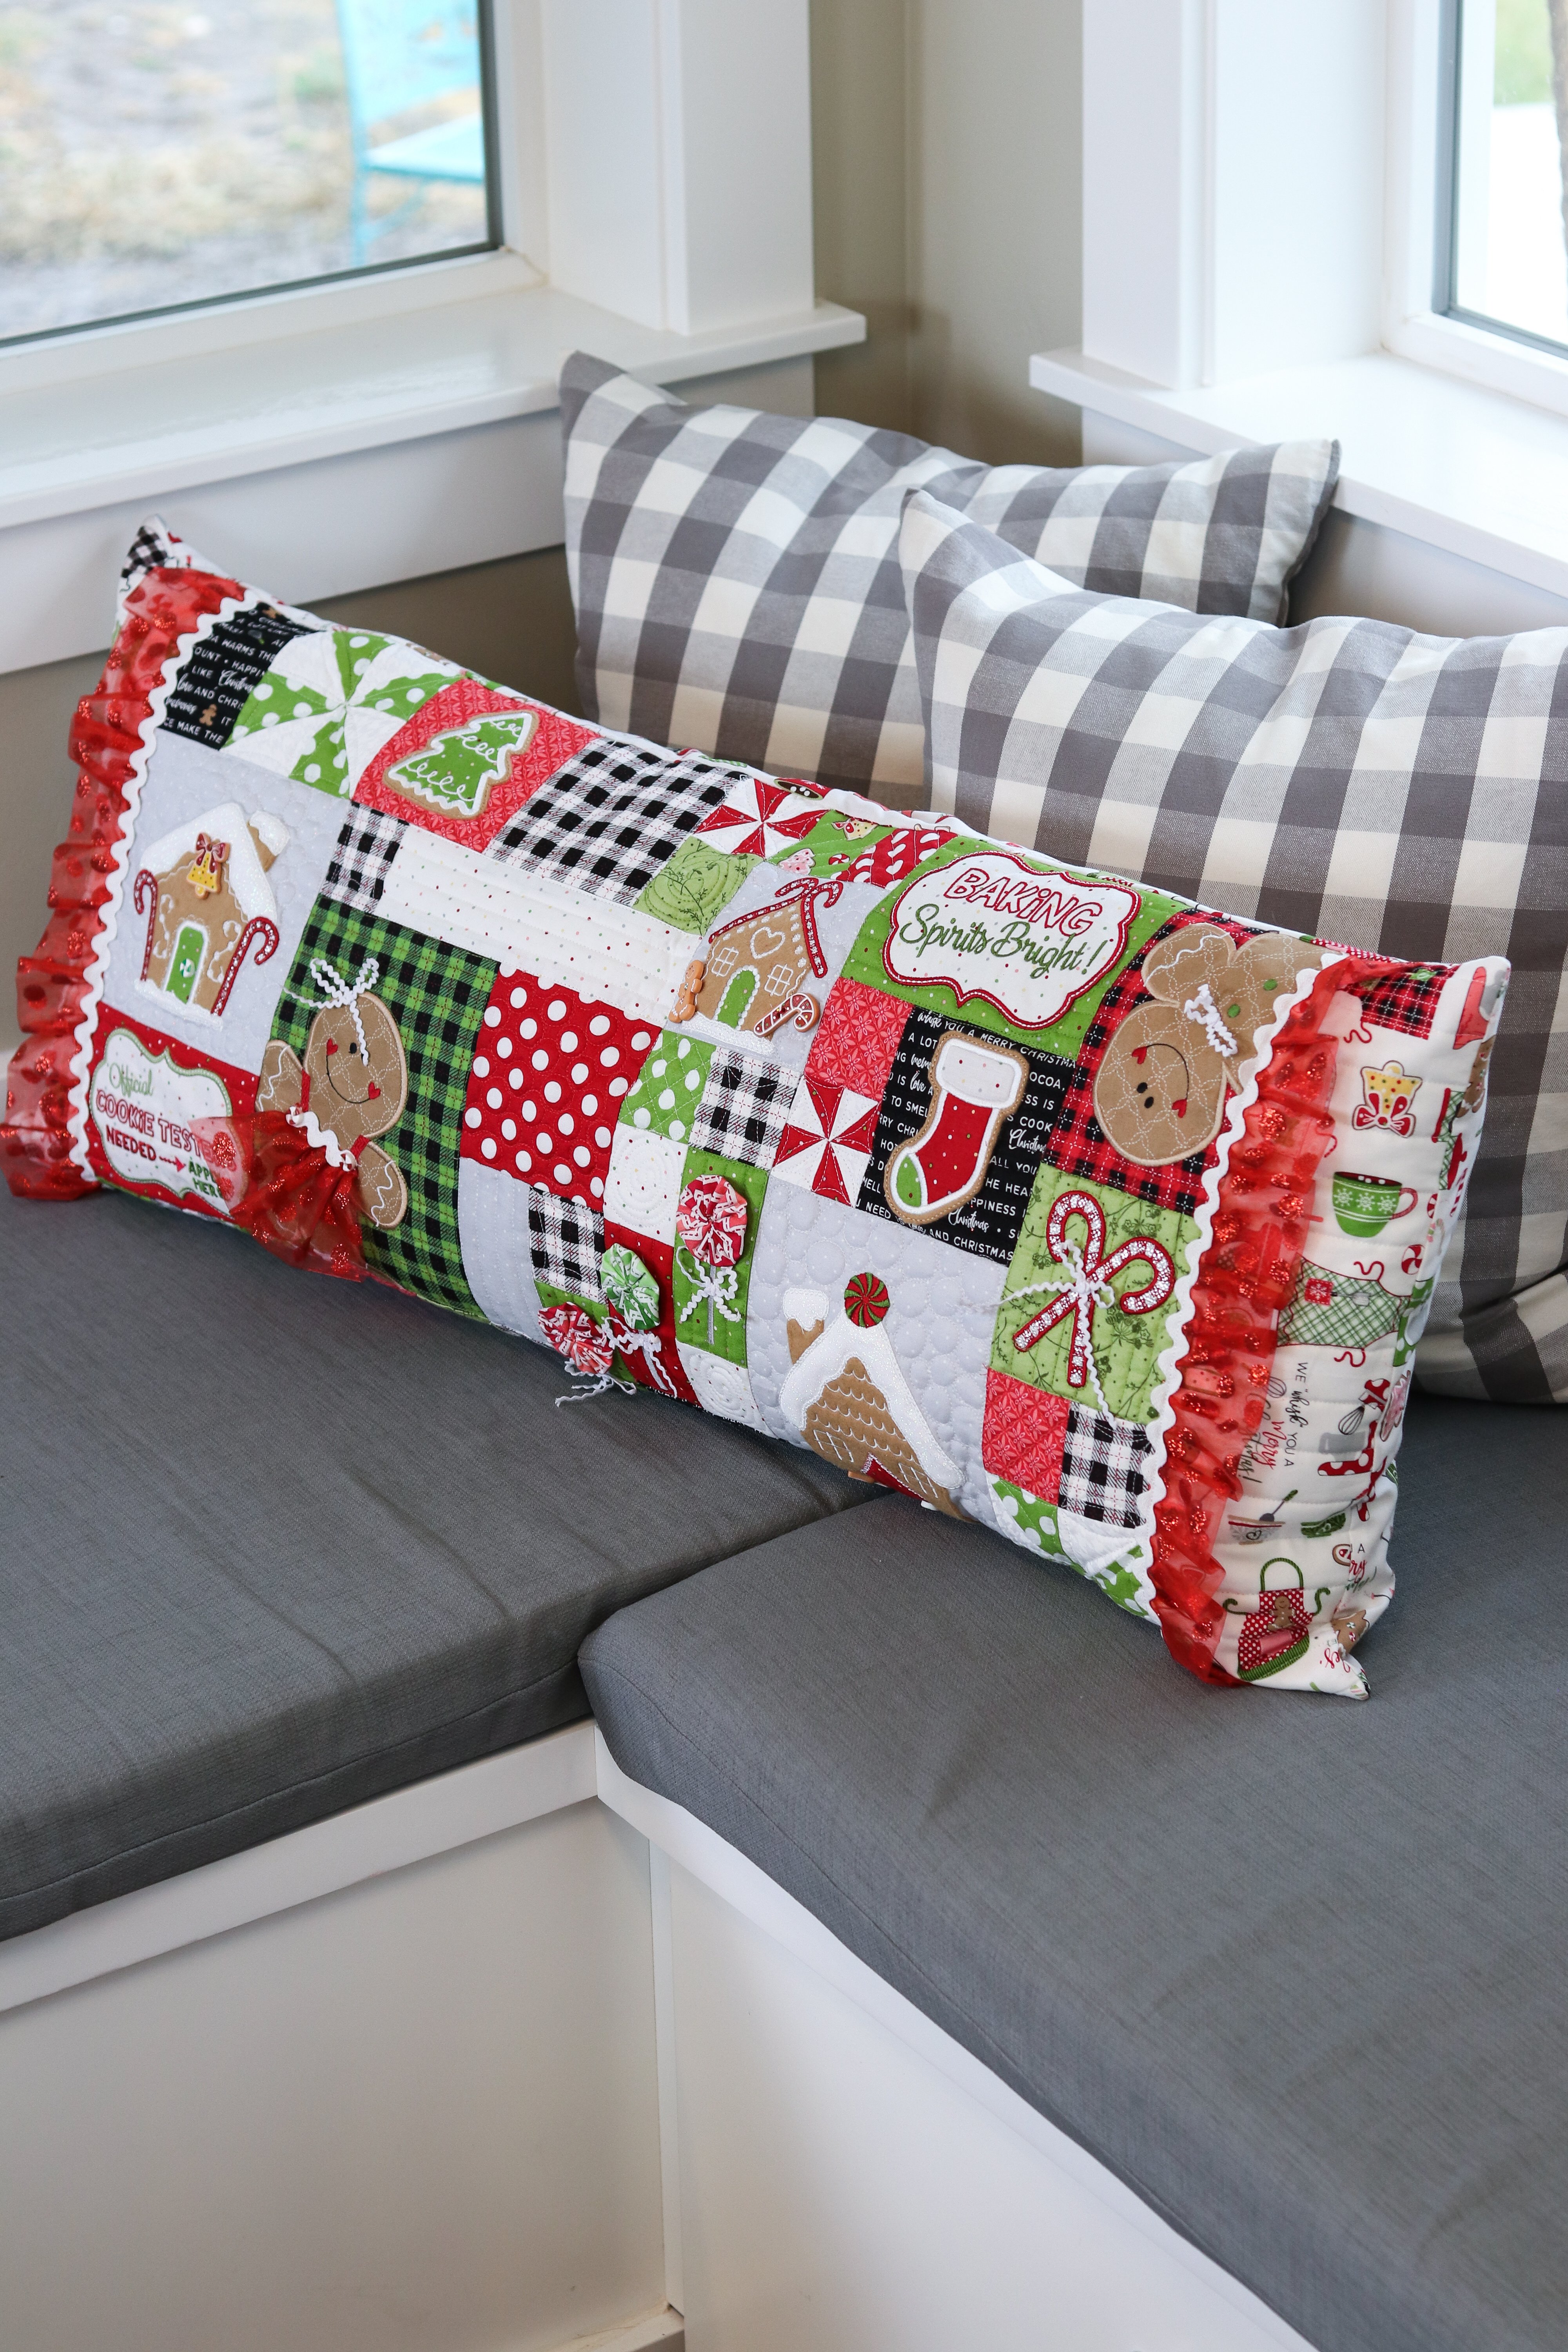
Reimagined Blocks
Now, here's how the gingerbread man looks in Kim's reimagined table runner. (Note: Kim gave this version a cute little pair of overalls! To learn how she did this, watch the video below around the 53 minute mark.)
.jpg?width=4284&height=5712&name=IMG_0339%20(1).jpg)
- Load the 6 x 8" Block-by-Block file for KDQ022.
- Load the 5x7 file for the gingerbread applique from Ginger's Kitchen.
- Hoop a sheet of Light Mesh Cut-Away stabilizer.
- Shift the design to the bottom corner so it looks like the gingerbread figure is peeking out from the seam. (Kim talks about this at approximately 51:30 in the video below.)
- Make sure the files are now combined.
- Complete steps for quilting the entire background block.
- Complete steps for completing the gingerbread applique.
- Using Orange Pop Rulers, square up block to 6 1/2 x 8 1/2".
Note: Kim made the second gingerbread applique block by mirroring the design to the other side of the block!
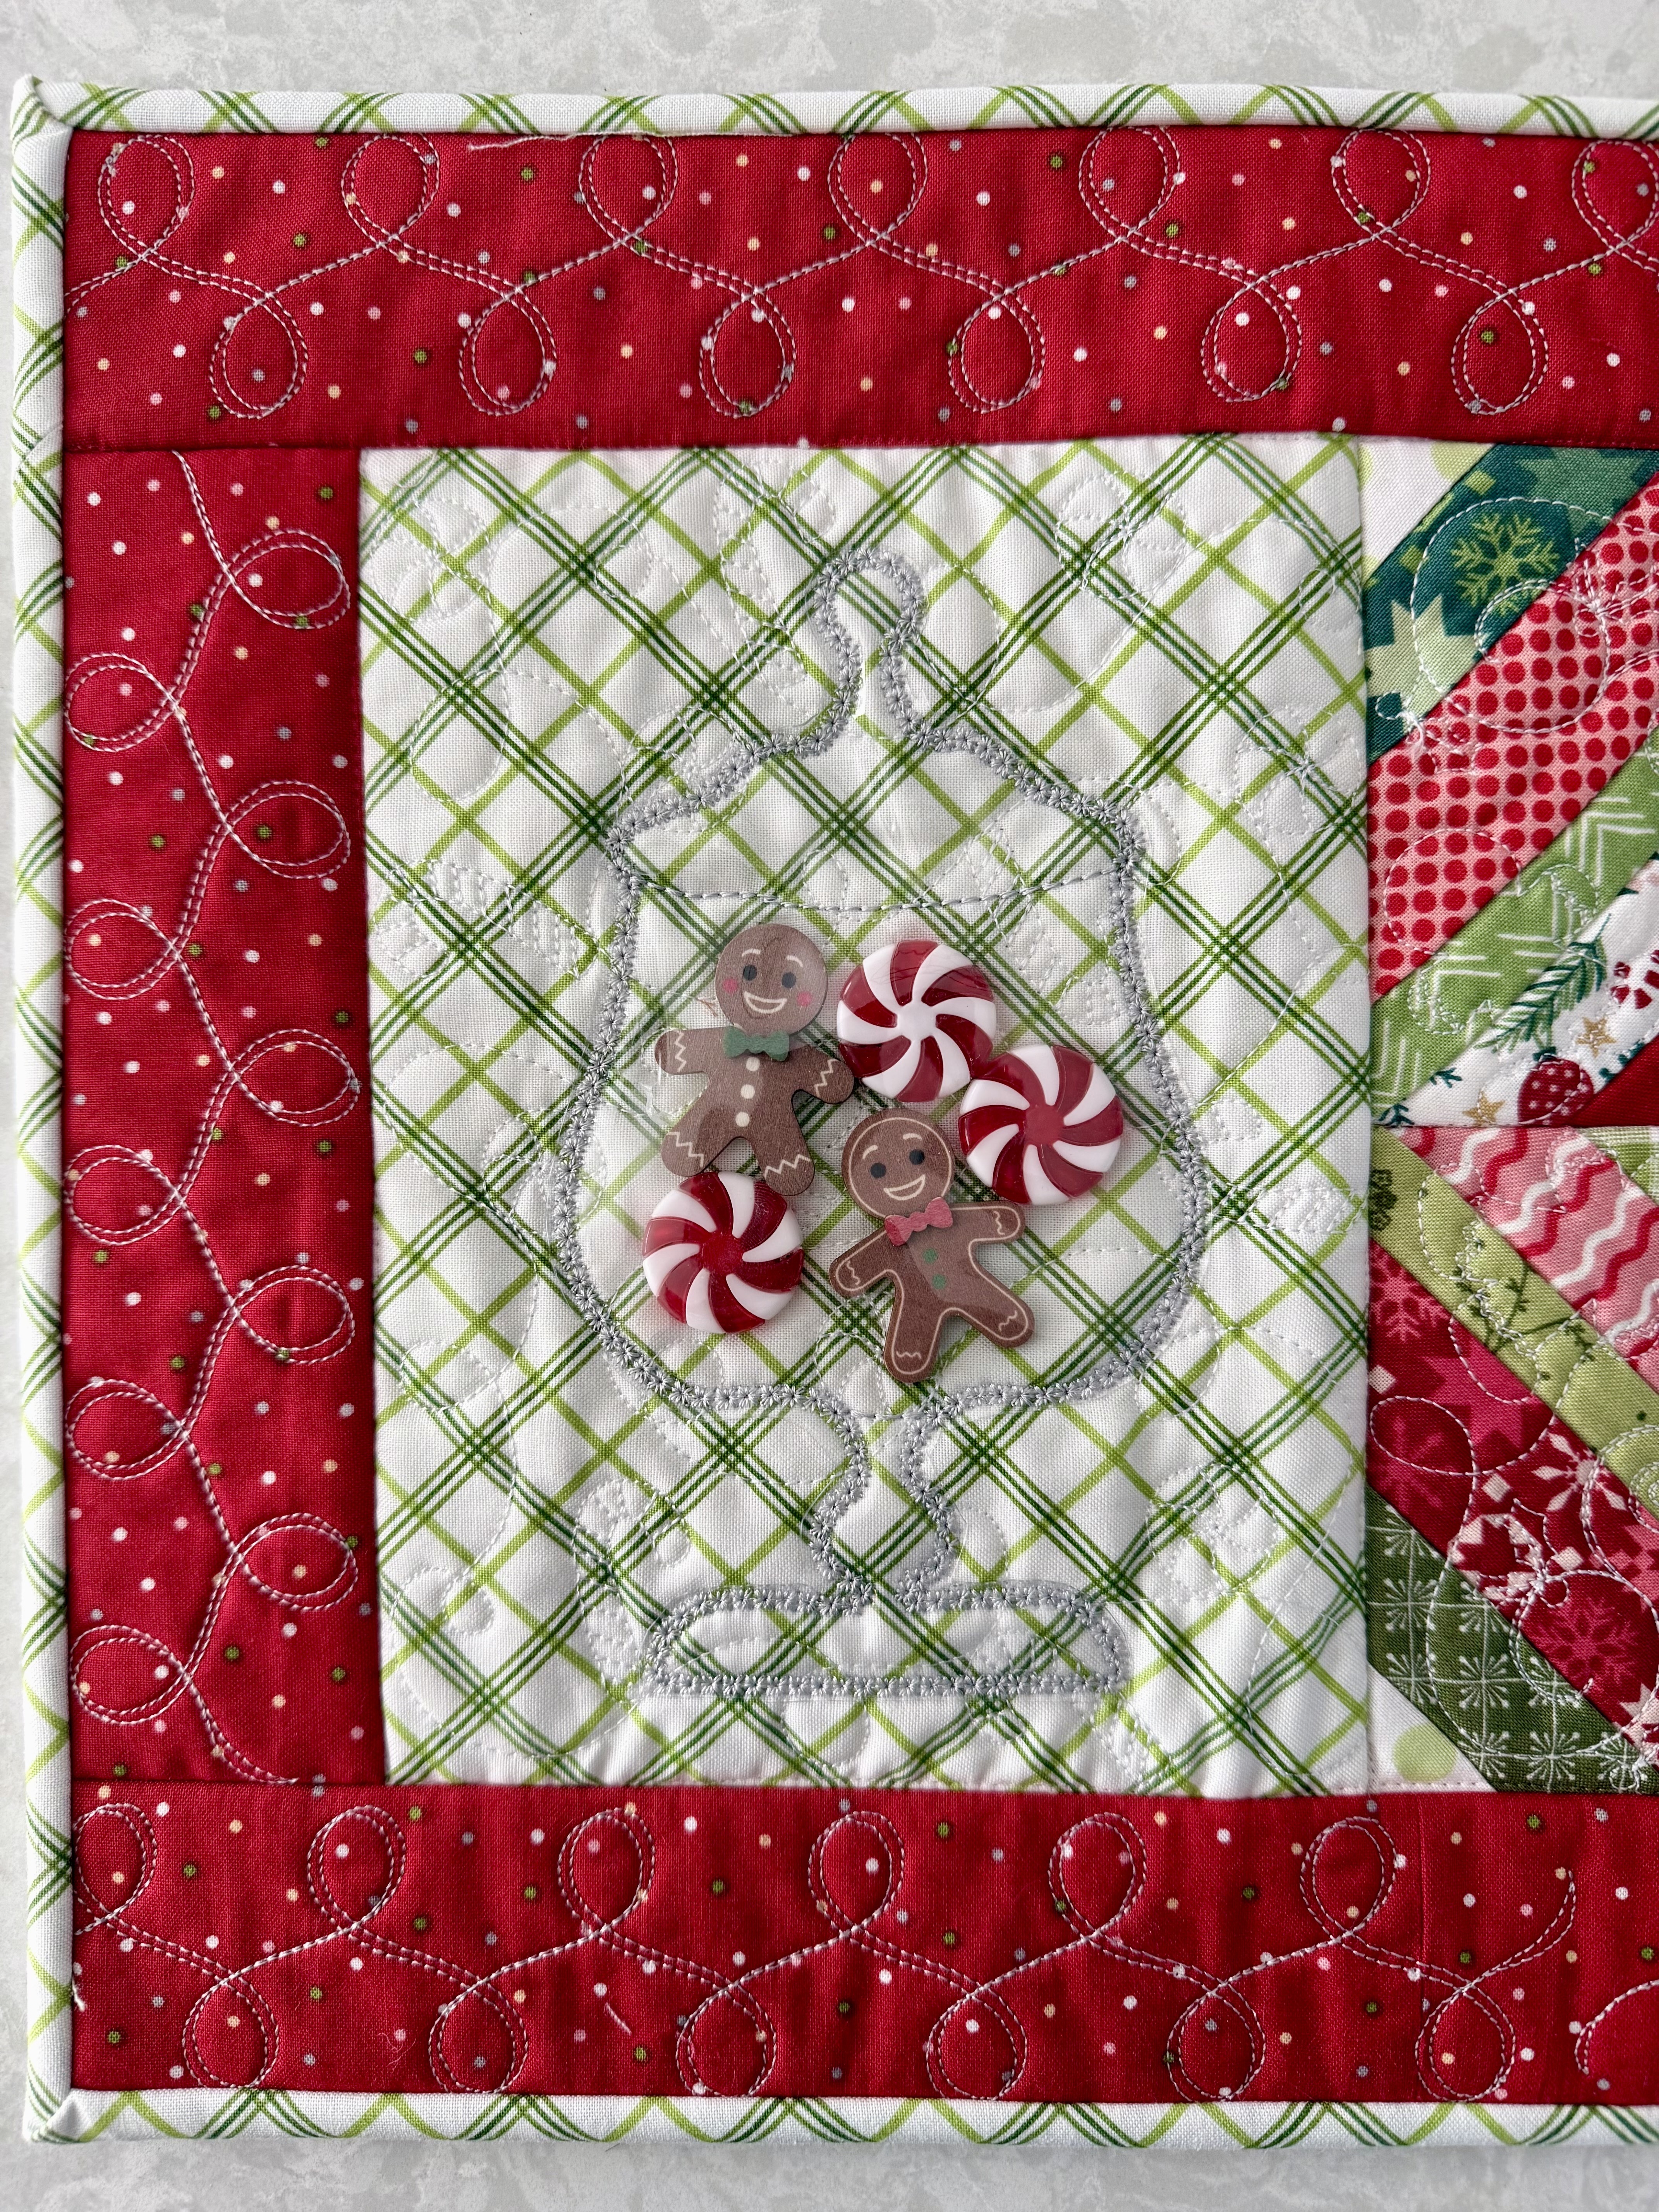
Apothecary Jars
Reimagined Blocks
It's amazing how the same jar looks completely different with such minor changes! (Note: Kim found the little mints and ginger cookies at the local craft store.)
- Using Orange Pop Rulers, square the block to 6 1/2 x 8 1/2". Sew all blocks together as shown in the photo.
- Add 2 1/2" strips for borders. (Kim used the 2" width Block-by-Block file of Christmas Border 4.)
![]()
Craft Night With Kimberbell
Now, I feel that it would be MUCH more helpful if I let Kim talk about her Gingerbread Table Runner (instead of me trying to explain all the things)!
If you don't have time to watch the whole show, go to approximately the 42:00 mark. (However, you'll definitely want to watch the entire thing to catch Cassie's amazing project, too)!
Bonus Project
In addition to the Gingerbread Table Runner project, Kim also made a festive tea towel by combining the Baking Spirts Bright block from Ginger's Kitchen with the Smell My Feet Tea Towel from Broomhilda!
Be sure to watch the video all the way to the end to see that delightful project. 😊
Well, friends, what do you think? Who's making a Gingerbread Table Runner? When you go a little off-roading and try combining elements from different projects, the sky's the limit with your creativity!
Be sure to catch Craft Night With Kimberbell each month on our Facebook and Youtube channels.
Happy stitching!