.png)
.png?width=758&name=Blog-Images-Cup-of-Cheer-01%20(1).png)
Fringe may be a tiny technique, but trust me: a little fringe will take your machine embroidery projects to a whole new level of WOW!
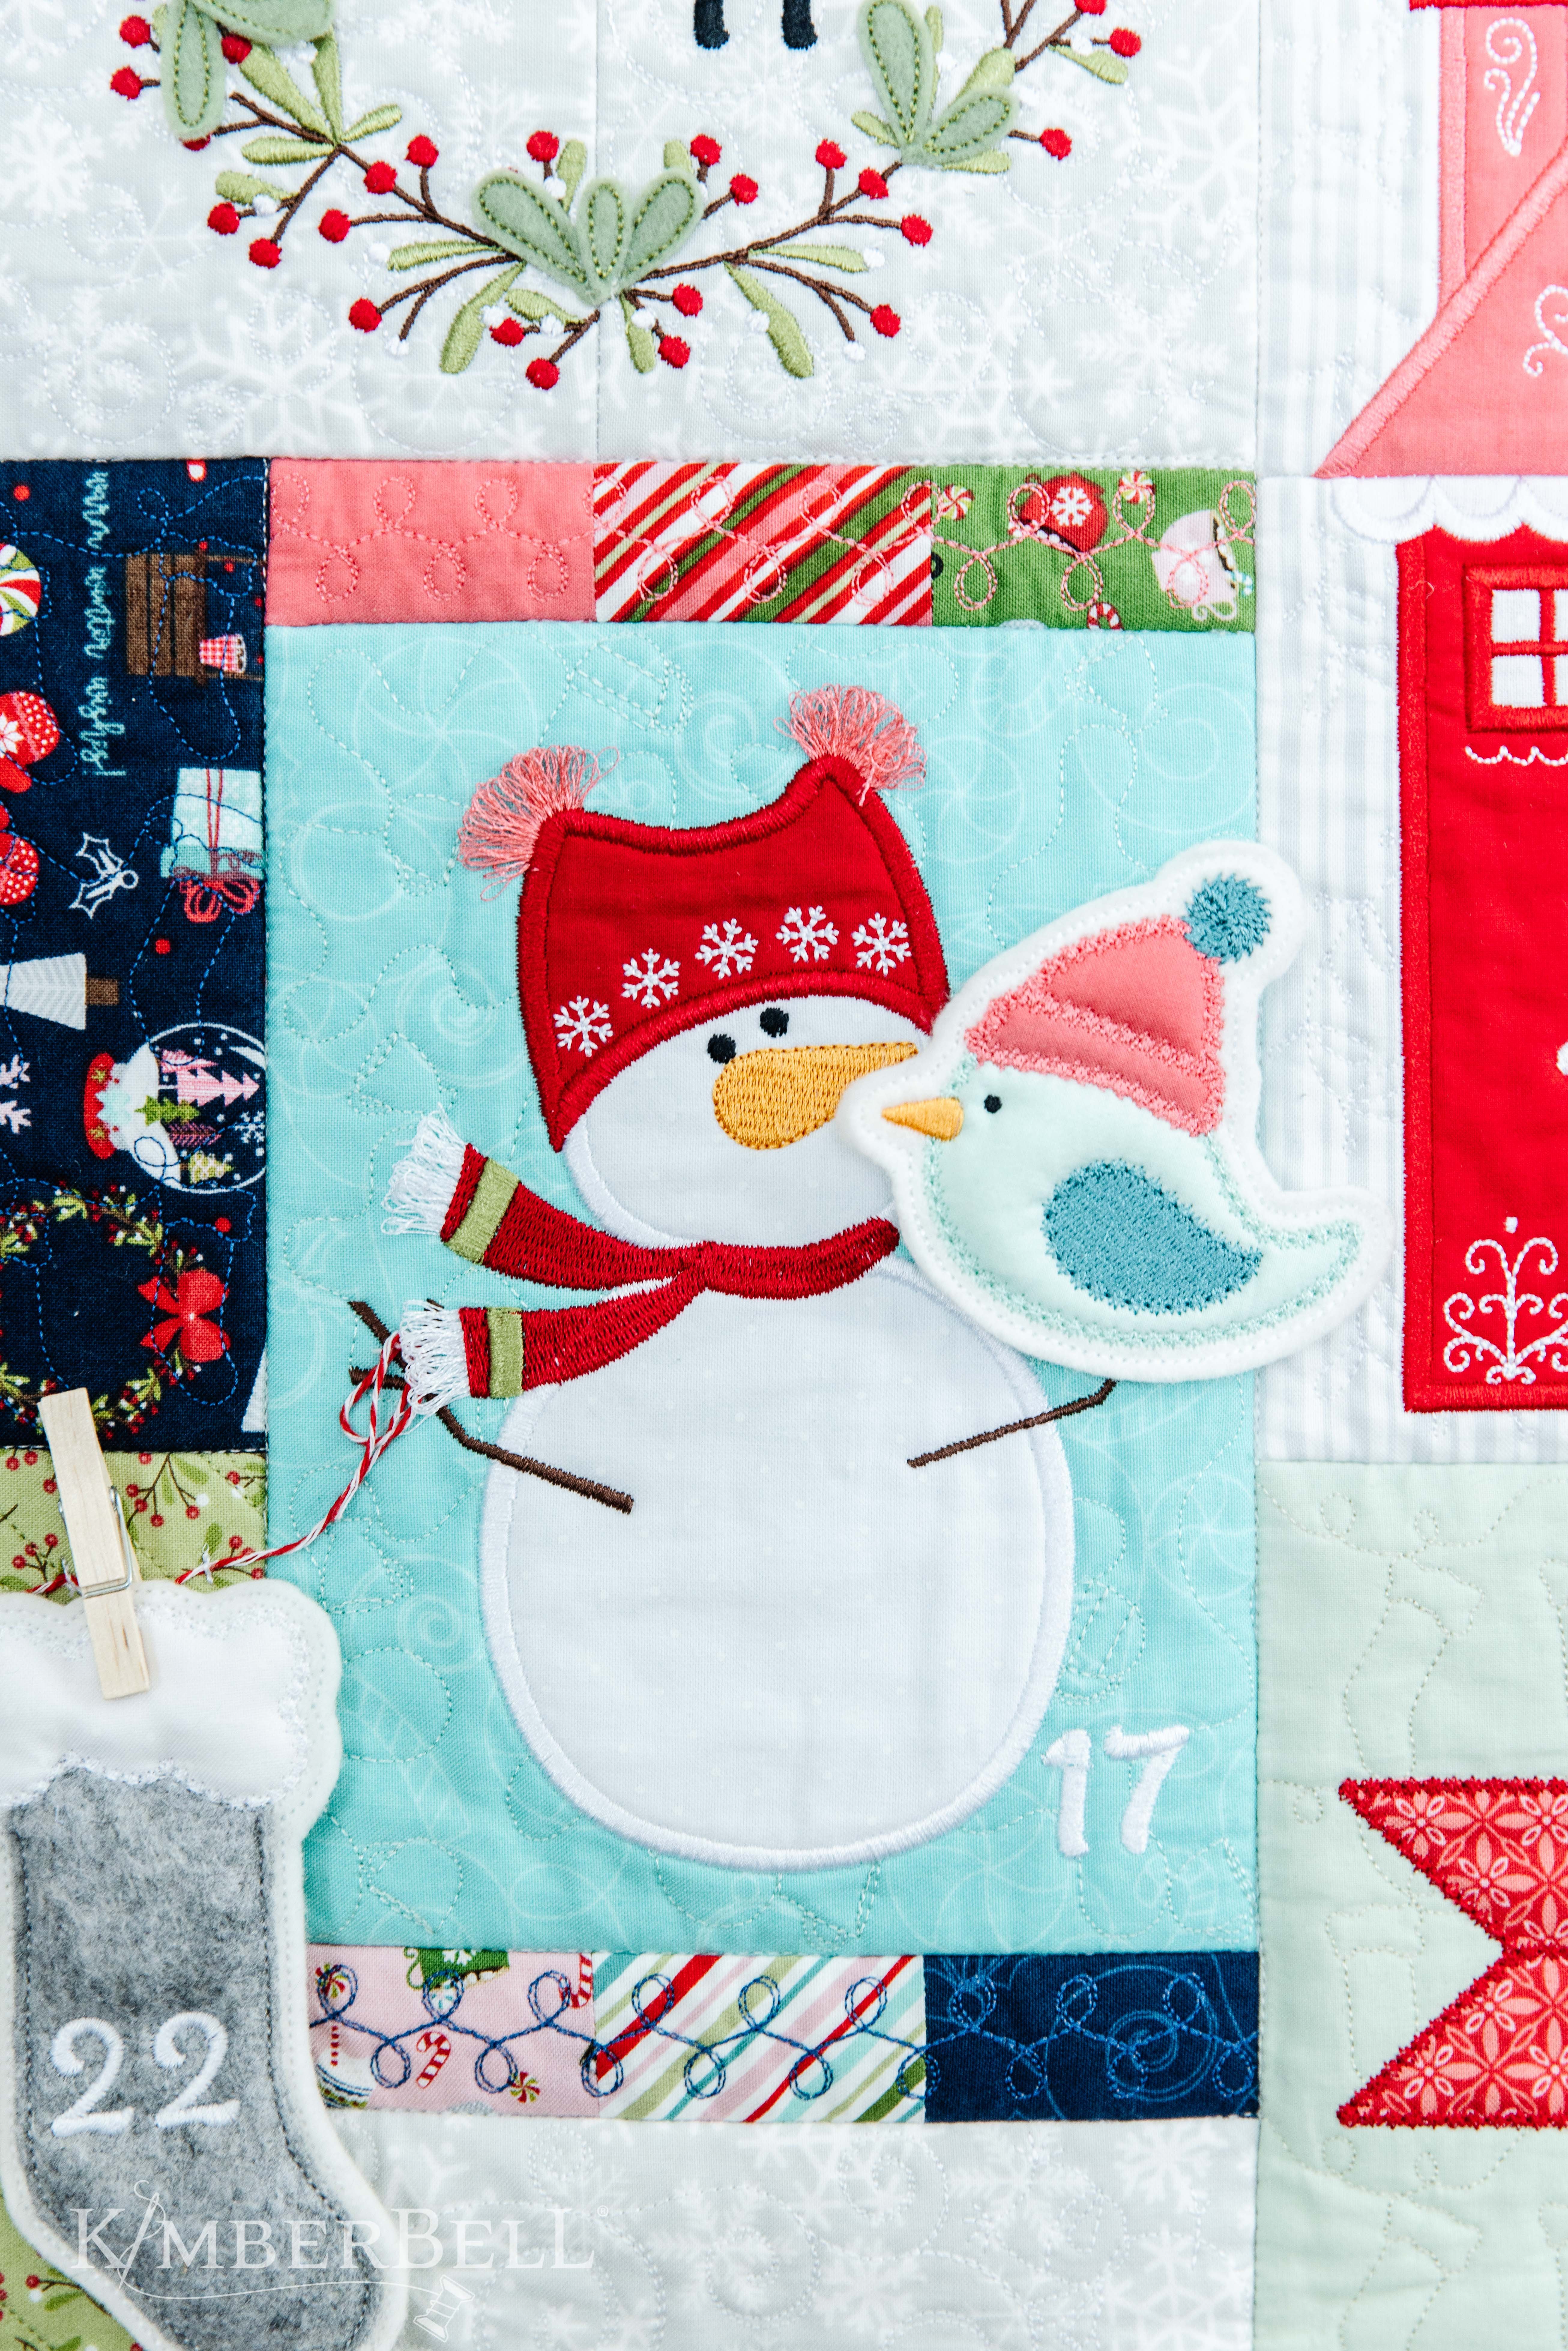
Take a look at this snowman from Kimberbell's Cup of Cheer Advent Quilt. The fringed tassels on his hat and scarf bring delightful dimension to the entire block!
Oh, the power of fringe...
And the best news? It's not at all hard to do! 😀
A Tale of Two Bobbins
There are two ways to make fringe on your embroidery machine:
- With normal-weight bobbin thread (Choose a contrasting color!)
- With water-soluble bobbin thread (Be sure to change back to regular bobbin thread afterwards!)
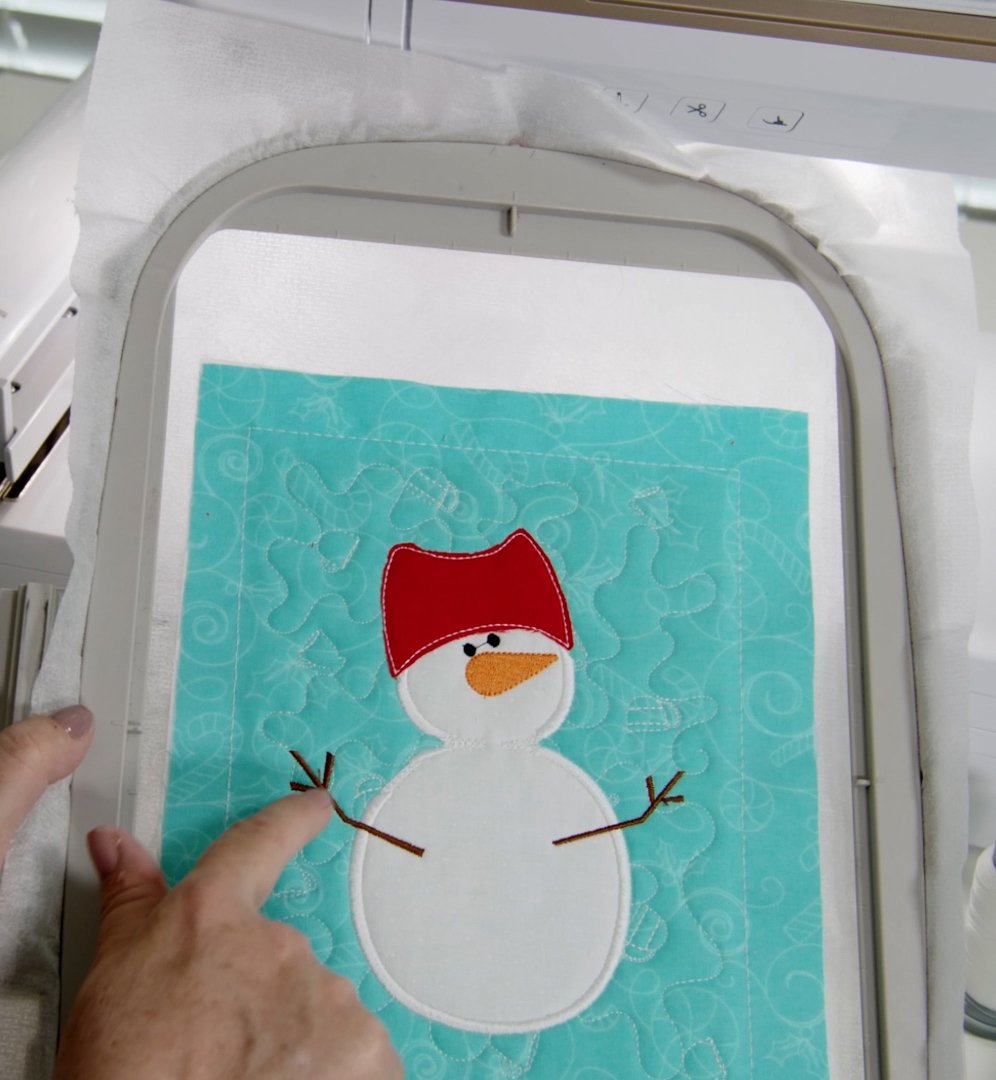
Both ways are super easy. Let's take a look at the snowman before the fringe is added, then walk step-by-step through the whole fringing process.
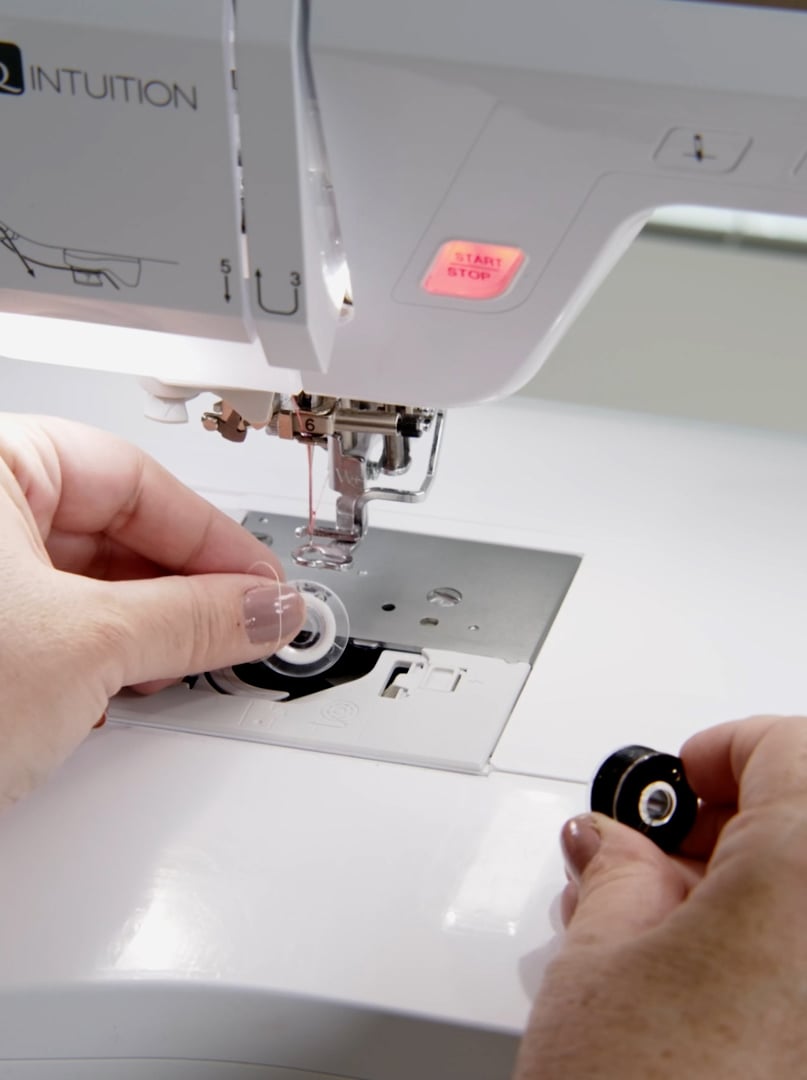
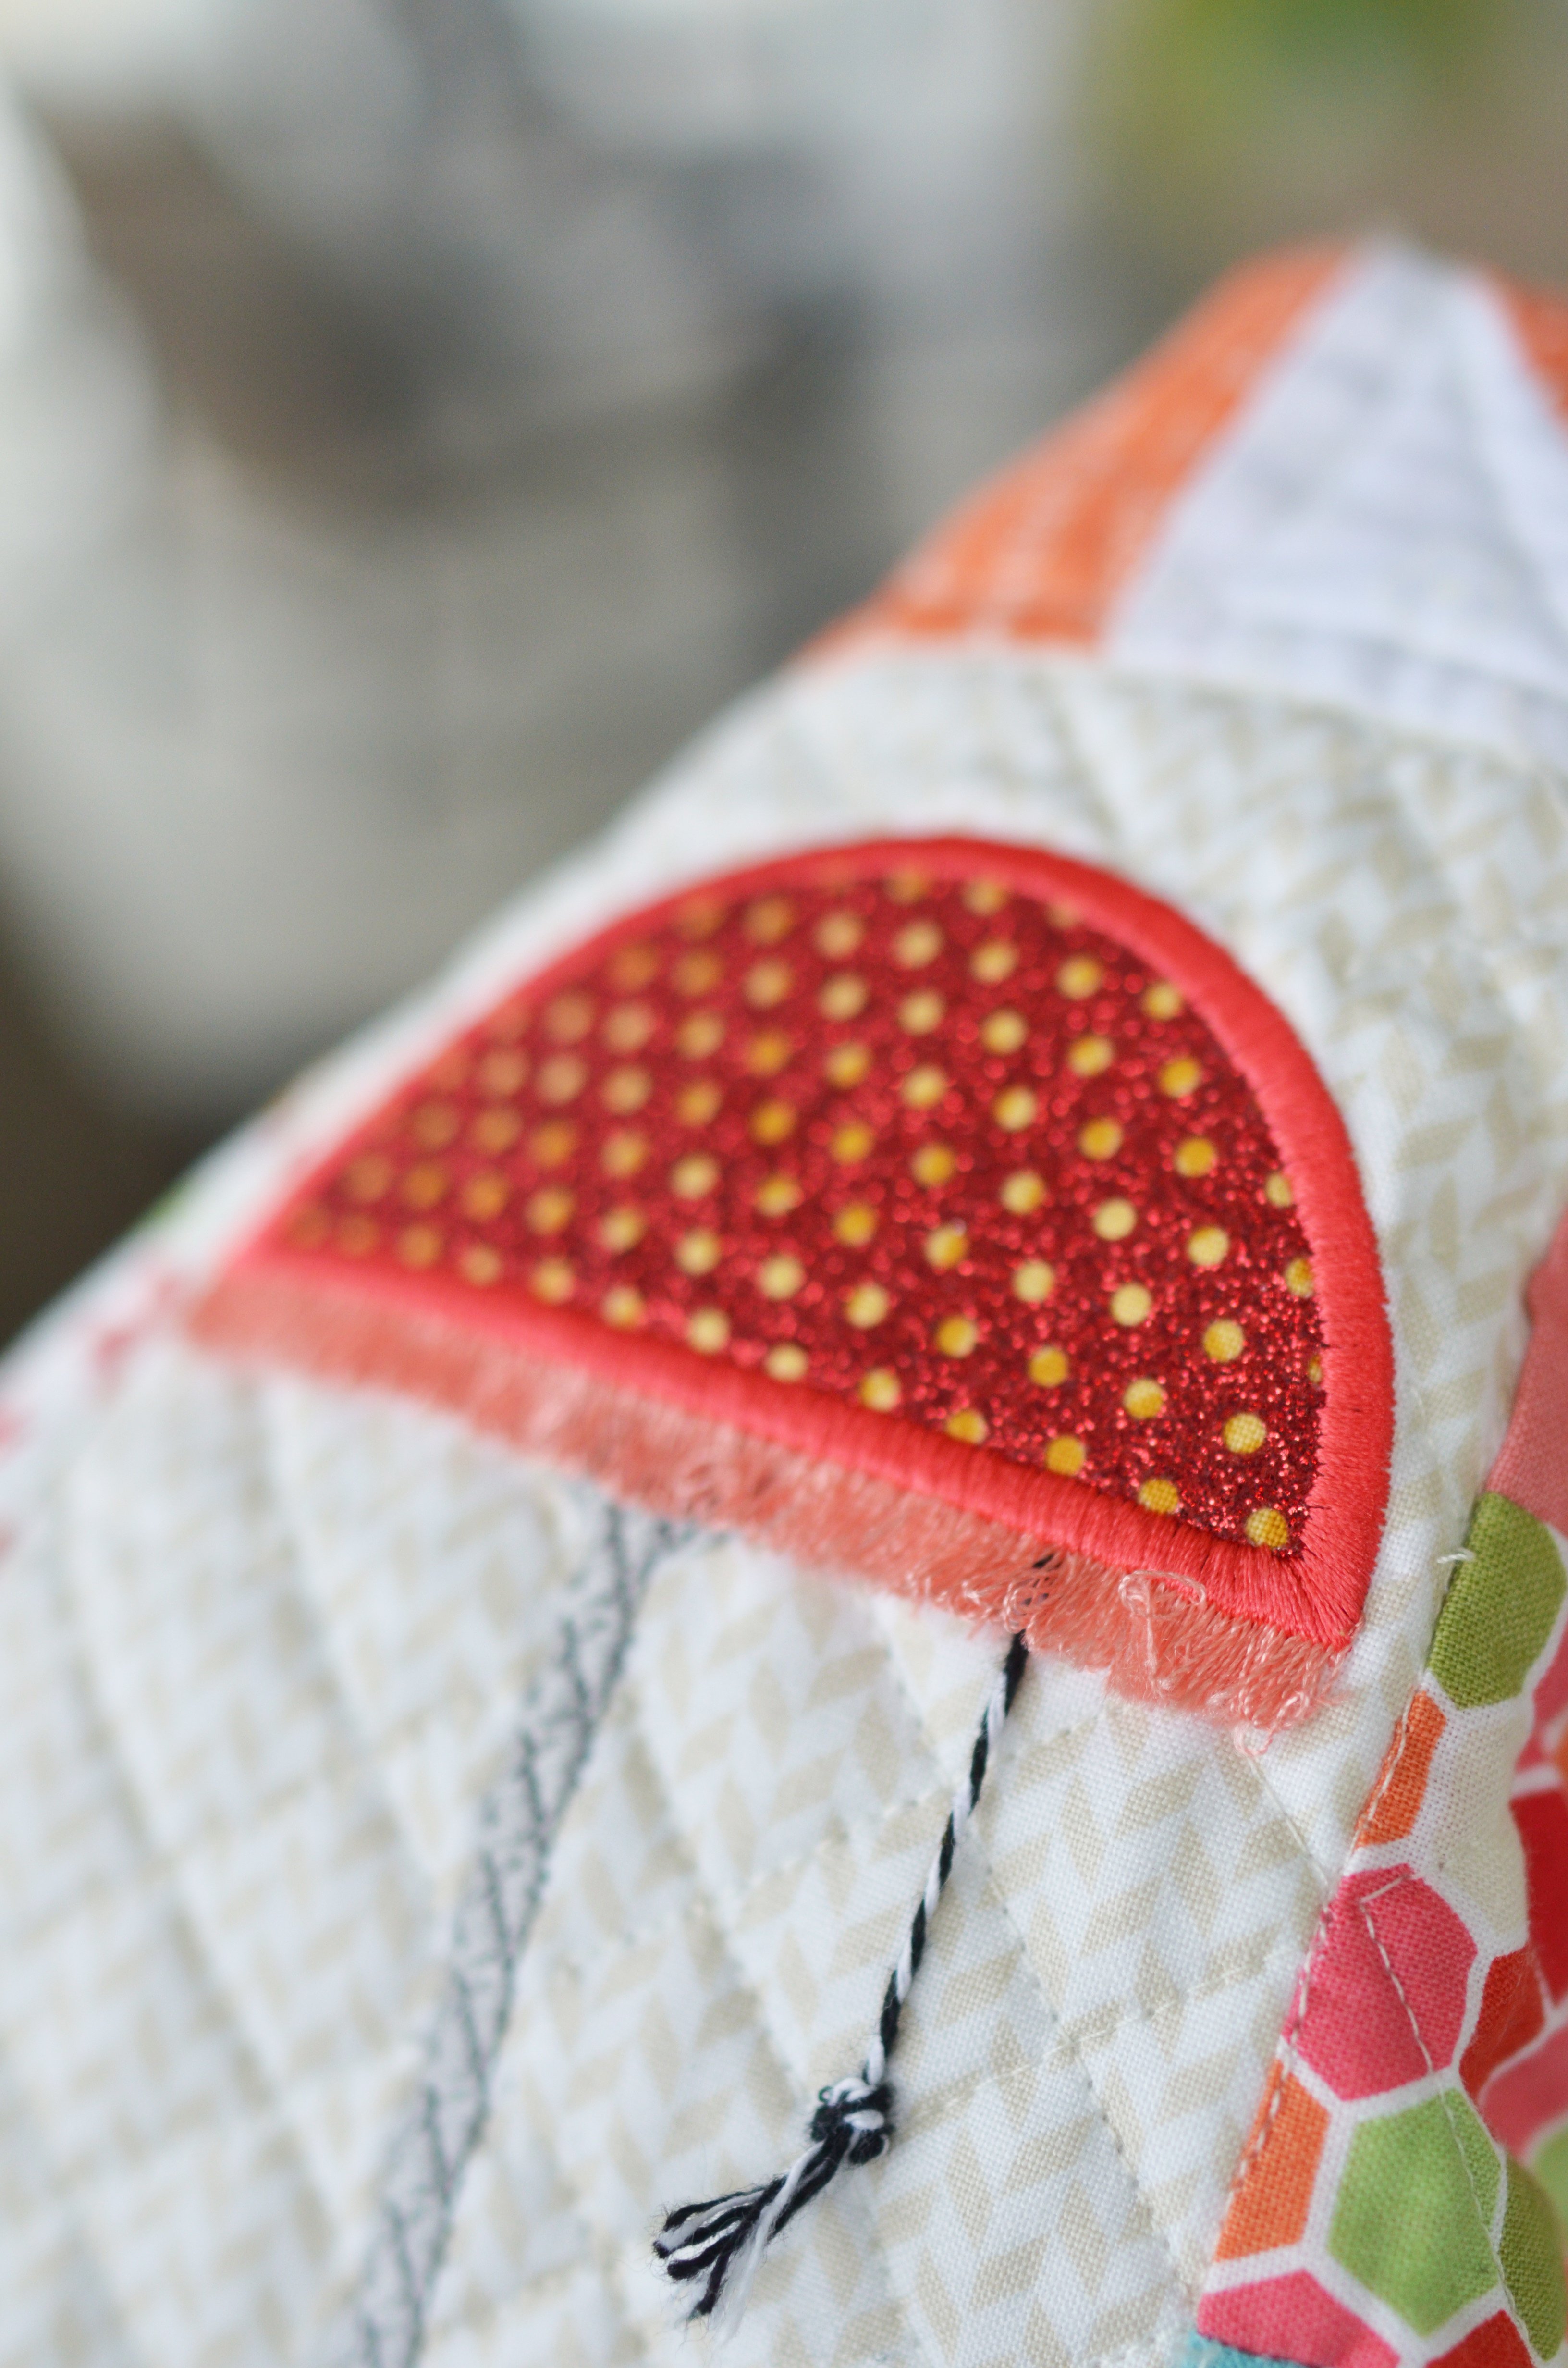
Step One: Change Bobbin Thread to Visible Color
When it's time to stitch the fringe, you'll first want to change the bobbin to a visible color. Why? Because you'll cut the bobbin thread to make the fringe and you don't want to cut the wrong stitches.
If the thread is a visible color, you can easily see what you're supposed to cut. So, since we used a white bobbin thread for the rest of this design, we're going to change the bobbin thread to black.
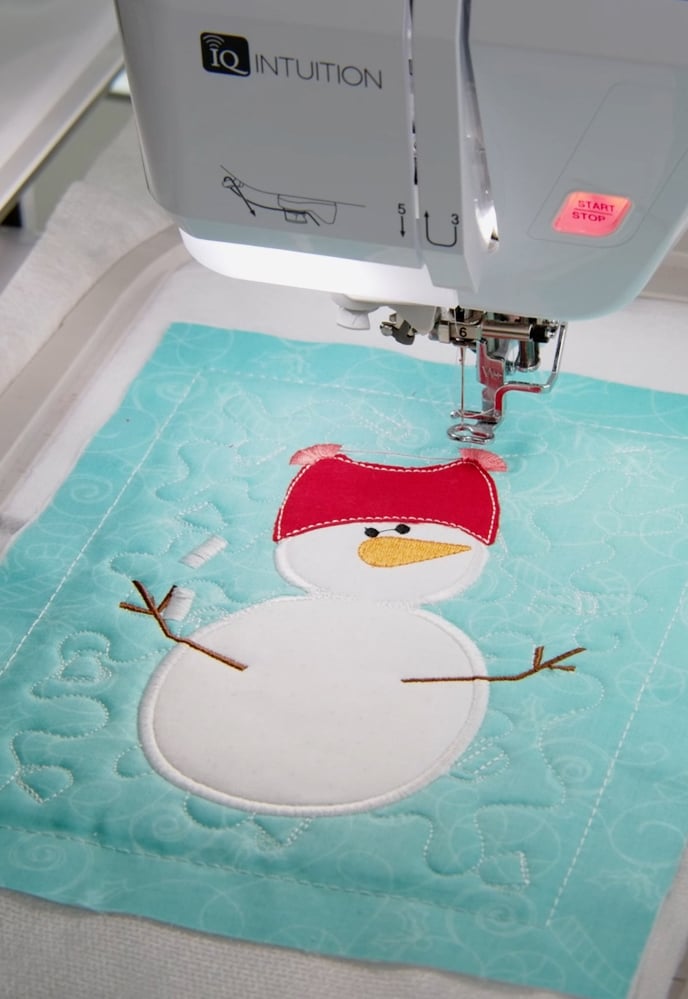
Step Two: Stitch the Fringe
Once you've changed the bobbin, you'll go ahead with the fringe stitches. (They may look longer than what you're used to in a satin stitch!)
Remember to change the bobbin thread back to the regular color after you're done. This is especially important if you've used a water-soluble bobbin.
Step Three: Remove From Hoop and Turn Project Over
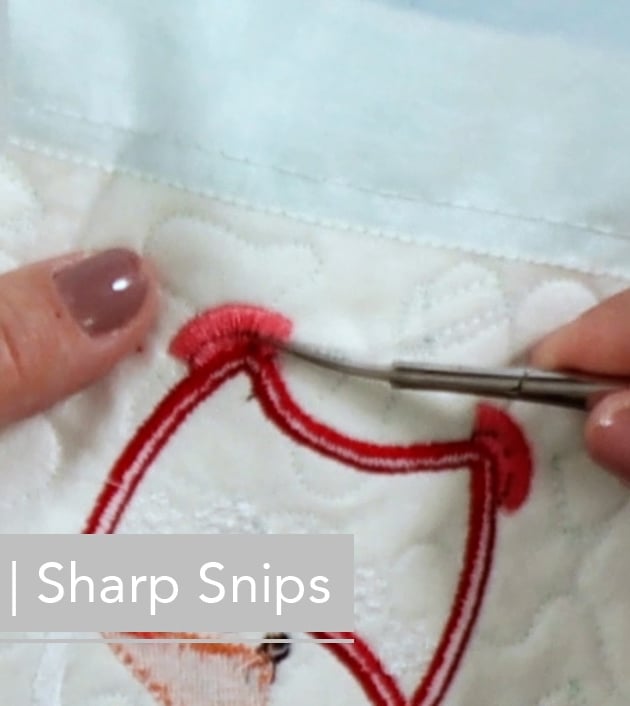
After you're done stitching out the entire design, go ahead and remove your project from the hoop. Use Kimberbell Sharp Snips or a seam ripper to carefully clip the black thread only.
Just snip, snip, snip away! Oh, and be careful not to clip the other stitches. You just want to clip the black ones. 😊
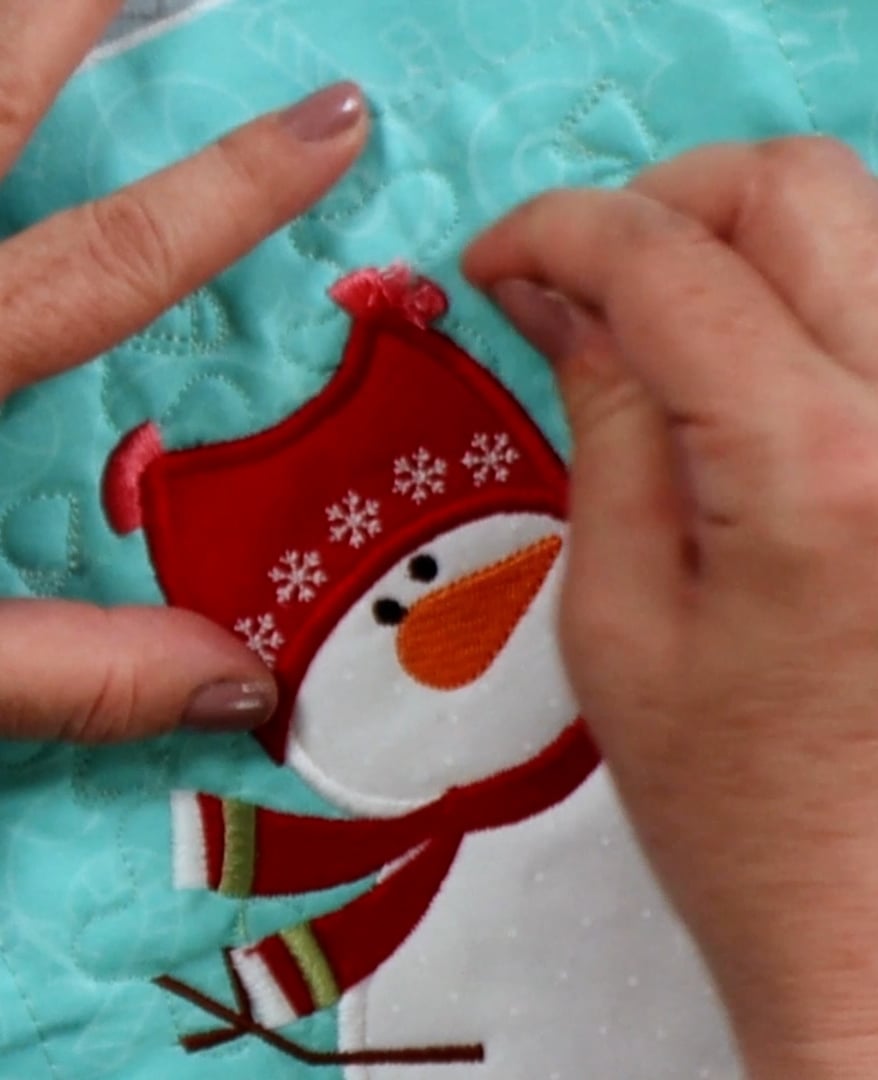
Step Four: Lift Satin Stitches
When you're done clipping, turn the project back around and, with your fingernail, carefully lift the satin stitches to form the fringe. This is the fun part! Just go along and fluff it all up.
And that, my friends, is all there is to it.
Water-Soluble Bobbin
Now, there's no clipping necessary if you used a water-soluble bobbin. Simply spray the back with a little bit of water and the bobbin stitches will dissolve!
After you're done spraying, turn the project over and lift the satin stitches as shown above.
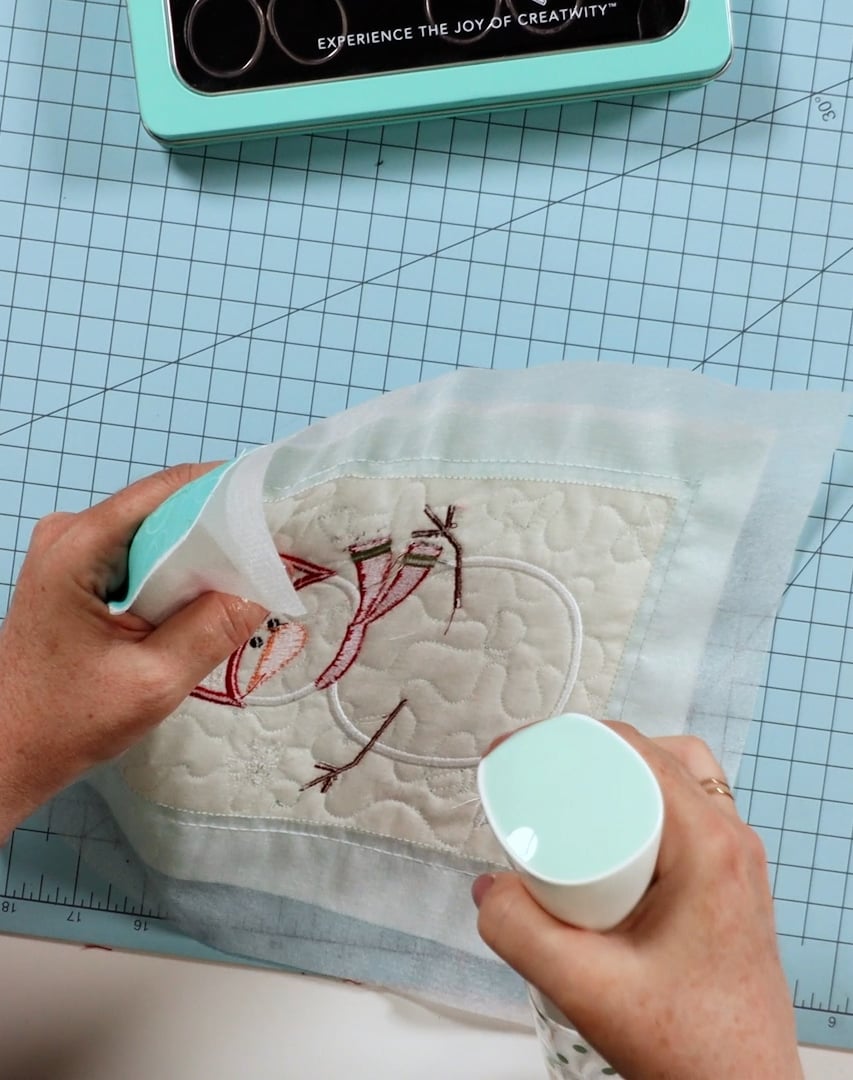
⭐ WARNING: If you do use water-soluble bobbin thread, DON'T FORGET TO CHANGE IT BACK TO NORMAL BOBBIN THREAD AFTER STITCHING THE FRINGE AREAS! ⭐
Fabulous Fringe
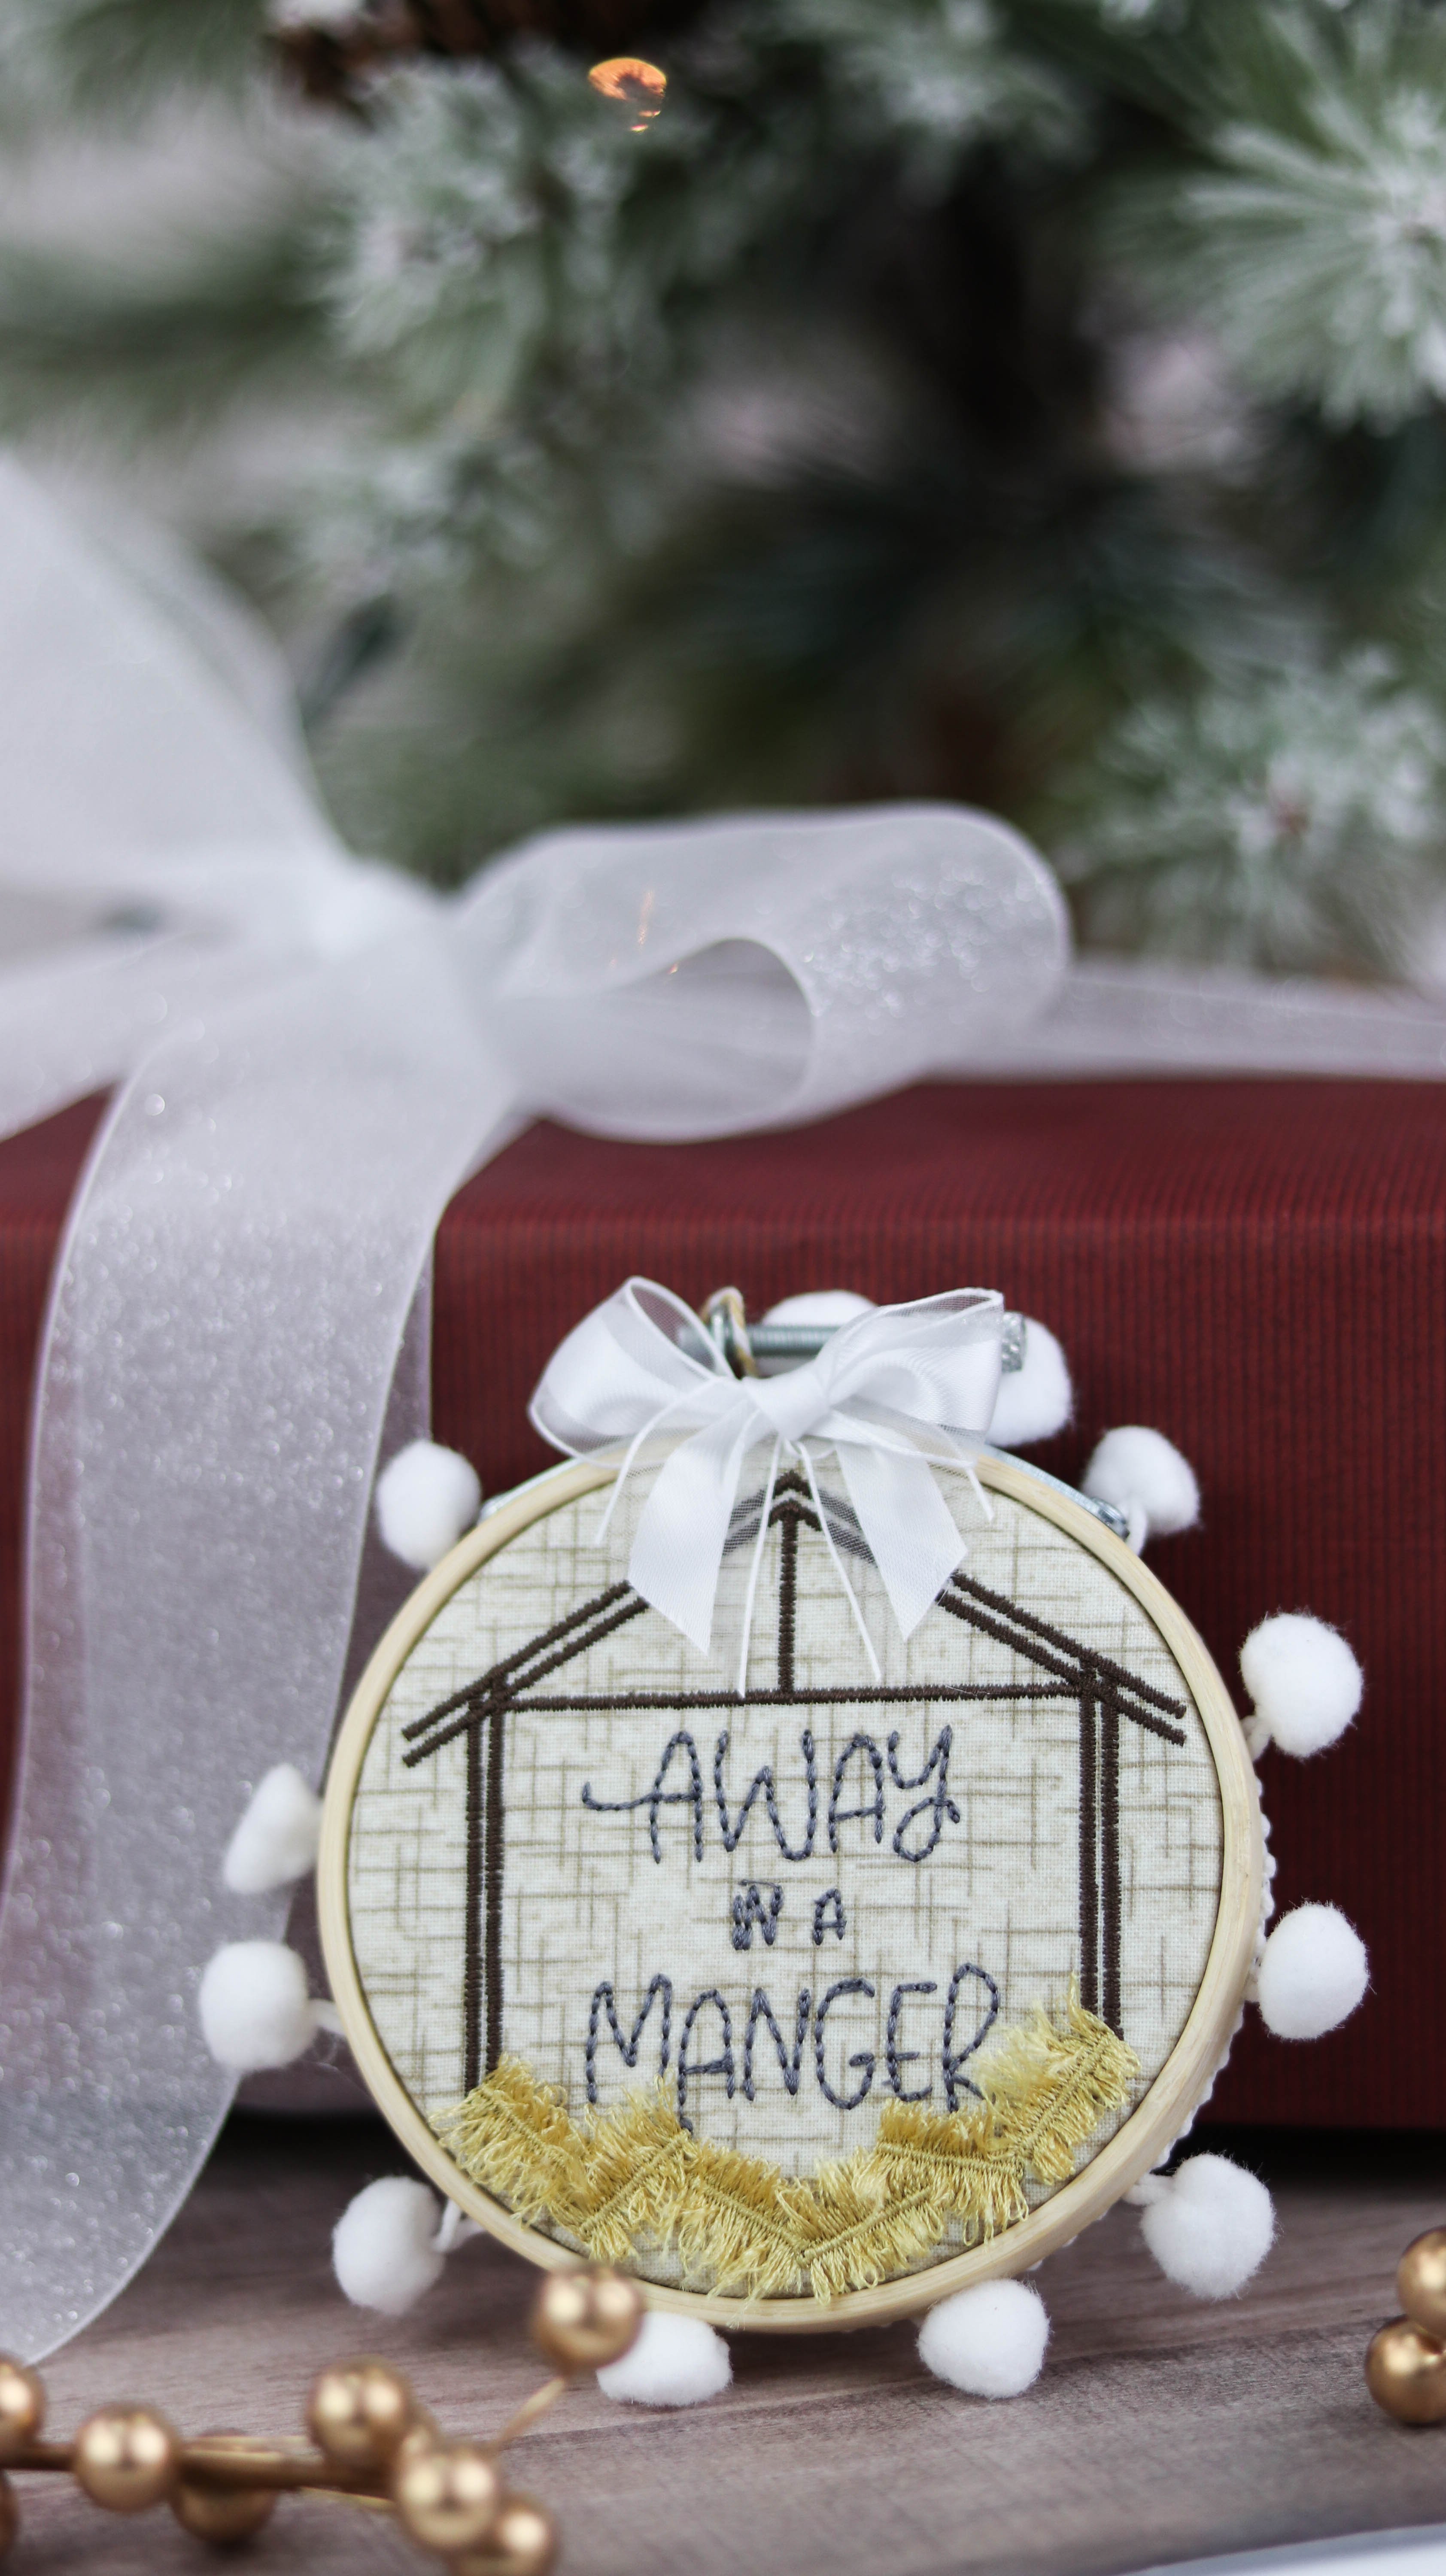
Fringe is such a fun technique and it's used in a variety of Kimberbell projects. For example, check out the fringed hay from our Happy Hoop Decor: Christmas Nativity Ornaments collection:
And this lamp from our Make Yourself at Home quilt has fabulous fringe along the bottom.
As you can see, fringe adds a special touch to your projects that makes them that much more than they would be without it. More dimensional. More realistic. More eye-catching. More everything!
To learn more about the fringe technique, be sure to check out Kim's How to Fringe on Your Embroidery Machine video tutorial below!